
TL AWD V6-3.7L (2010)
Control Assembly: Service and Repair
Audio-HVAC Display Unit Removal/Installation (Without Navigation)
Audio-HVAC Display Unit Removal/Installation
Without Navigation
NOTE:
-
Put on gloves to protect your hands.
-
Take care not to scratch the dashboard and related parts.
-
Lay a shop towel under the parts when working on them to protect the face panel from scratches or other damage.
1. Remove the dashboard center vent See: Air Register/Service and Repair/Dashboard Center Vent Removal/Installation.
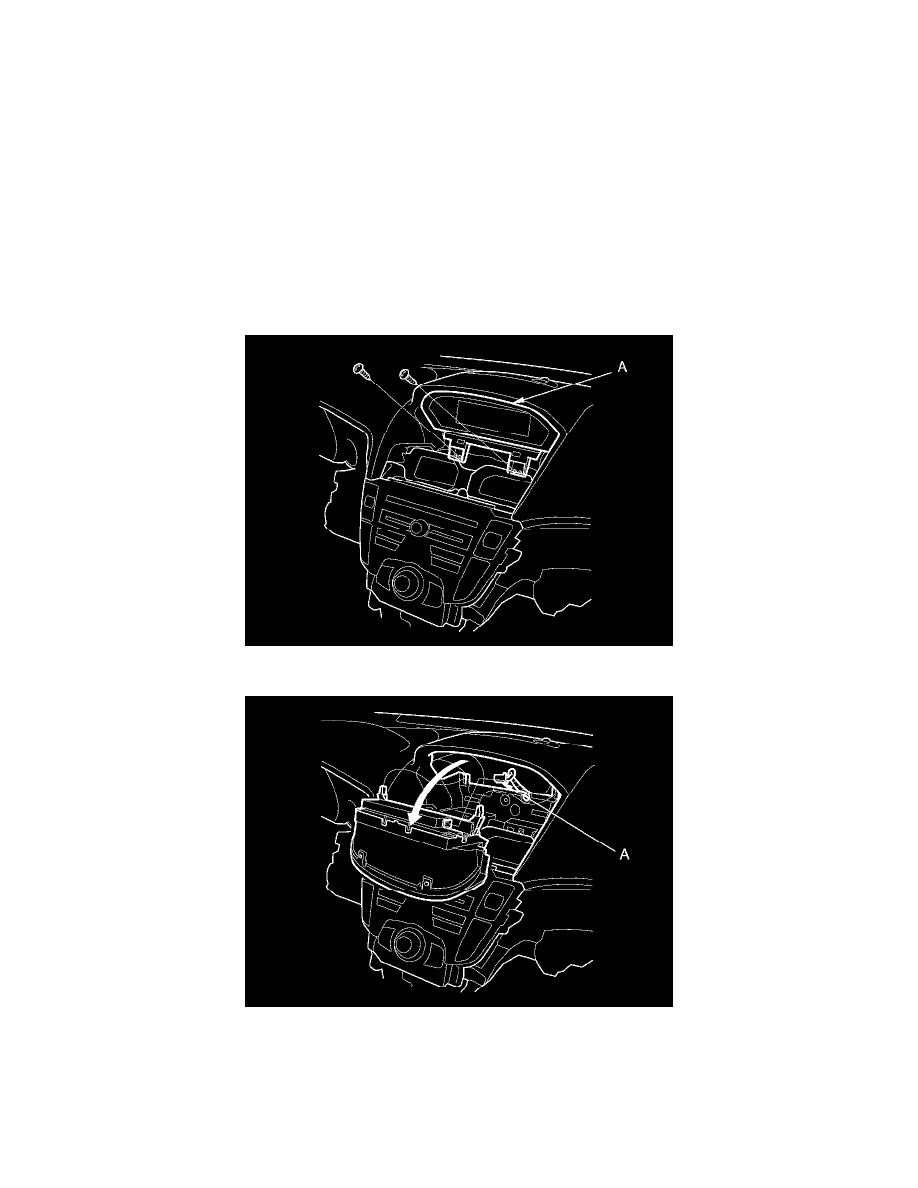
2. Carefully remove the screws from the audio-HVAC display unit (A).
3. Pull out the audio-HVAC display unit. Then disconnect the connector (A) from the audio-HVAC display unit.
4. Install the audio-HVAC display unit in the reverse order of removal.