
TL AWD V6-3.7L (2010)
Malfunction Indicator Lamp: Testing and Inspection
MIL Circuit Troubleshooting
1. Turn the ignition switch to ON (II), or press the engine start/stop button to select the ON mode.
2. Do the gauge self-diagnostic function See: Instrument Panel, Gauges and Warning Indicators/Instrument Cluster / Carrier/Testing and
Inspection/Initial Inspection and Diagnostic Overview.
Does the MIL indicator flash?
YES -
Go to step 3.
NO -
Substitute a known-good gauge control module, and recheck. If the symptom/indication goes away with a known-good gauge control module, replace the
original gauge control module See: Instrument Panel, Gauges and Warning Indicators/Instrument Cluster / Carrier/Service and Repair.
3. Connect the HDS to the DLC See: Testing and Inspection/Initial Inspection and Diagnostic Overview.
4. Check the SCS in the DATA LIST with the HDS.
Is a short indicated?
YES -
Go to step 5.
NO -
Update the ECM/PCM if it does not have the latest software See: Testing and Inspection/Programming and Relearning/ECM/PCM Update, or substitute
a known-good ECM/PCM See: Testing and Inspection/Initial Inspection and Diagnostic Overview, then recheck. If the symptom/indication goes away
and the ECM/PCM was updated, troubleshooting is complete. If the symptom/indication goes away and the ECM/PCM was substituted, replace the
original ECM/PCM See: Engine Control Module/Service and Repair.
5. Turn the ignition switch to LOCK (0), or press the engine start/stop button to select the OFF mode.
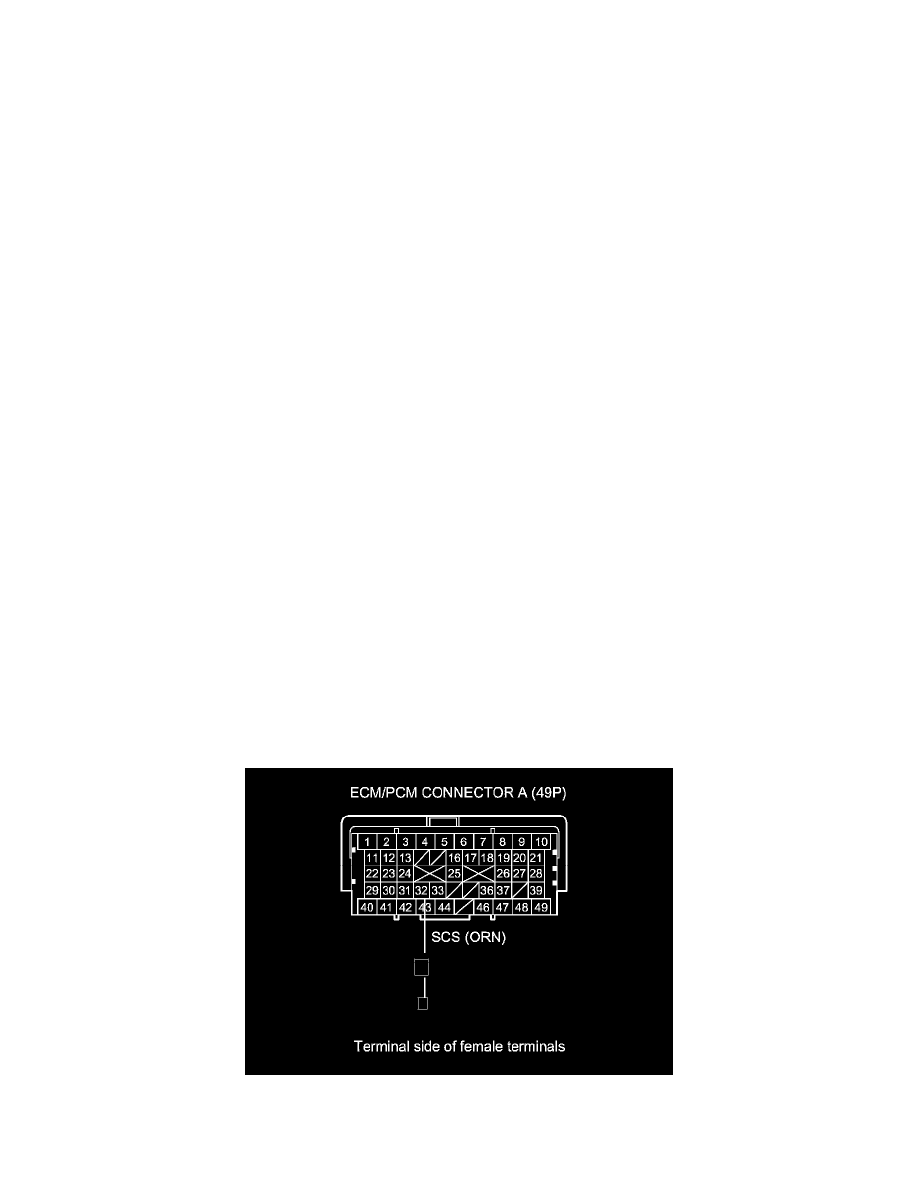
6. Disconnect ECM/PCM connector A (49P), then disconnect the HDS.
7. Check for continuity between ECM/PCM connector terminal A32 and body ground.
Is there continuity?
YES -