
TL AWD V6-3.7L (2010)
Seat Position Sensor: Service and Repair
Driver's Seat Position Sensor Replacement
Removal
NOTE: Do not turn the ignition switch to ON (II), or press the engine start/stop button to select the ON mode, and do not connect the battery cable while
removing the driver's seat position sensor.
1. Raise the seat all the way up.
2. Do the battery terminal disconnection procedure See: Starting and Charging/Battery/Service and Repair/Procedures, then wait at least 3 minutes
before starting work.
3. Remove the recline cover See: Body and Frame/Seats/Service and Repair/Front Seat Recline Cover Removal/Installation.
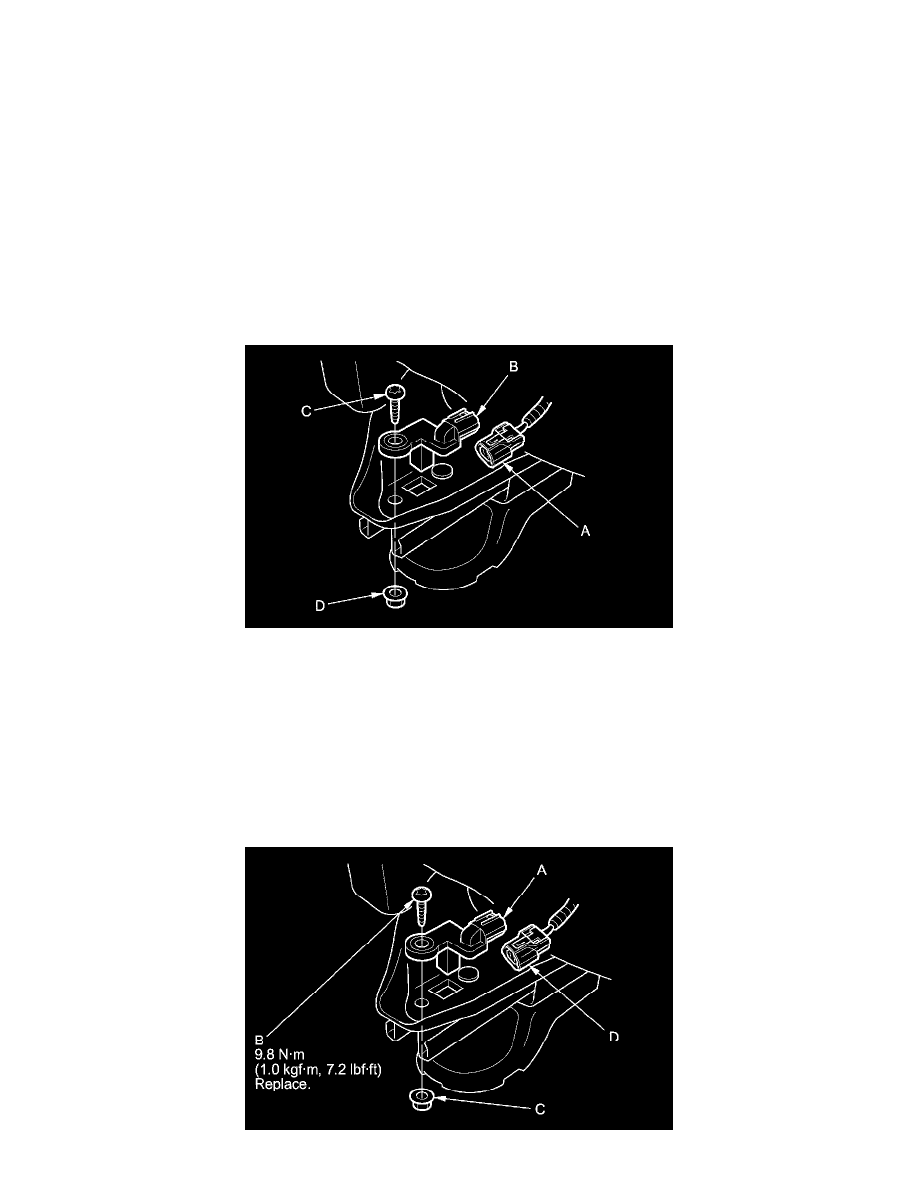
4. Disconnect the driver's seat wire harness 2P connector (A) from the driver's seat position sensor (B).
5. Remove the TORX bolt (C) and nut (D) using a TORX T30 bit, then remove the driver's seat position sensor.
Installation
NOTE:
-
Be sure to install the harness so it is not pinched or interferes with other parts.
-
Do not turn the ignition switch to ON (II), or press the engine start/stop button to select the ON mode, and do not connect the battery cable while
installing the driver's seat position sensor.
1. Install the driver's seat position sensor (A) with a new TORX bolts (B) using a TORX T30 bit, and new nut (C).