
TL AWD V6-3.7L (2010)
Alternator: Removal and Replacement
Alternator Removal and Installation
Removal
1. Remove the engine compartment covers See: Body and Frame/Access Cover/Service and Repair.
2. Do the battery terminal disconnection procedure See: Battery/Service and Repair/Procedures.
3. Raise the vehicle on the lift.
4. Remove the splash shield See: Body and Frame/Splash Guard/Service and Repair/Front Splash Shield Replacement.
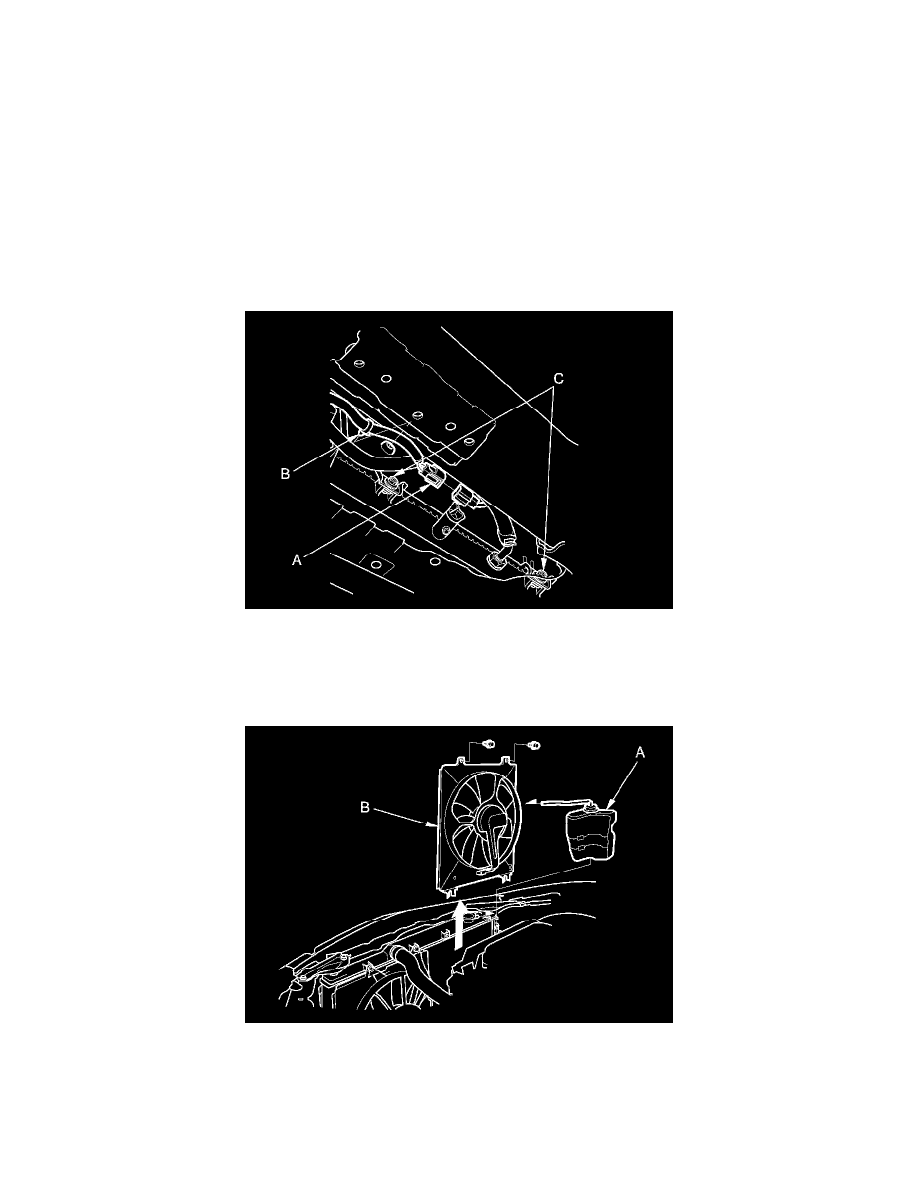
5. Disconnect the A/C condenser fan motor connector (A) and remove the harness clamp (B).
6. Loosen the A/C condenser fan shroud mounting bolts (C).
7. Lower the vehicle on the lift.
8. Remove the coolant reservoir (A), then remove the A/C condenser fan shroud assembly (B).
9. Remove the drive belt See: Engine, Cooling and Exhaust/Engine/Drive Belts, Mounts, Brackets and Accessories/Drive Belt/Service and Repair.
10. Disconnect the alternator connector (A) and the positive alternator cable (B) from the alternator.