
TL AWD V6-3.7L (2010)
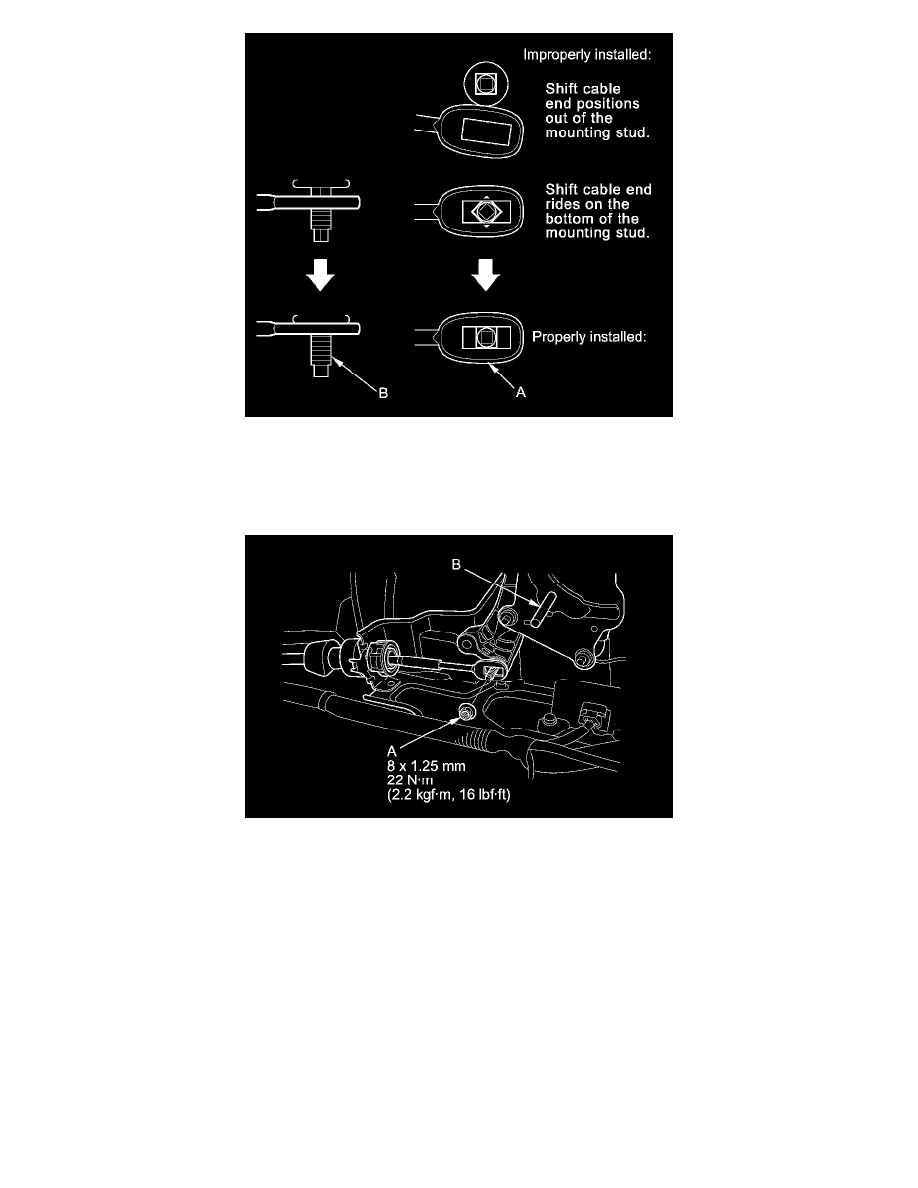
11. If the cable end is out of position on the mounting stud, remove the shift cable from the bracket, and reinstall the shift cable. Do not install the shift
cable end on the mounting stud while the shift cable is on the bracket. If the shift cable end rides on the bottom of the mounting stud, rotate the
stud and align the square fitting with the hole.
12. Install and tighten the nut (A) on the shift cable end.
13. Remove the 6.0 mm (0.24 in) pin (B) that was installed to hold the shift lever.
14. Turn the ignition switch to ON (II), or press the engine start/stop button to select the ON mode. Move the shift lever to each position, and check
that the A/T gear position indicator follows the transmission range switch.
15. Shift the shift lever to P, and check that the shift lock works properly. Push the shift lock release, and check that the shift lever releases, and also
check that the shift lever locks when it is shifted back to P.
16. Install the center console See: Body and Frame/Interior Moulding / Trim/Console/Service and Repair/Removal and Replacement/Center Console
Removal/Installation.