
TL FWD V6-3.5L (2009)
Radio Receiver: Service and Repair
XM Receiver Removal/Installation
Without AcuraLink
SRS components are located in this area. Review the SRS component locations, See: Restraint Systems/Air Bag Systems/Locations and the precautions
and procedures See: Body and Frame/Interior Moulding / Trim/Dashboard / Instrument Panel/Air Bag(s) Arming and Disarming/Service and Repair
before doing repairs or service.
1. Remove the center console. See: Body and Frame/Interior Moulding / Trim/Console/Service and Repair/Removal and Replacement/Center
Console Removal/Installation
2. Remove the HandsFreeLink control unit. See: Cellular Phone/Communications Control Module/Service and Repair
3. Remove the audio unit. See: Service and Repair/Audio Unit Removal/Installation (Without Navigation)
If the vehicle is a Canada model with navigation, remove the audio-navigation unit. See: Service and Repair/Audio-Navigation Unit
Removal/Installation (With Navigation)
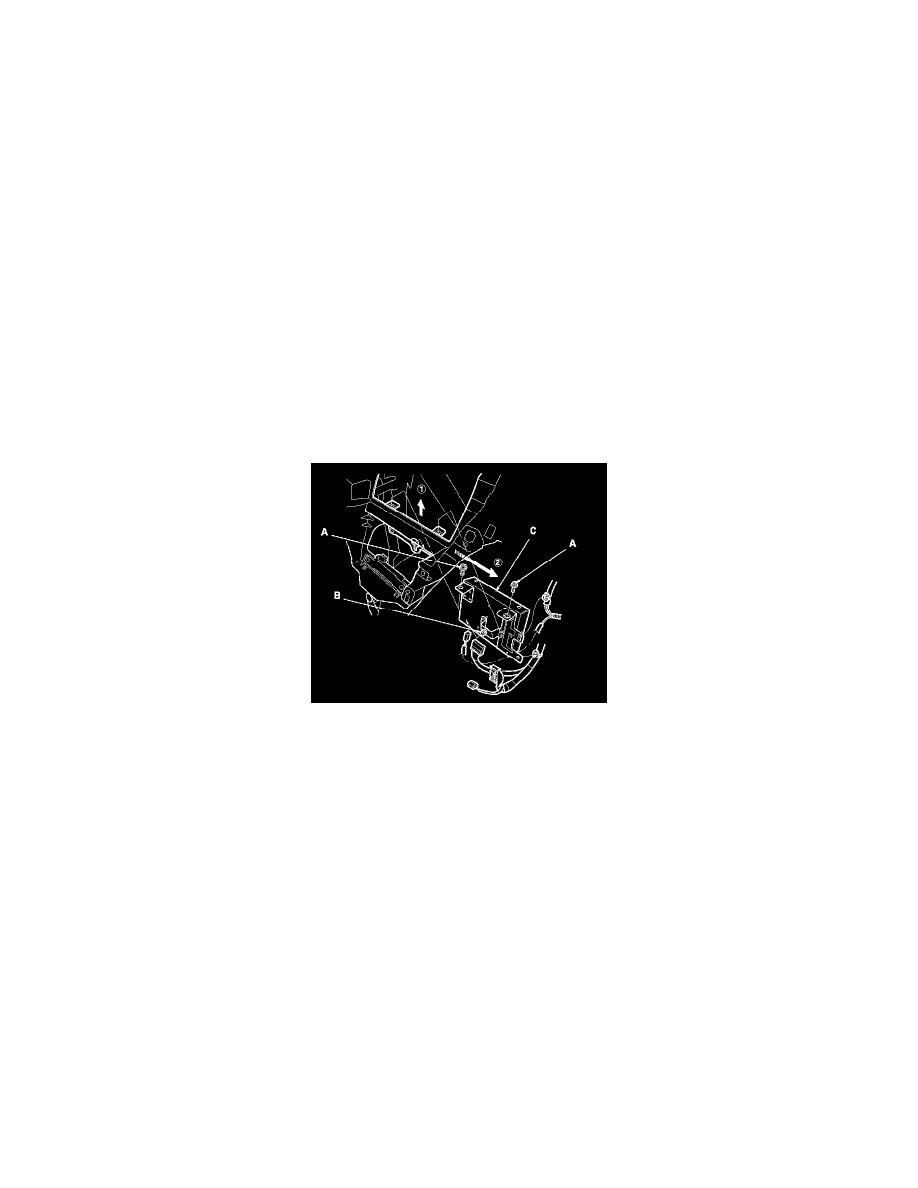
4. Remove the bolts (A), and loosen the bolt (B).
5. Pull the XM receiver (C) out, then disconnect the connectors from the XM receiver, and detach the clips.
6. Install the XM receiver in the reverse order of removal.