
TL FWD V6-3.5L (2009)
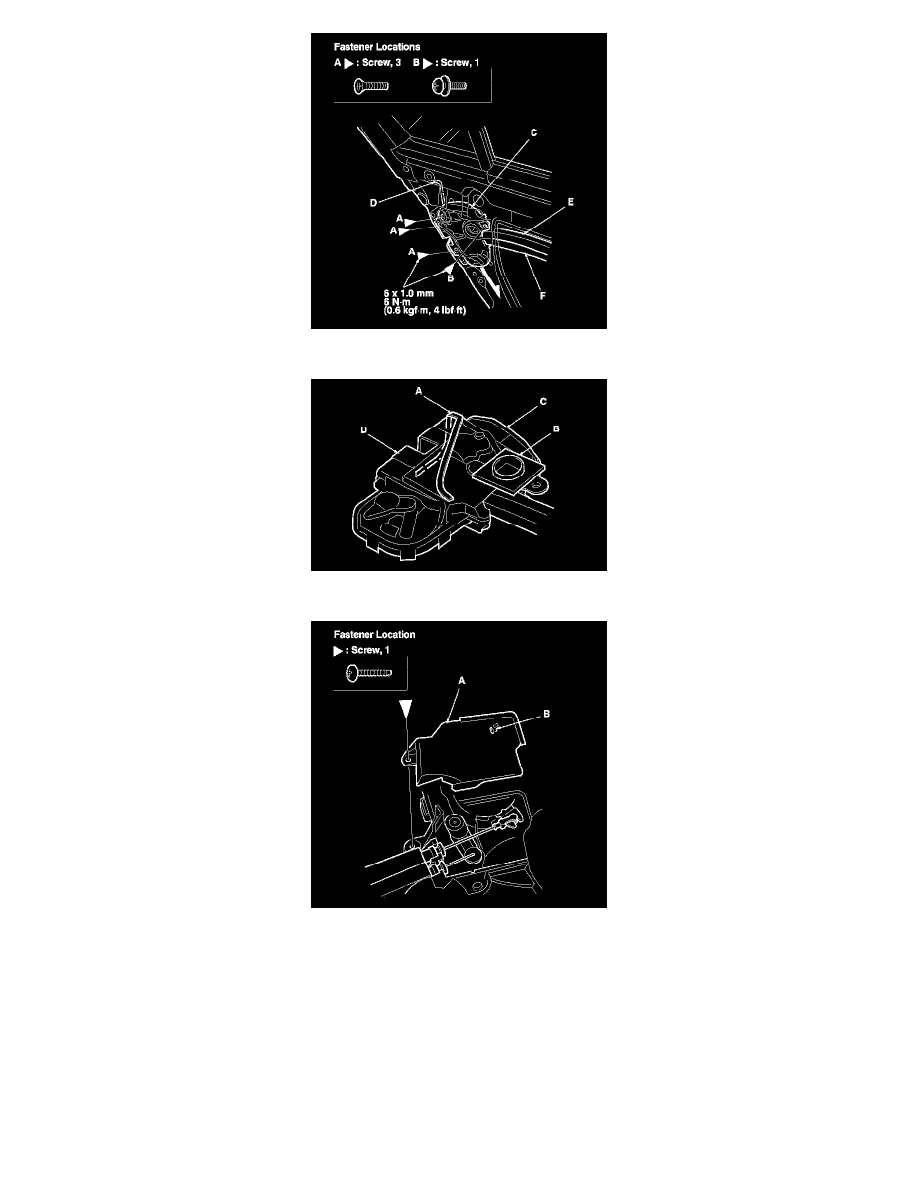
8. Remove the foam seals (A, B) from the latch protector (C) and the latch (D).
9. Remove the screw, then remove the latch protector (A) by releasing the hook (B).
10. Detach the latch cable (A) and the inner handle cable (B) from the latch (C).
11. Install the latch in the reverse order of removal, and note these items:
-
Before reinstalling the latch protector, clean the latch and the latch protector surfaces with isopropyl alcohol where the new foam seals will be
attached.
-
After reinstalling the latch protector to the latch, attach the new foam seals to the protector and the latch.
-
Make sure the actuator connector is plugged in properly, and the outer handle rod is connected securely.
-
Make sure the door locks and opens properly.
-
Make sure the plastic cover on the door is installed properly and sealed around its outside perimeter to seal out water.