
TL FWD V6-3.5L (2009)
Hood Latch: Service and Repair
Hood Latch Replacement
NOTE:
-
Put on gloves to protect your hands.
-
Take care not to scratch the body and the related parts.
1. Remove these items:
-
Front bulkhead cover See: Access Cover/Service and Repair
-
Front bulkhead brace cover See: Grille/Service and Repair/Front Bulkhead Brace Cover Replacement
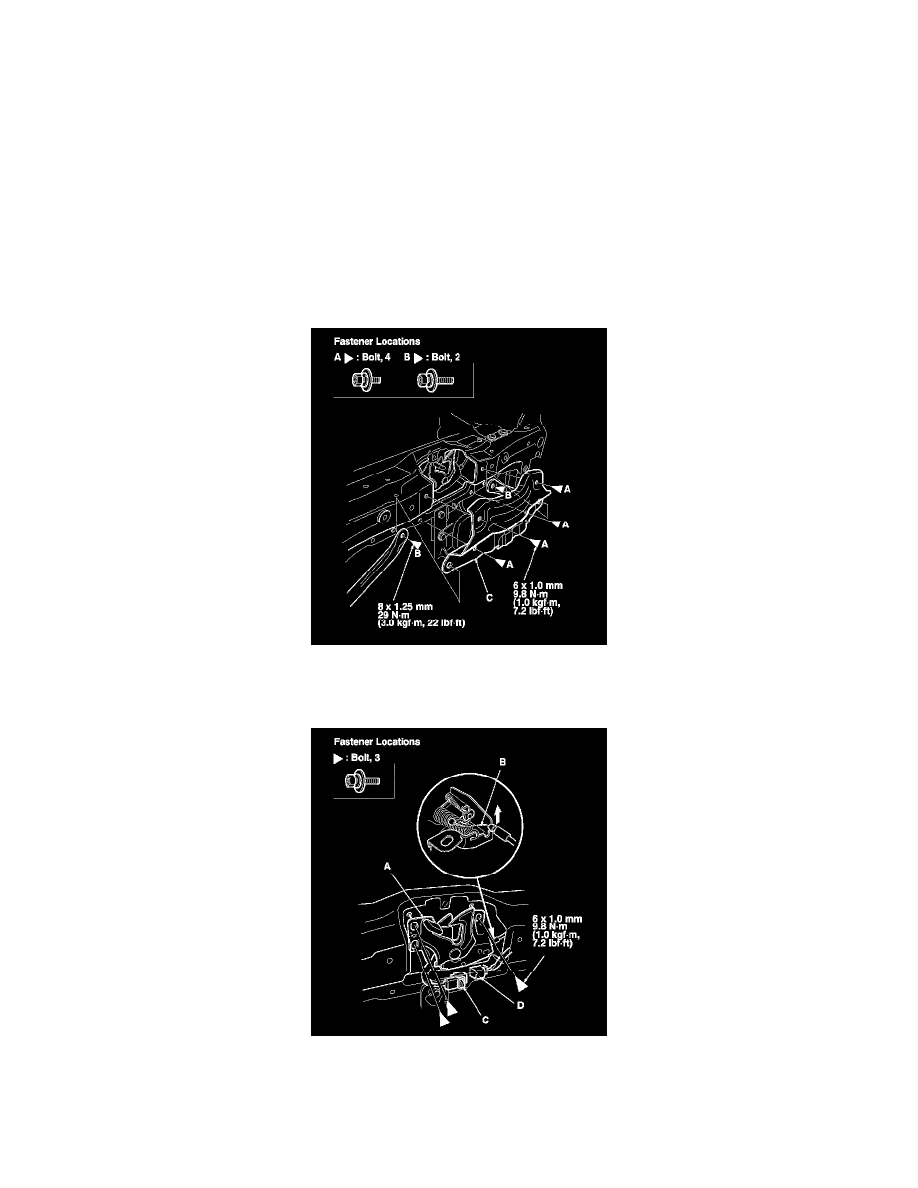
2. Remove the bolts (A, B), then remove the front bulkhead center cover (C).
3. Remove the bolts, then remove the hood latch (A) from the body, and disconnect the hood opener cable (B) from the hood latch.
4. Detach the harness clip (C), and disconnect the hood latch switch connector (D).
5. Install the latch in the reverse order of removal, and note these items:
-
Apply multipurpose grease to each location on the hood latch indicated by the arrows.
-
Make sure the hood opener cable is connected properly, and the hood latch switch connector is plugged in properly.