
TL FWD V6-3.5L (2009)
Trim Panel: Service and Repair
Interior Trim Removal/Installation - C-Pillar Trim
Interior Trim Removal/Installation - C-Pillar Trim
Special Tools Required
-
KTC trim tool set SOJATP2014*
*Available through the Acura Tool and Equipment Program.
C-Pillar Trim
SRS components are located in this area. Review the SRS component locations See: Restraint Systems/Air Bag Systems/Locations and the precautions
and procedures See: Dashboard / Instrument Panel/Air Bag(s) Arming and Disarming/Service and Repair before doing repairs or service.
NOTE:
-
Follow the C-pillar trim installation procedure carefully; improper installation could cause the side curtain airbag to deploy improperly and
possibly cause injury.
-
Put on gloves to protect your hands.
-
Use the appropriate tool from the KTC trim tool set to avoid damage when removing components.
-
Take care not to scratch the trim or the panels.
-
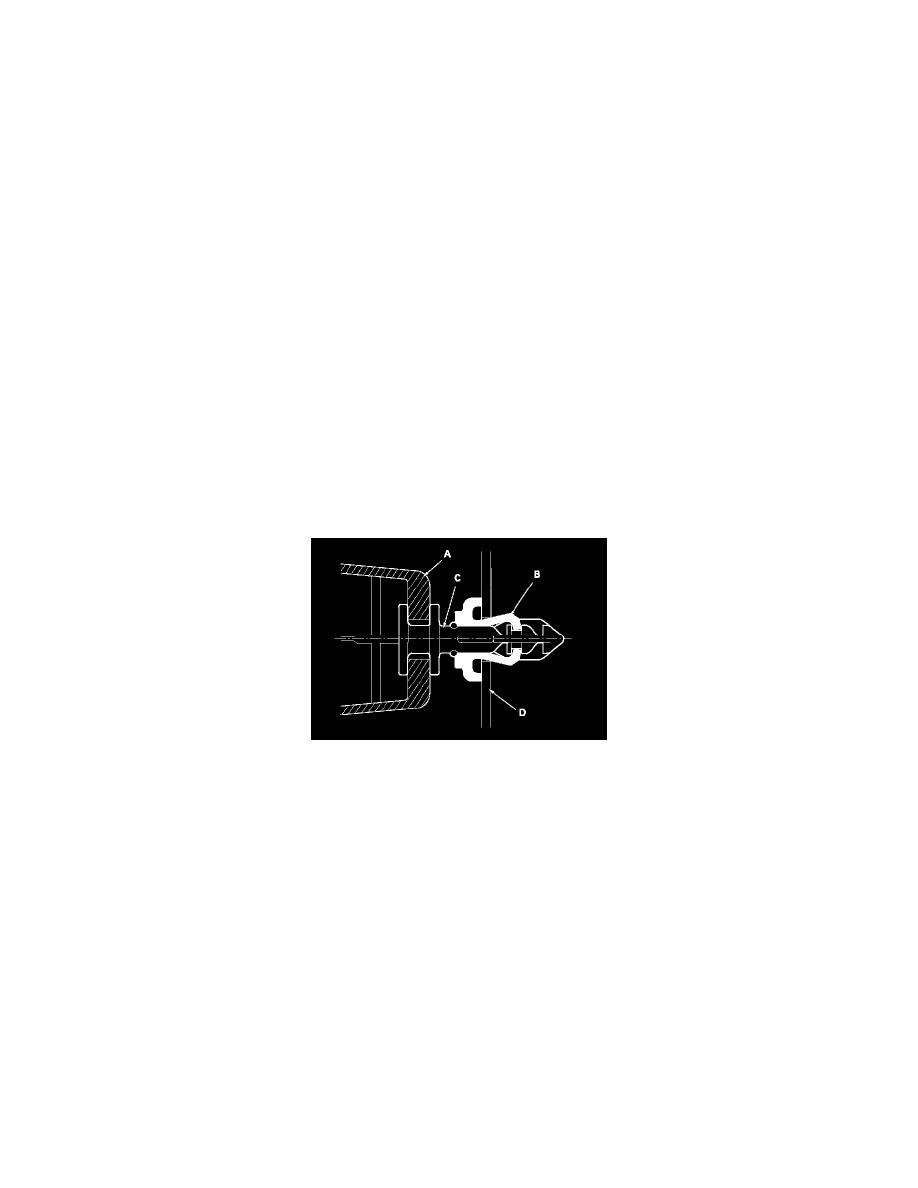
The upper clip in the C-pillar trim (A) consists of a plastic grommet (B) and a metal pin (C). The grommet expanded by the pin secures it to the
body panel (D). The upper clip must be replaced with a new one when the trim is reinstalled.
1. Remove these items:
-
Rear seat cushion See: Seats/Service and Repair/Rear Seat Removal/Installation
-
Rear seat-back See: Seats/Service and Repair/Rear Seat Removal/Installation
-
Rear door opening seal, as needed See: Scuff Plate/Service and Repair/Interior Trim Removal/Installation - Rear Door Sill Area
2. Hit the upper clip in the C-pillar trim (A) with a rubber mallet. Hitting the clip breaks the projections (B) on the pin (C) and pushes it into the
grommet (D) on the body (E).
NOTE: The upper clip must be replaced with a new one when the C-pillar trim is reinstalled.