TL FWD V6-3.5L (2009)

Engine Oil: Service and Repair
Engine Oil Replacement
1. Warm up the engine.
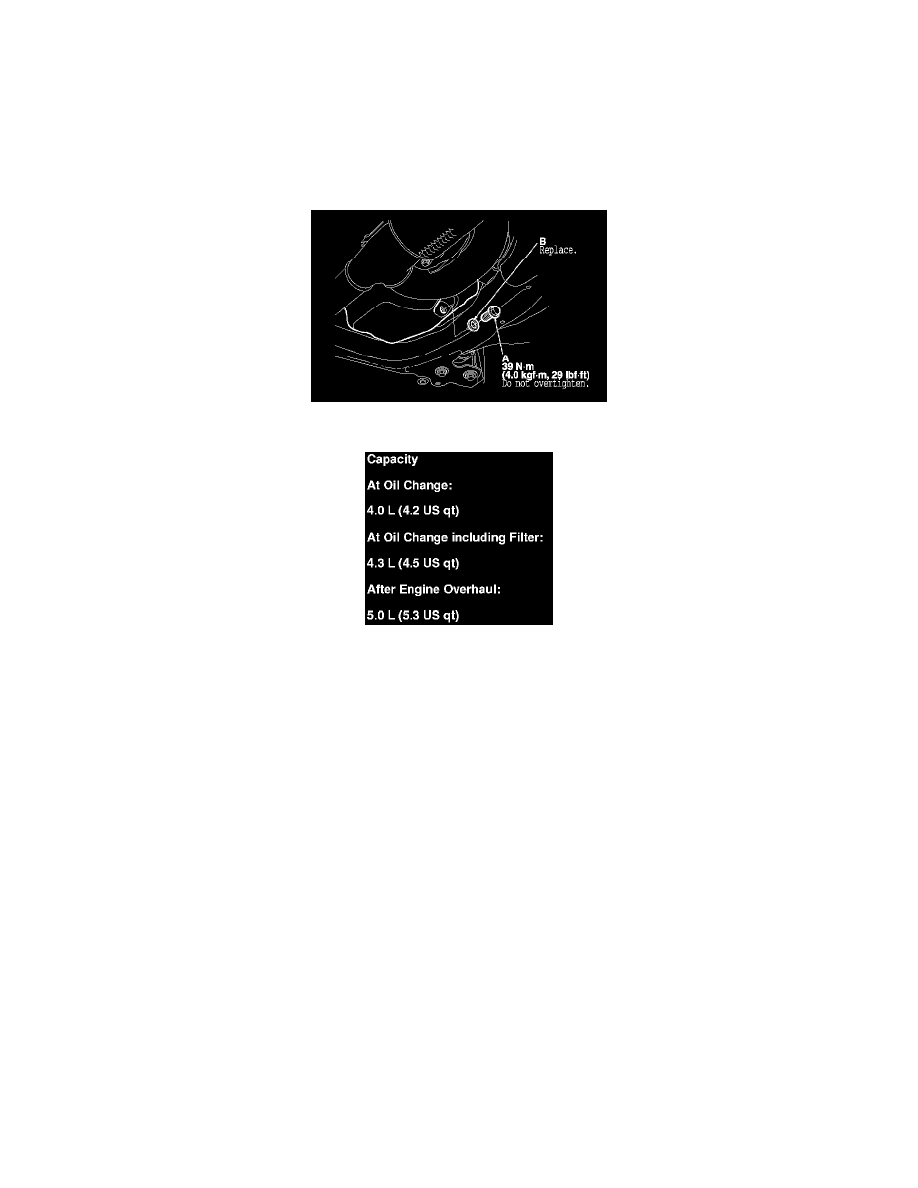
2. Remove the drain bolt (A), and drain the engine oil.
3. Reinstall the drain bolt with a new washer (B).
4. Refill with the recommended oil. See: Specifications
5. Run the engine for more than 3 minutes, then check for oil leakage.
6. If the maintenance minder required engine oil replacement, reset the maintenance minder, See: Service Reminder Indicators/Maintenance
Required Lamp/Indicator/Description and Operation and this procedure is complete. If the maintenance minder did not require engine oil
replacement, go to step 7.
7. Turn the ignition switch to LOCK (0), or press the engine start/stop button to select the OFF mode.
8. Connect the Honda Diagnostic System (HDS) to the data link connector (DLC). See: Powertrain Management/Computers and Control
Systems/Testing and Inspection/Initial Inspection and Diagnostic Overview
9. Turn the ignition switch to ON (II), or press the engine start/stop button to select the ON mode.
10. Make sure the HDS communicates with the vehicle and the powertrain control module (PCM). If it does not communicate, troubleshoot the DLC
circuit. See: Powertrain Management/Computers and Control Systems/Testing and Inspection/Component Tests and General Diagnostics/DLC
Circuit Troubleshooting
11. Select GAUGES in the BODY ELECTRICAL with the HDS.
12. Select ADJUSTMENT in the GAUGES with the HDS.
13. Select MAINTENANCE MINDER in the ADJUSTMENT with the HDS.
14. Select RESET in the MAINTENANCE MINDER with the HDS.
15. Select RESETTING THE ENGINE OIL LIFE with the HDS.
NOTE: If you changed the ATF at the same time with the engine oil, select RESETTING THE ENGINE OIL LIFE AND ATF with the HDS
instead.
