
TL FWD V6-3.5L (2009)
Steering Control Module: Service and Repair
EPS Control Unit Removal/Installation
1. Do the battery terminal disconnection procedure. See: Starting and Charging/Battery/Service and Repair/Procedures
2. Remove these items:
-
Passenger's dashboard undercover See: Body and Frame/Interior Moulding / Trim/Dashboard / Instrument Panel/Service and
Repair/Passenger's Dashboard Undercover Removal/Installation
-
Passenger's front door sill trim See: Body and Frame/Interior Moulding / Trim/Scuff Plate/Service and Repair/Interior Trim
Removal/Installation - Front Door Sill Area
-
Passenger's kick panel See: Body and Frame/Interior Moulding / Trim/Scuff Plate/Service and Repair/Interior Trim Removal/Installation -
Front Door Sill Area
-
Passenger's under-dash fuse/relay box See: Relays and Modules - Power and Ground Distribution/Relay Box/Service and Repair/Passenger's
Under-Dash Fuse/Relay Box (MICU) Removal/Installation
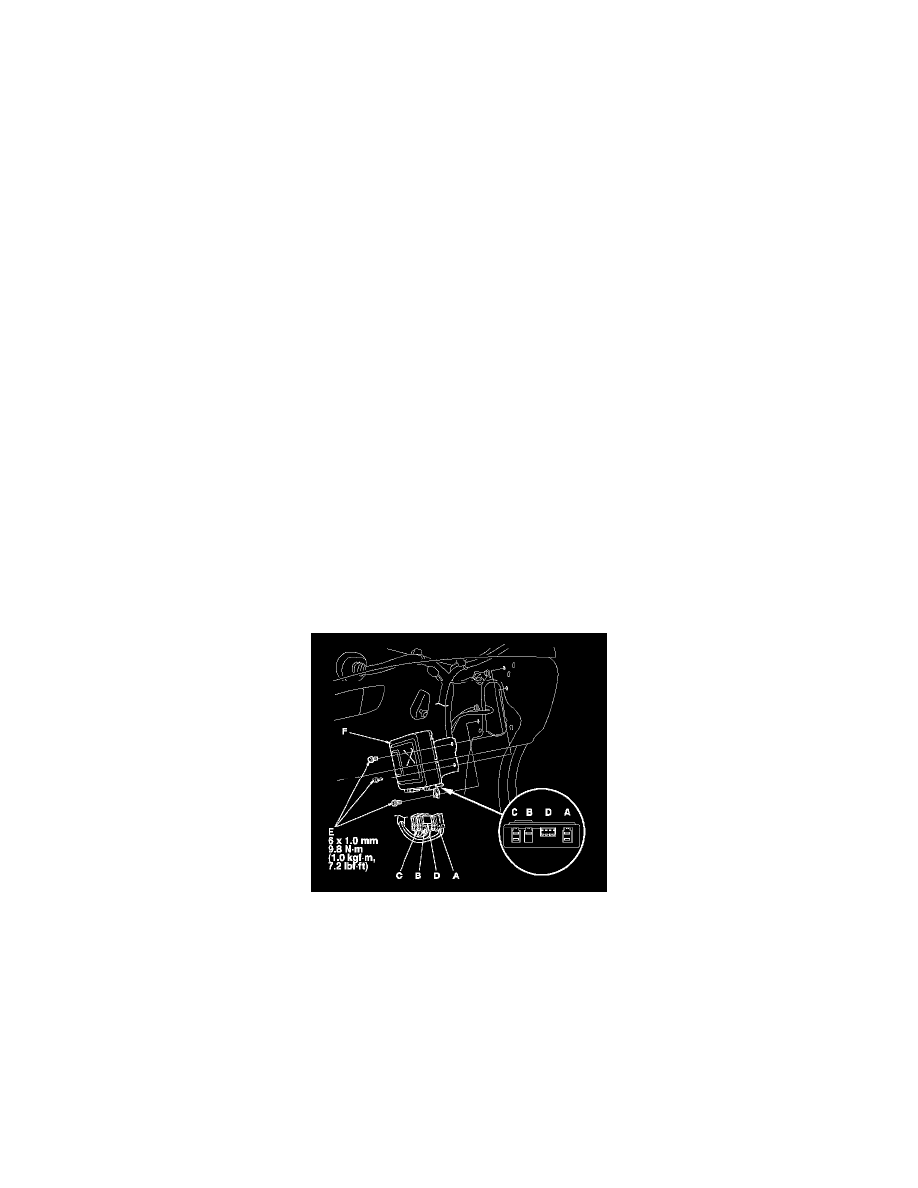
3. Disconnect EPS control unit connector A (2P), connector B (2P), connector C (2P), and connector D (28P).
4. Remove the bolts (E) from the EPS control unit (F).
5. Remove the EPS control unit.
6. Install the EPS control unit in the reverse order of removal.
7. Do the battery terminal reconnection procedure. See: Starting and Charging/Battery/Service and Repair/Procedures
8. Do the torque sensor neutral position memorization. See: Sensors and Switches/Sensors and Switches - Steering and Suspension/Sensors and
Switches - Steering/Steering Angle Sensor/Testing and Inspection
9. After installation, start the engine, allow it to idle, and turn the steering wheel from lock-to-lock several times. Check that the EPS indicator does
not come on.