
TL FWD V6-3.5L (2009)
Starter Solenoid: Testing and Inspection
Starter Solenoid Test
1. Remove the engine compartment covers. See: Body and Frame/Access Cover/Service and Repair
2. Do the battery terminal disconnection procedure. See: Battery/Service and Repair/Procedures
3. Remove the air intake duct splash separator. See: Engine, Cooling and Exhaust/Engine/Service and Repair/Engine Removal
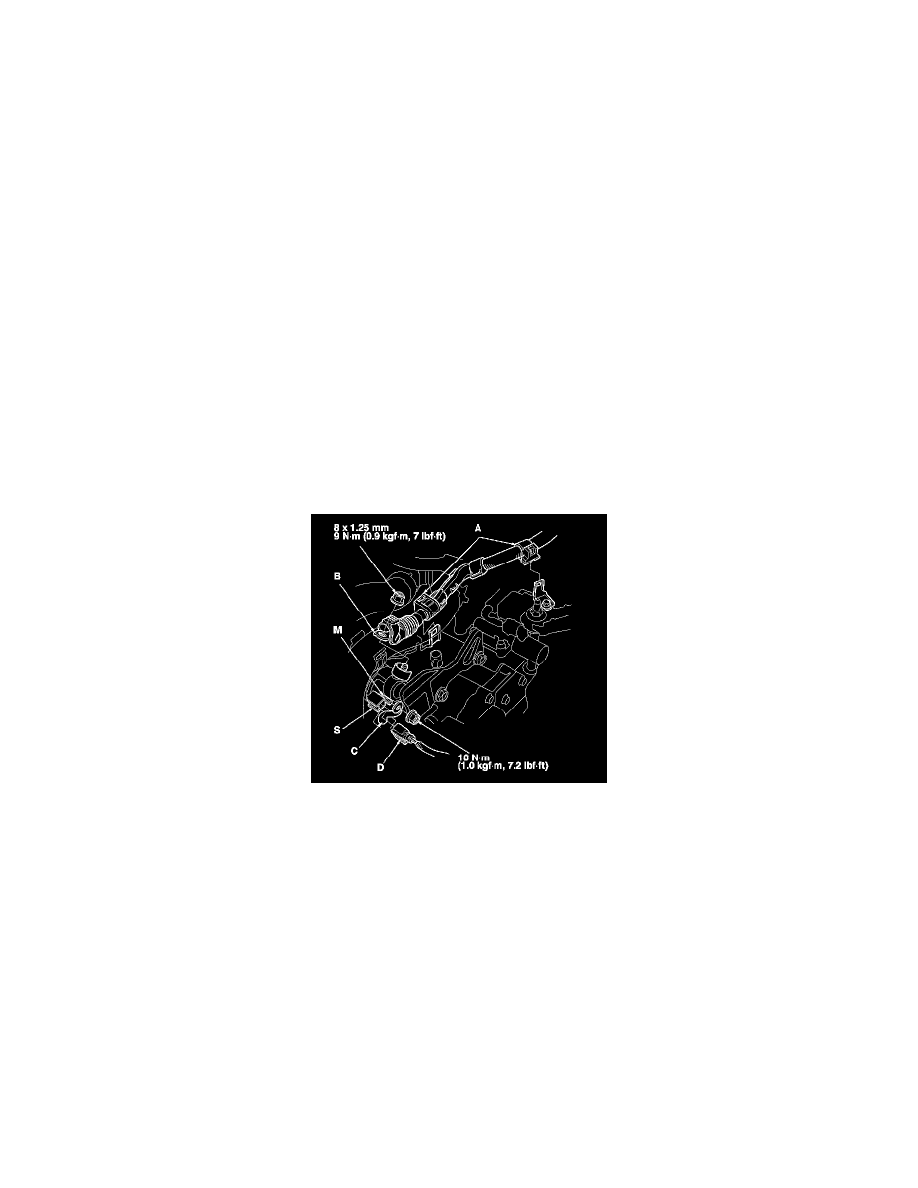
4. Remove the harness clamps (A), then disconnect the positive starter cable (B), the motor wire (C), and the S terminal connector (D).
5. Check the hold-in coil for continuity between the S terminal and the armature housing (ground). There should be continuity.
-
If there is continuity, go to step 6.
-
If there is no continuity, replace the solenoid.
6. Check the pull-in coil for continuity between the S terminal and the M terminal. There should be continuity.
-
If there is continuity, the solenoid is OK.
-
If there is no continuity, replace the solenoid.
7. Install the wire and the connector in the reverse order of removal.
8. Do the battery terminal reconnection procedure. See: Battery/Service and Repair/Procedures
9. Install the engine compartment covers. See: Body and Frame/Access Cover/Service and Repair