
TL FWD V6-3.5L (2009)
Pressure Regulating Solenoid: Service and Repair
A/T Clutch Pressure Control Solenoid Valve A and B Replacement
A/T Clutch Pressure Control Solenoid Valve A and B Replacement
1. Do the battery removal procedure. See: Starting and Charging/Battery/Service and Repair/Removal and Replacement
2. Remove the air cleaner assembly. See: Engine, Cooling and Exhaust/Engine/Tune-up and Engine Performance Checks/Air Cleaner
Housing/Service and Repair
3. Remove the battery base. See: Automatic Transmission/Transaxle/Service and Repair/Removal and Replacement/Automatic Transmission
Removal
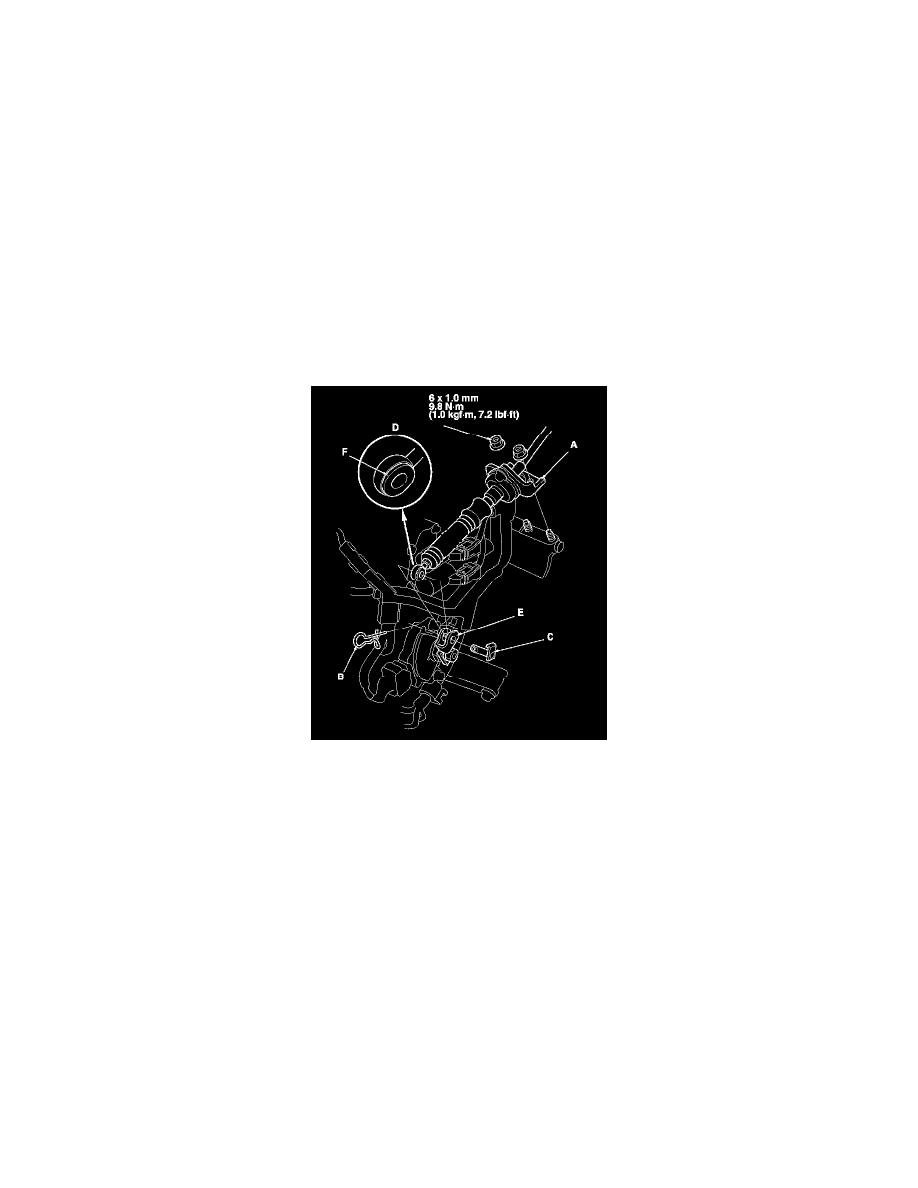
4. Remove the nuts securing the shift cable bracket (A).
5. Remove the spring clip (B) and the control pin (C), then separate the shift cable end (D) from the selector control lever (E).
6. Check the bushing (F) in the shift cable end for proper fit and wear. If the bushing is loose or worn, replace the shift cable. See: Automatic
Transmission/Transaxle/Shift Linkage/Shift Cable/Service and Repair
7. Disconnect these connectors:
-
A/T clutch pressure control solenoid valve A connector (A)
-
A/T clutch pressure control solenoid valve B connector (B)
-
4th clutch transmission fluid pressure switch connector (C)
-
Shift solenoid wire harness connector (D)
8. Remove the bolt securing the harness cover (E), and remove the harness cover from its bracket (F).