
TL FWD V6-3.5L (2009)
Shifter A/T: Removal and Replacement
Paddle Shifter + (Upshift Switch) or Paddle Shifter - (Downshift Switch) Replacement
Paddle Shifter + (Upshift Switch) or Paddle Shifter - (Downshift Switch) Replacement
SRS components are located in this area. Review the SRS component locations See: Restraint Systems/Air Bag Systems/Locations and the precautions
and procedures See: Body and Frame/Interior Moulding / Trim/Dashboard / Instrument Panel/Air Bag(s) Arming and Disarming/Service and Repair
before doing repair or service.
1. Remove the steering wheel. See: Steering and Suspension/Steering/Steering Wheel/Service and Repair/Removal and Replacement/Steering Wheel
Removal
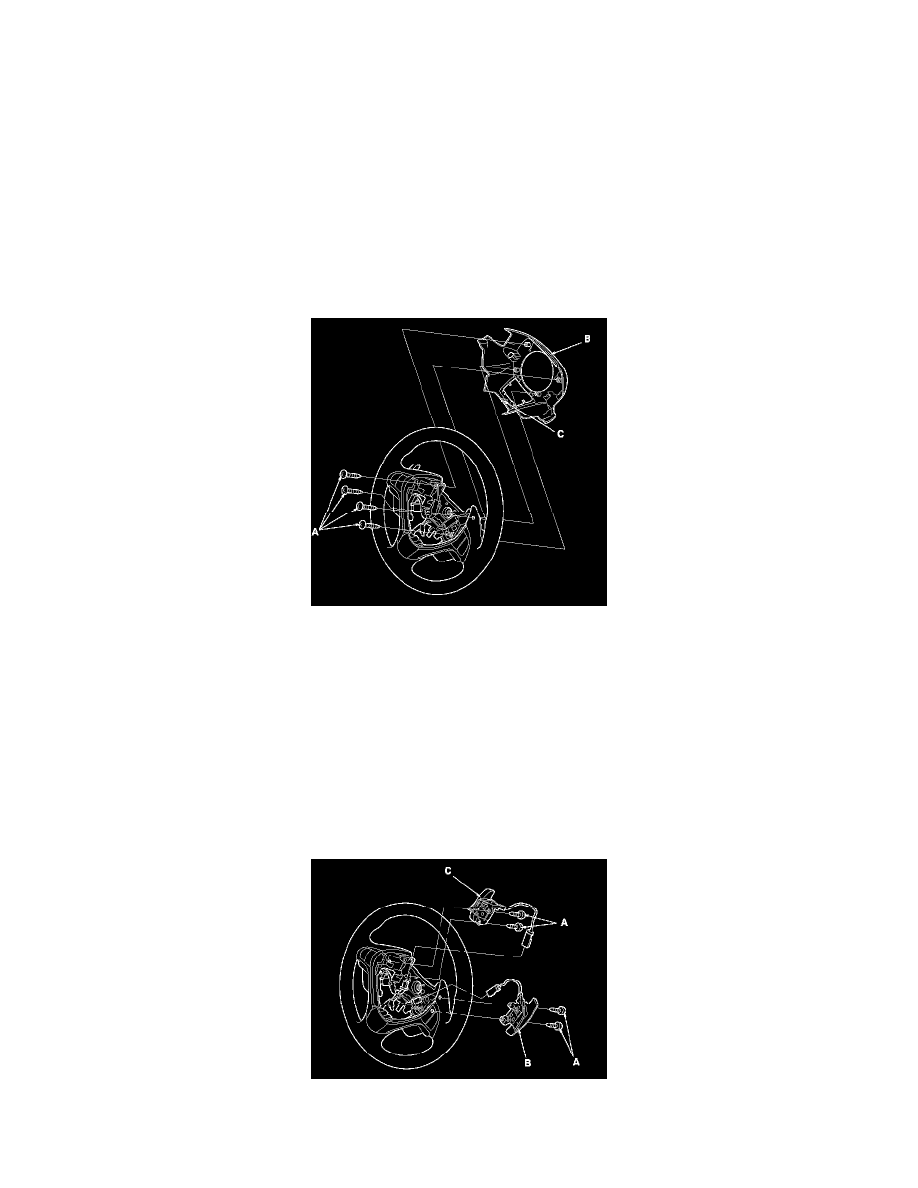
2. Remove the four screws (A) securing the steering wheel rear cover (B).
3. Pull the snap-fit portion (C) up carefully, then remove the steering wheel rear cover.
4. Disconnect the paddle shifter + (upshift switch) or paddle shifter - (downshift switch) connector. Remove the screws (A) securing the paddle
shifter + (upshift switch) (B) or paddle shifter - (downshift switch) (C), then remove the paddle shifter + (upshift switch) or paddle shifter -
(downshift switch).
5. Install the new paddle shifter + (upshift switch) or paddle shifter - (downshift switch) on the steering wheel.
6. Connect the paddle shifter + (upshift switch) or paddle shifter - (downshift switch) connector securely, and install the connector in the connector
holder.
7. Install the steering wheel rear cover with the screws.
8. Install the steering wheel. See: Steering and Suspension/Steering/Steering Wheel/Service and Repair/Removal and Replacement/Steering Wheel
Installation