
TL FWD V6-3.5L (2009)
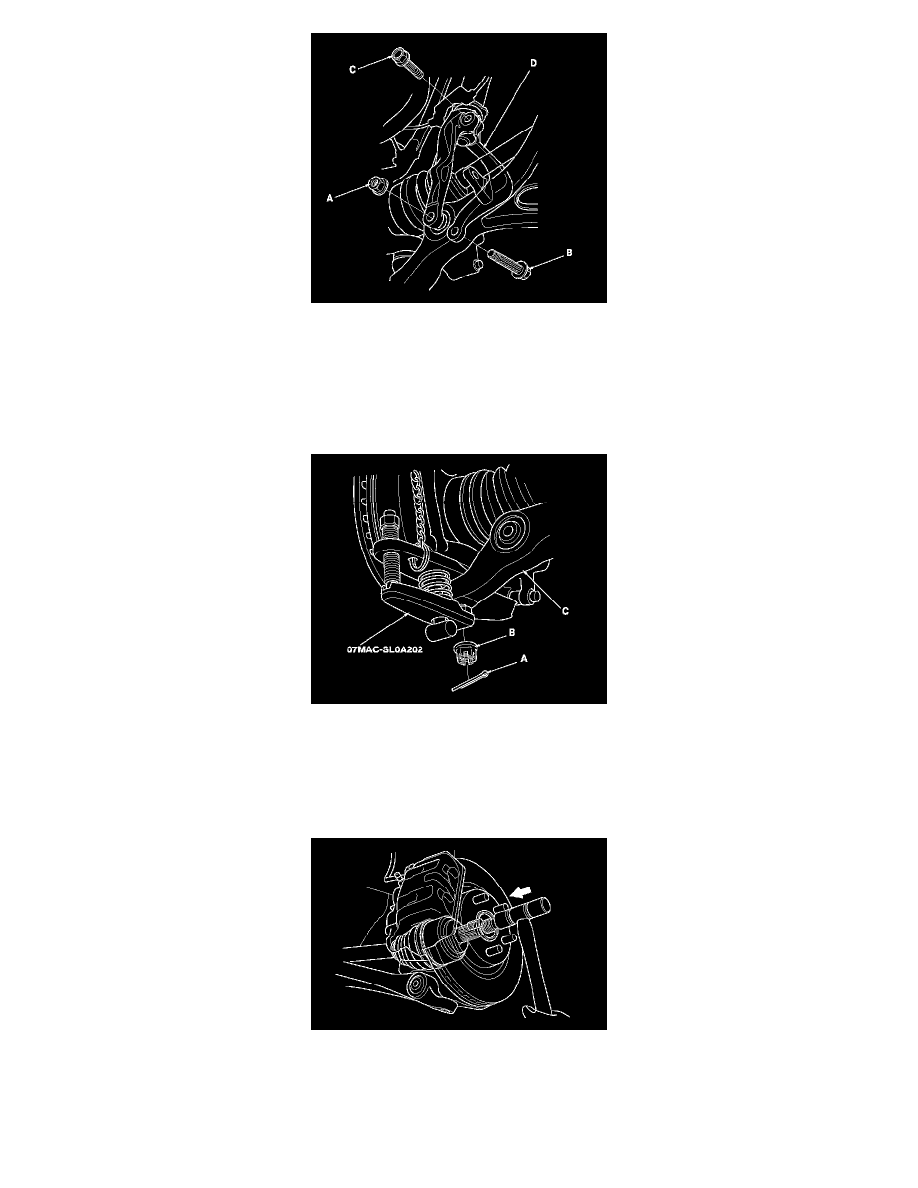
7. Remove the cotter pin (A) from the knuckle ball joint, then remove the castle nut (B). Separate the ball joint from the lower arm (C) using the ball
joint remover. See: Steering and Suspension/Suspension/Ball Joint/Service and Repair/Ball Joint Boot Inspection/Replacement
NOTE:
-
Be careful not to damage the ball joint boot when installing the remover.
-
Do not force or hammer on the lower arm, or pry between the lower arm and the knuckle. You could damage the ball joint.
8. Pull the knuckle outward, and separate the outboard joint from the front hub using a plastic hammer.
9. Remove exhaust pipe A.
-
Without SH-AWD See: Engine, Cooling and Exhaust/Exhaust System/Muffler/Service and Repair
-
With SH-AWD See: Engine, Cooling and Exhaust/Exhaust System/Muffler/Service and Repair
10. Left driveshaft: Pry the inboard joint (A) from the differential using a prybar. Remove the driveshaft as an assembly.
NOTE:
-
Do not pull on the driveshaft (B), or the inboard joint may come apart. Pull the inboard joint straight out to avoid damaging the oil seal.
-
Be careful not to damage the oil seal with the prybar.