
TL FWD V6-3.5L (2009)
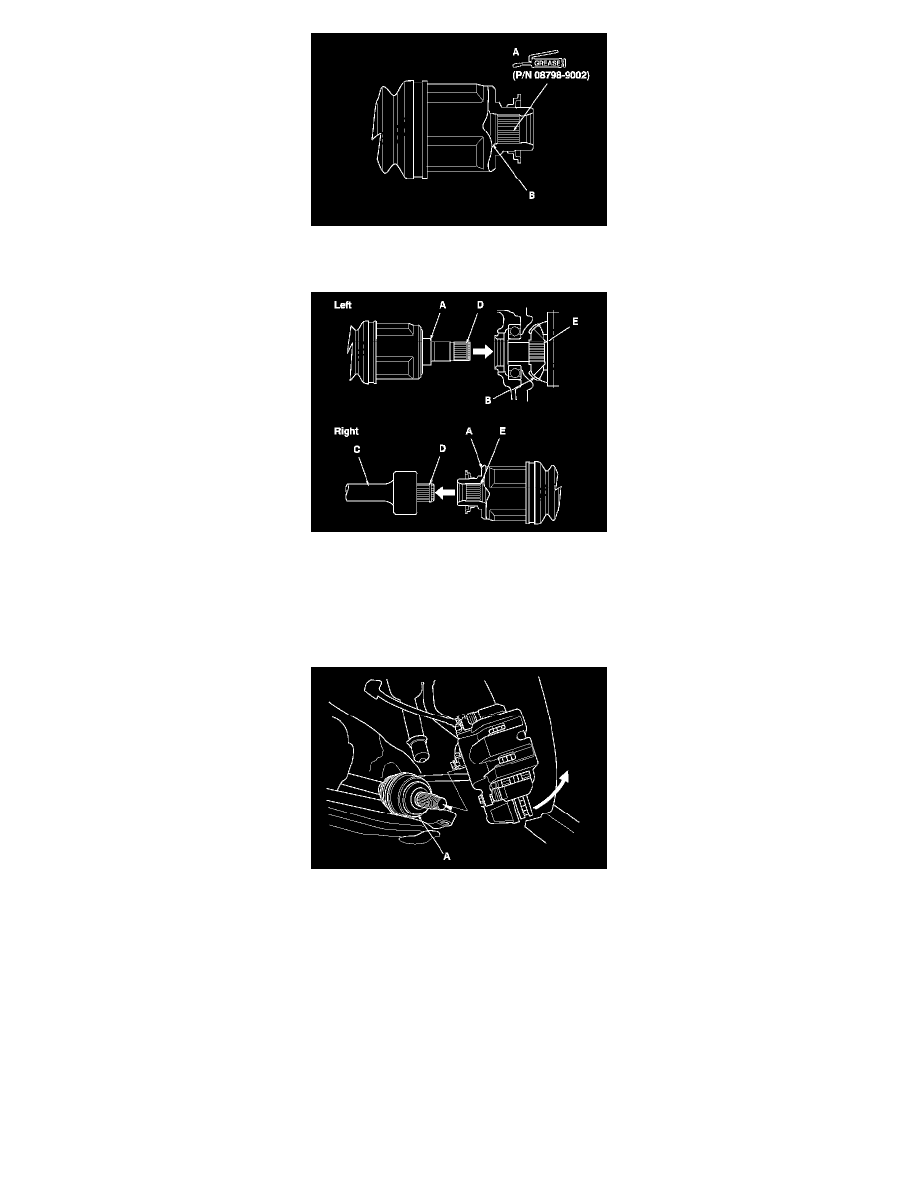
6. Insert the inboard end (A) of the driveshaft into the differential (B) or the intermediate shaft (C) until the set ring (D) locks in the groove (E).
NOTE: Insert the driveshaft horizontally to prevent damaging the oil seal.
7. Install the outboard joint (A) into the front hub on the knuckle.
8. Install exhaust pipe A.
-
Without SH-AWD See: Engine, Cooling and Exhaust/Exhaust System/Muffler/Service and Repair
-
With SH-AWD See: Engine, Cooling and Exhaust/Exhaust System/Muffler/Service and Repair
9. Wipe off any grease contamination from the ball joint tapered section and threads, then install the knuckle (A) onto the lower arm (B). Be careful
not to damage the ball joint boot (C). Wipe off the grease before tightening the nut at the ball joint. Torque the castle nut (D) to the lower torque
specification, then tighten it only far enough to align the slot with the ball joint pin hole.
NOTE:
-
Make sure the ball joint boot is not damaged or cracked.
-
Do not align the nut by loosening it.
10. Install a new cotter pin (E) into the ball joint pin hole, and bend the cotter pin as shown.