
TSX L4-2.4L (2005)
Trunk / Liftgate Interior Trim Panel: Service and Repair
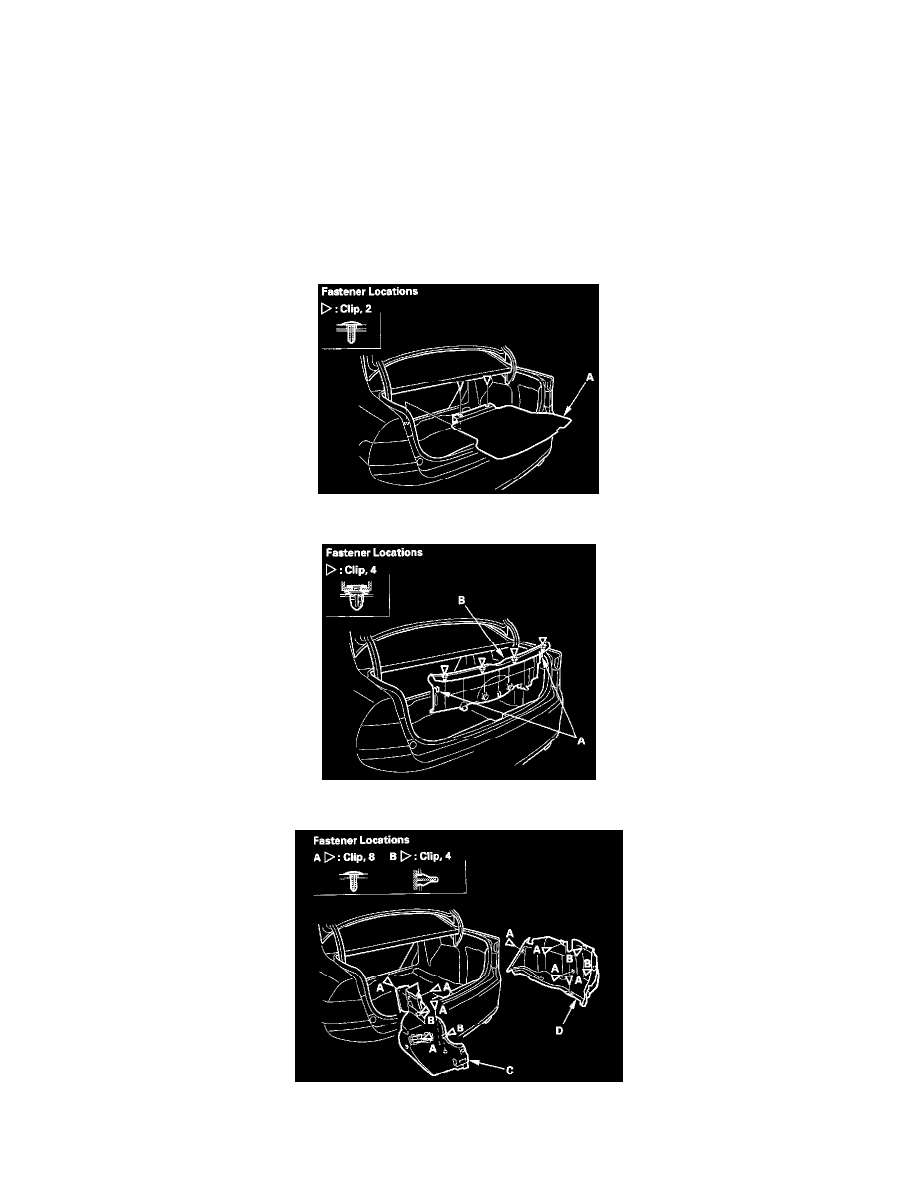
Trim Removal/Installation - Trunk Area
Trim Removal/Installation - Trunk Area
Special Tools Required
KTC trim tool set SOJATP2014 *
* Available through the American Honda Tool and Equipment Program.
NOTE:
-
Put on gloves to protect your hands.
-
Take care not to bend or scratch the trim and panels.
-
Use the appropriate tool from the KTC trim tool set to avoid damage when prying components.
1. Remove the clips, then remove the spare tire lid (A).
2. Detach the clips, and release the hooks (A) by pulling the trunk rear trim panel (B) up, then remove it.
3. Remove the clips (A), and detach the clips (B), then remove the left trunk side trim panel (C) and right trunk side trim panel (D) from the trunk.