
TSX L4-2.4L (2005)
-
Put on gloves to protect your hands.
-
Take care not to bend or scratch the trim and panels.
-
Use the appropriate tool from the KTC trim tool set to avoid damage when prying components.
1. Remove these items:
-
Rear seat side bolster.
-
Rear door opening trim, as needed.
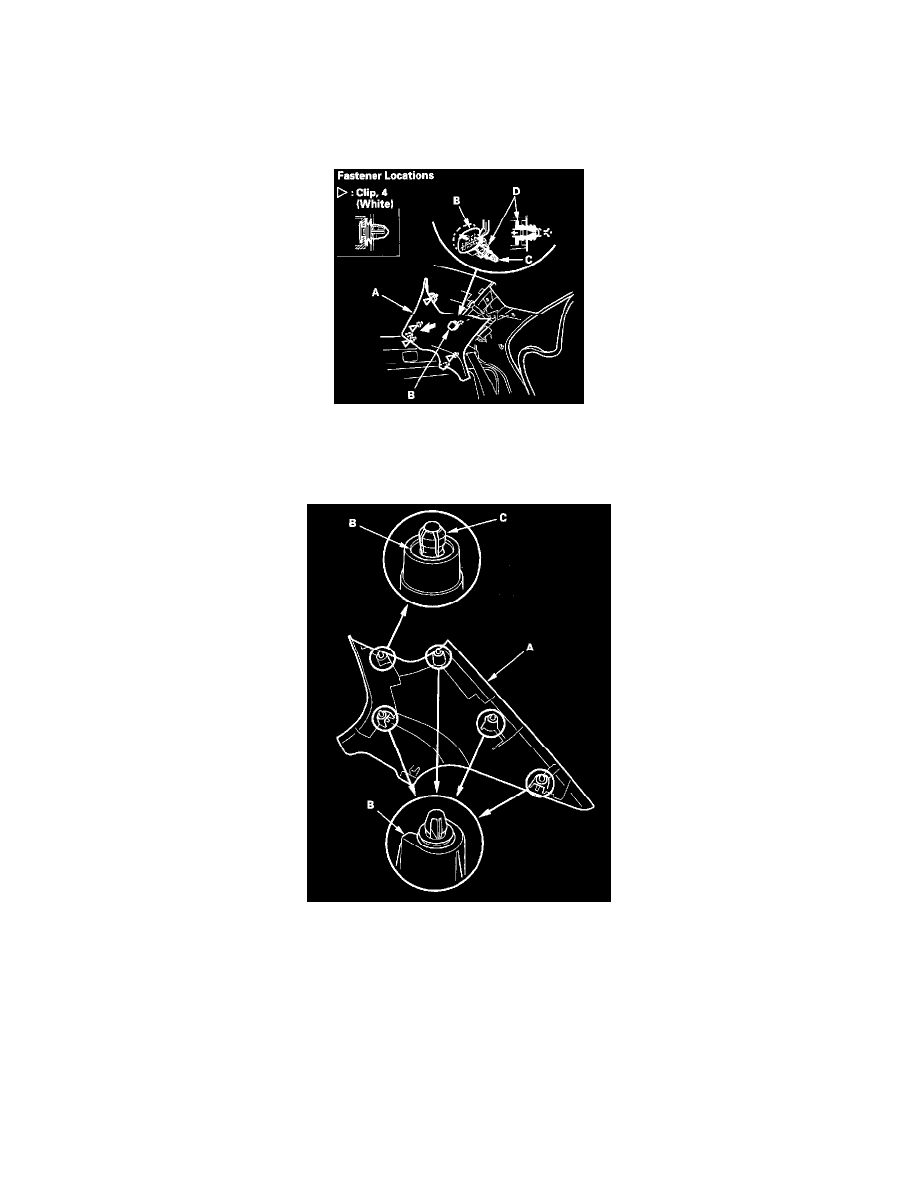
2. Remove the C-pillar trim (A).
1. Pry the C-pillar cap (B) out until it is stopped by the hooks (C) in the grommet (D).
2. Pull the C-pillar trim back by hand to detach the clips, then remove the trim.
3. Release the hooks on the grommet and pull the cap out. Discard the cap.
3. Install the trim in the reverse order of removal, and note these items:
-
Replace any damaged clips with new ones.
-
Do not reuse the C-pillar cap; always replace it.
-
If the side curtain airbag has deployed, replace the C-pillar trim with new one.
-
To prevent the side curtain airbags from deploying improperly and possibly causing injury, inspect removed pieces and replace them if they
have any of these types of damage:
-
Any cracks, deformations, or stress-whitened areas in the C-pillar trim (A)
-
Any cracks, or stress-whitened areas in the grommet and clip seating surfaces (B)
-
Bent or broken grommet (C)
-
Replace any damaged parts with new ones.
-
Make sure the top of the trim overlaps with the headliner correctly.
-
Push the clips into place securely.