
TSX L4-2.4L (2005)
Piston: Service and Repair
Piston Installation
Piston Installation
If the Crankshaft is Already Installed
1. Set the crankshaft to bottom dead center (BDC) for each cylinder.
2. Remove the connecting rod caps, then install the ring compressor. Check that the bearing is securely in place.
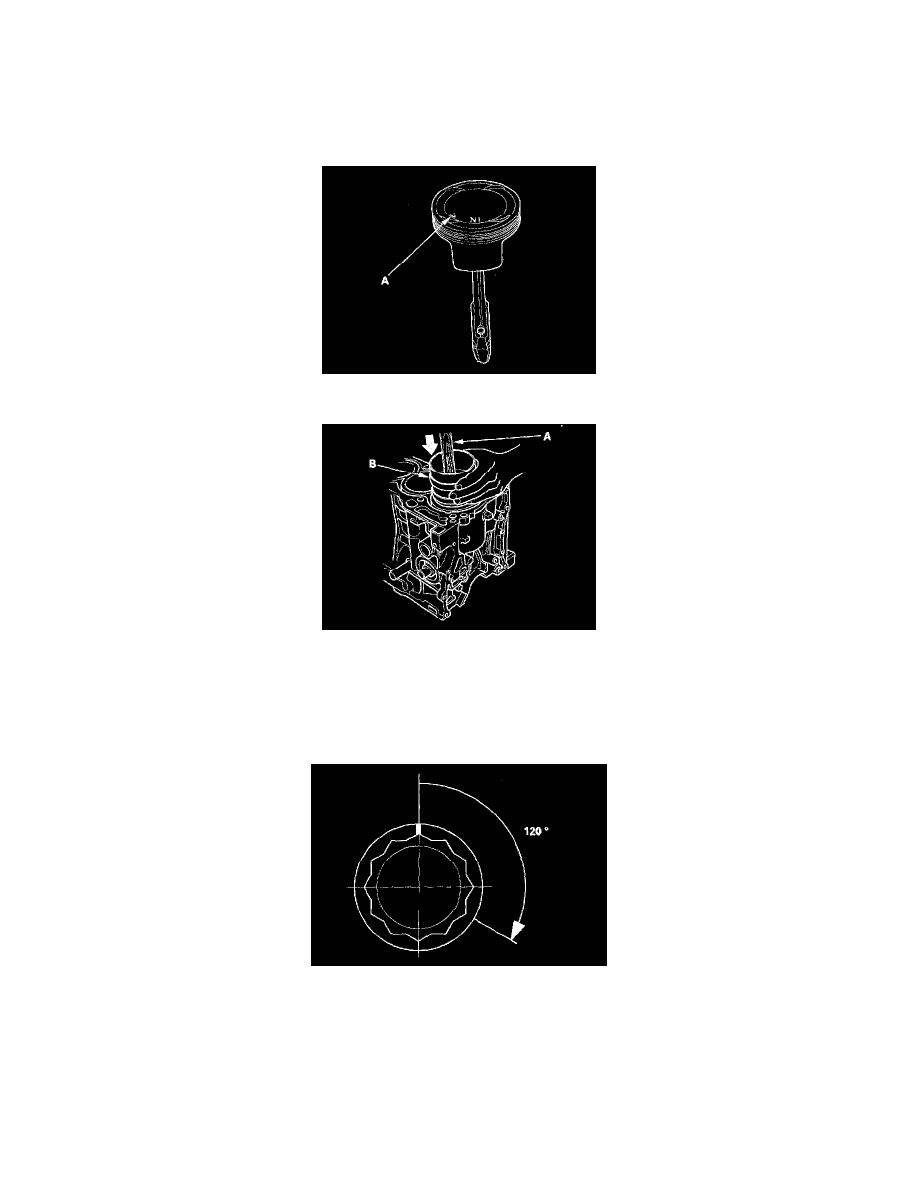
3. Position the mark (A) to face the cam chain side of the engine.
4. Position the piston in the cylinder, and tap it in using the wooden handle of a hammer (A). Maintain downward force on the ring compressor (B) to
prevent the rings from expanding before entering the cylinder bore.
5. Stop after the ring compressor pops free, and check the connecting rod-to-crank journal alignment before pushing the piston into place.
6. Check the connecting rod bearing clearance with plastigage.
7. Inspect the connecting rod bolts.
8. Apply engine oil to the bolt threads, then install the rod caps with bearings. Torque the bolts to 36 Nm (3.7 kgf-m, 27 ft. lbs.).
9. Tighten the connecting rod bolts an additional 120°.
NOTE: Remove the connecting rod bolt if you tightened it beyond the specified angle, and go back to step 7 of the procedure. Do not loosen it
back to the specified angle.
If the Crankshaft is Not Installed
1. Remove the connecting rod caps, then install the ring compressor, and check that the bearing is securely in place.