
TSX L4-2.4L (2005)
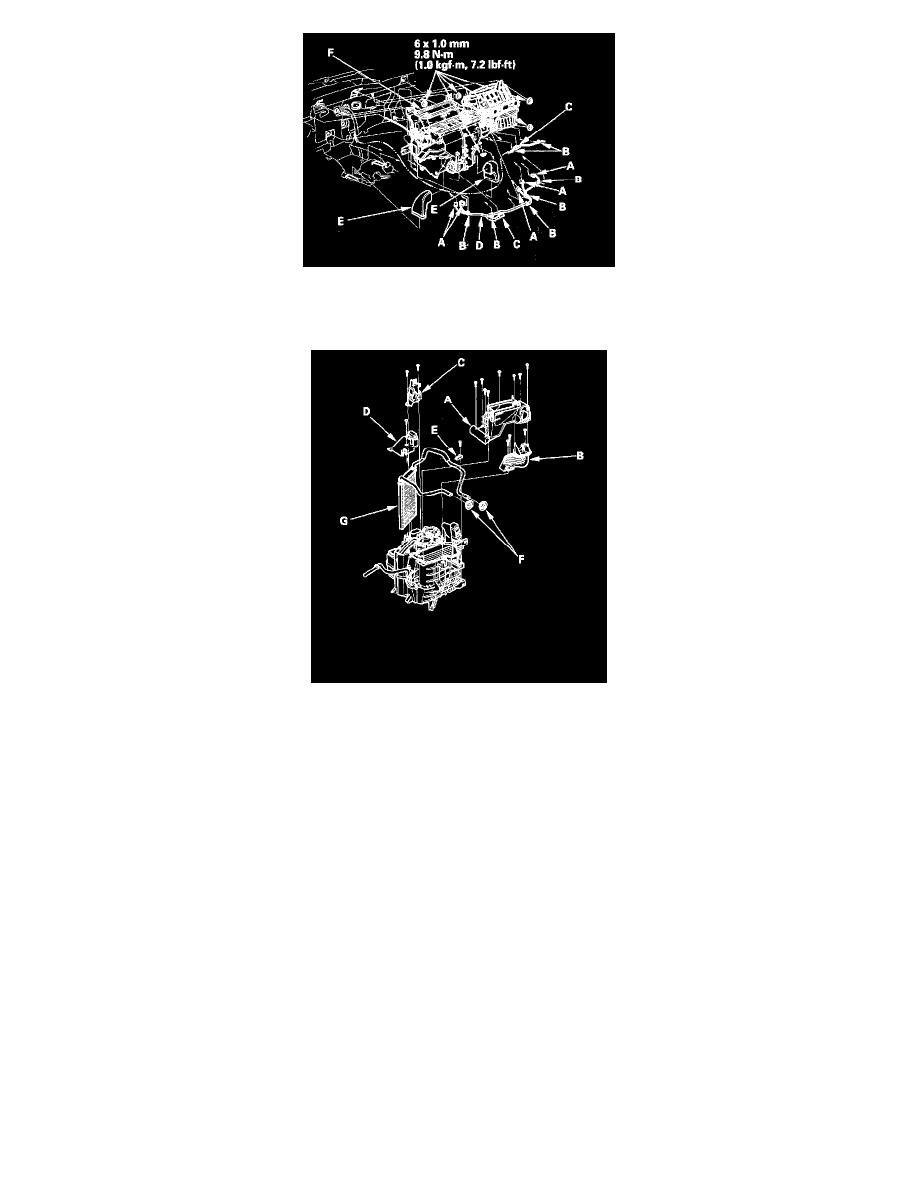
10. Disconnect the connectors (A) From the driver's air mix control motor, the evaporator temperature sensor, the power transistor, the mode control
motor, passenger's air mix control motor, and the recirculation control motor, then remove the wire harness clips (B), the connector clips (C) and
the wire harness (D). Remove the heater ducts (E). then remove the mounting nuts and the blower-heater unit (F).
11. Remove the self-tapping screws and the joint duct A, then remove the self-tapping screws and the joint duct B. Remove the self-tapping screws,
then remove the passenger's heater outlet (C), and the heater core cover (D). Remove the self-tapping screws, the heater pipe bracket (E), the
grommets (F) and carefully pull out the heater core (G) so you don't bend the inlet and outlet pipes.
12. Install the heater core and the evaporator core in the reverse order of removal.
13. Install the heater unit in the reverse order of removal, and note these items:
-
Do not interchange the inlet and outlet heater hoses, and install the hose clamps securely.
-
Refill the cooling system with engine coolant.
-
Adjust the heater valve cable.
-
Make sure that there is no coolant leakage.
-
Make sure that there is no air leakage.
-
Refer to evaporator core replacement.
-
Do the PCM idle learn procedure.
-
Do the power window control unit reset procedure.
-
Enter the anti-theft codes for the radio and the navigation system, then enter the customer's radio station presets.