
TSX L4-2.4L (2005)
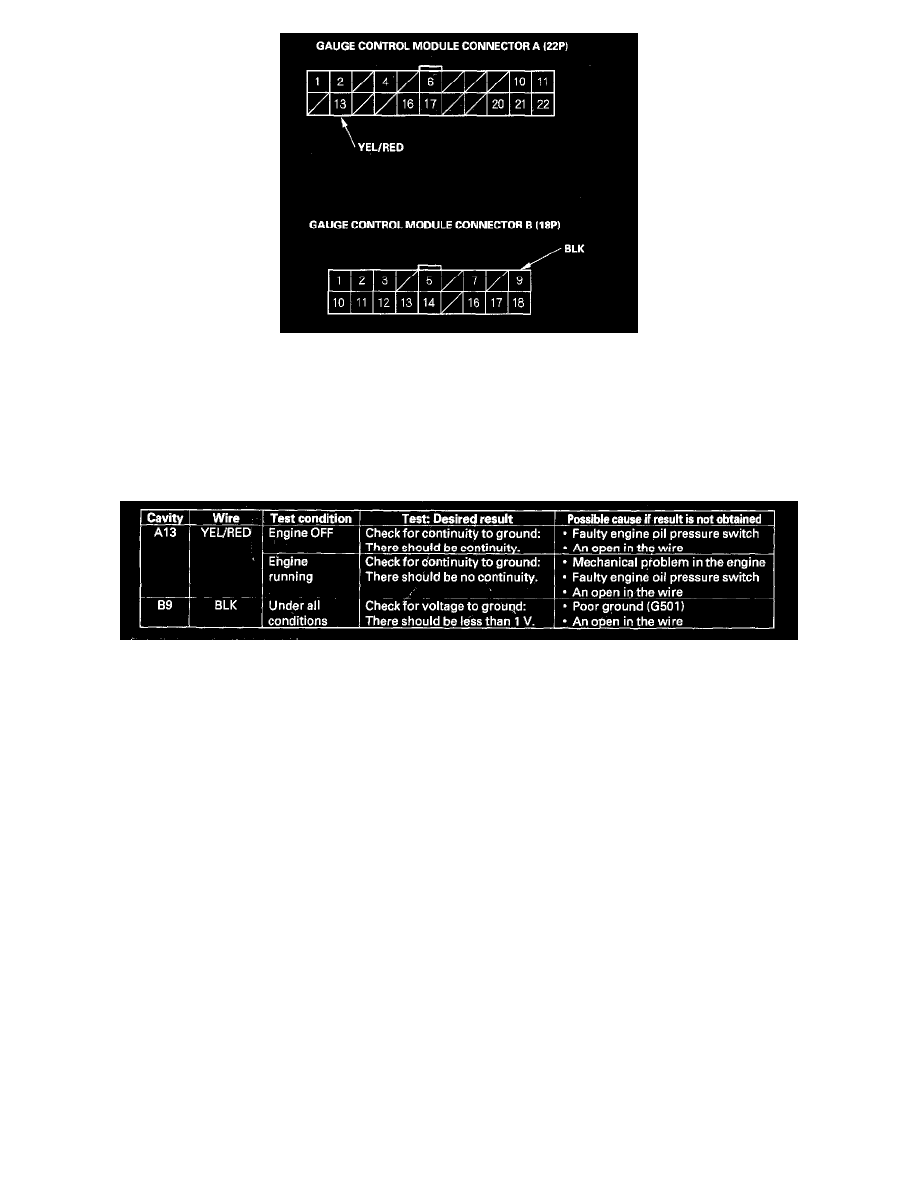
7. Disconnect the gauge control module connectors A and B.
NOTE: All connectors are wire side of female terminals.
8. Inspect the connector and socket terminals to be sure they are all making good contact.
-
If the terminals are bent, loose or corroded, repair them as necessary, and recheck the system.
-
If the terminals are OK, go to step 9.
9. Reconnect the connectors, and make these input tests at the connector.
-
If any test indicates a problem, find and correct the cause, then recheck the system.
-
If the input tests prove OK, go to step 10.
10. Perform the Gauge Self-diagnosis Procedure.
-
If the beeper sounds and the seat belt reminder light flashes, go to step 11.
-
If the beeper does not sound or the seat belt reminder light does not flash, replace the gauge control module.
11. Substitute a known-good under-dash fuse/relay box and recheck the system.
-
If the symptom is gone, the multiplex integrated control unit (MICU) is faulty; replace the under-dash fuse/relay box.
-
If the symptom is still present, the gauge control module is faulty; replace the gauge control module.