
TSX L4-2.4L (2005)
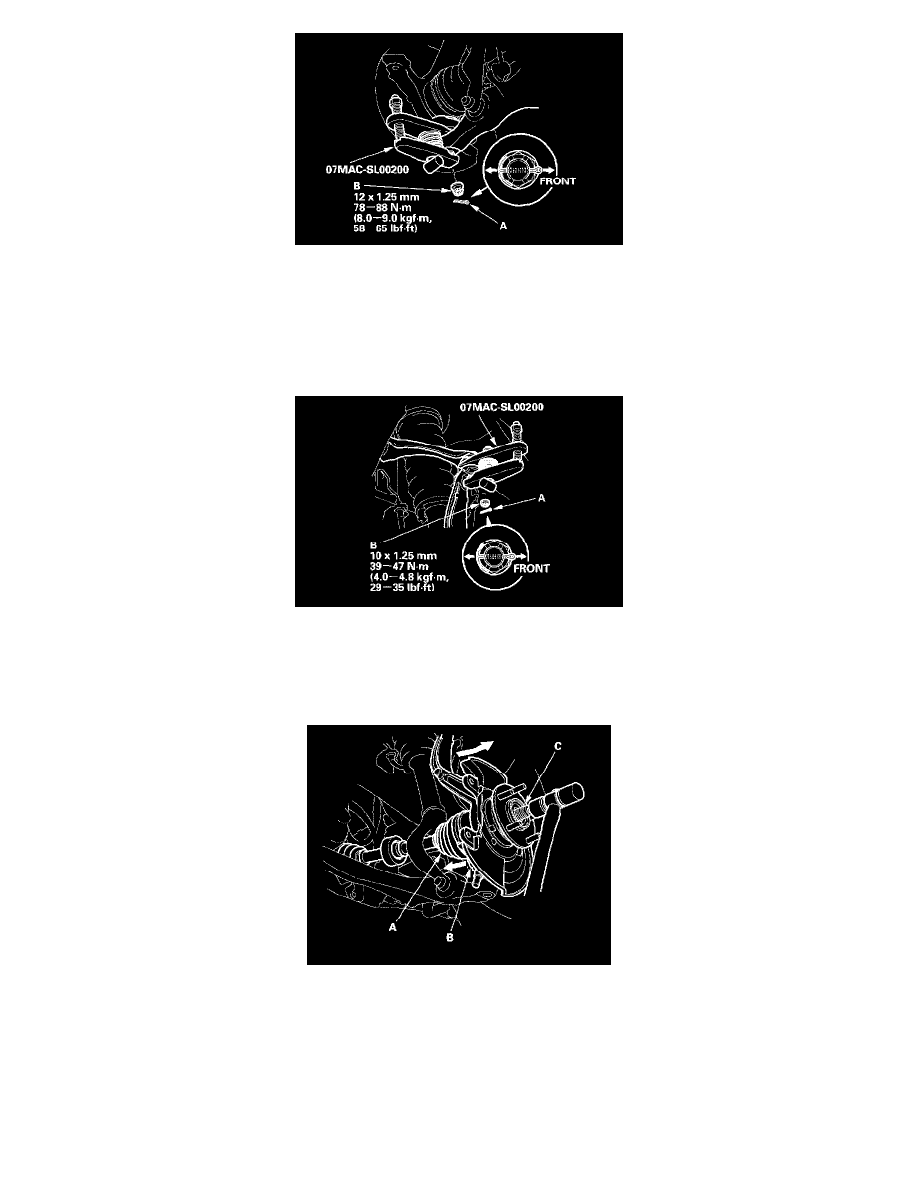
12. Remove the cotter pin (A) from the lower arm ball joint, and loosen the nut (B).
NOTE:
^
Do not force or hammer on the lower arm, or pry between the lower arm and the knuckle. You could damage the ball joint.
^
Insert the new cotter pin in to the ball joint pin from the front to the rear of the vehicle, and bend its end as shown.
13. Disconnect the lower arm ball joint from the lower arm using the special tool.
14. Remove the cotter pin (A) from the upper arm ball joint, and loosen the nut (B).
NOTE: During installation, insert the new cotter pin into the ball joint pin from the front to the rear of the vehicle, and bend its end as shown.
15. Disconnect the upper arm ball joint from the knuckle using the special tool.
16. Remove the driveshaft outboard joint (A) from the knuckle (B) by tapping the driveshaft end (C) with a plastic hammer while drawing the hub
outward, then remove the knuckle.
NOTE: Do not pull the driveshaft end outward. The inner driveshaft joint may come apart.
17. Install the knuckle/hub in the reverse order of removal, and note these items:
^
Be careful not to damage the ball joint boot when installing the knuckle.
^
Tighten all mounting hardware to the specified torque values.
^
Before connecting the lower arm ball joint to the lower arm, degrease the threaded section and tapered portion of the ball joint pin, and the
lower arm connecting hole, and the threaded section and mating surface of the castle nut.