
ZDX V6-3.7L (2010)
Accessory Control Display: Service and Repair
Interface Dial Removal/Installation
NOTE:
-
Put on gloves to protect your hands.
-
Take care not to scratch the dashboard and related parts.
-
Lay a shop towel under the parts when working on them to protect the face panel from scratches or other damage.
1. Remove the audio-navigation and HVAC switch panel See: Radio, Stereo, and Compact Disc/Service and Repair/Audio-Navigation and HVAC
Switch Panel Removal/Installation.
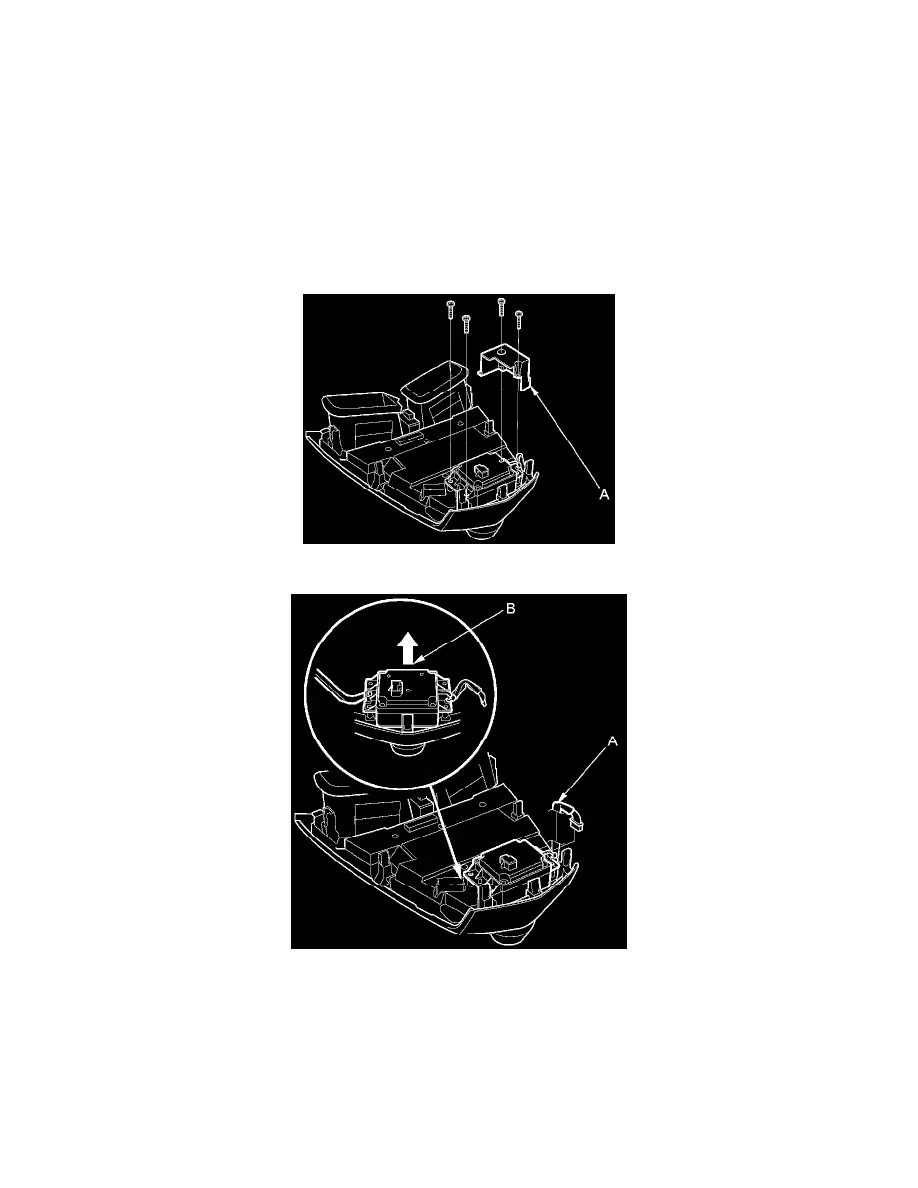
2. Remove the self-tapping screws and harness cover (A).
3. Disconnect the interface dial 13P connector (A).
4. Pry the interface dial (B) away from the audio-navigation and HVAC switch panel with KTC trim tools and applying even force as shown.
NOTE: Apply pressure slowly and steady until the knob and dial pops off.
5. Remove the interface dial (A), from the audio-navigation and HVAC switch panel.