
ZDX V6-3.7L (2010)
Power Seat Switch: Testing and Inspection
Power Seat Control Unit Input Test/Replacement
Power Seat Control Unit Input Test/Replacement
NOTE:
-
SRS components are located in this area. Review the SRS component locations See: Restraint Systems/Air Bag Systems/Locations, precautions
and procedures See: Interior Moulding / Trim/Dashboard / Instrument Panel/Air Bag(s) Arming and Disarming/Service and Repair before doing
repairs or servicing.
-
If you are troubleshooting multiple DTCs, be sure to follow the instructions in B-CAN System Diagnosis Test Mode A See: Powertrain
Management/Computers and Control Systems/Information Bus/Testing and Inspection/Component Tests and General
Diagnostics/Troubleshooting - B-CAN System Diagnosis Test Mode A.
1. Turn the ignition switch to LOCK (0), or press the engine start/stop button to select the OFF mode.
2. Remove the driver's seat See: Service and Repair/Front Seat Removal/Installation.
NOTE: Be careful not to scratch the interior trim.
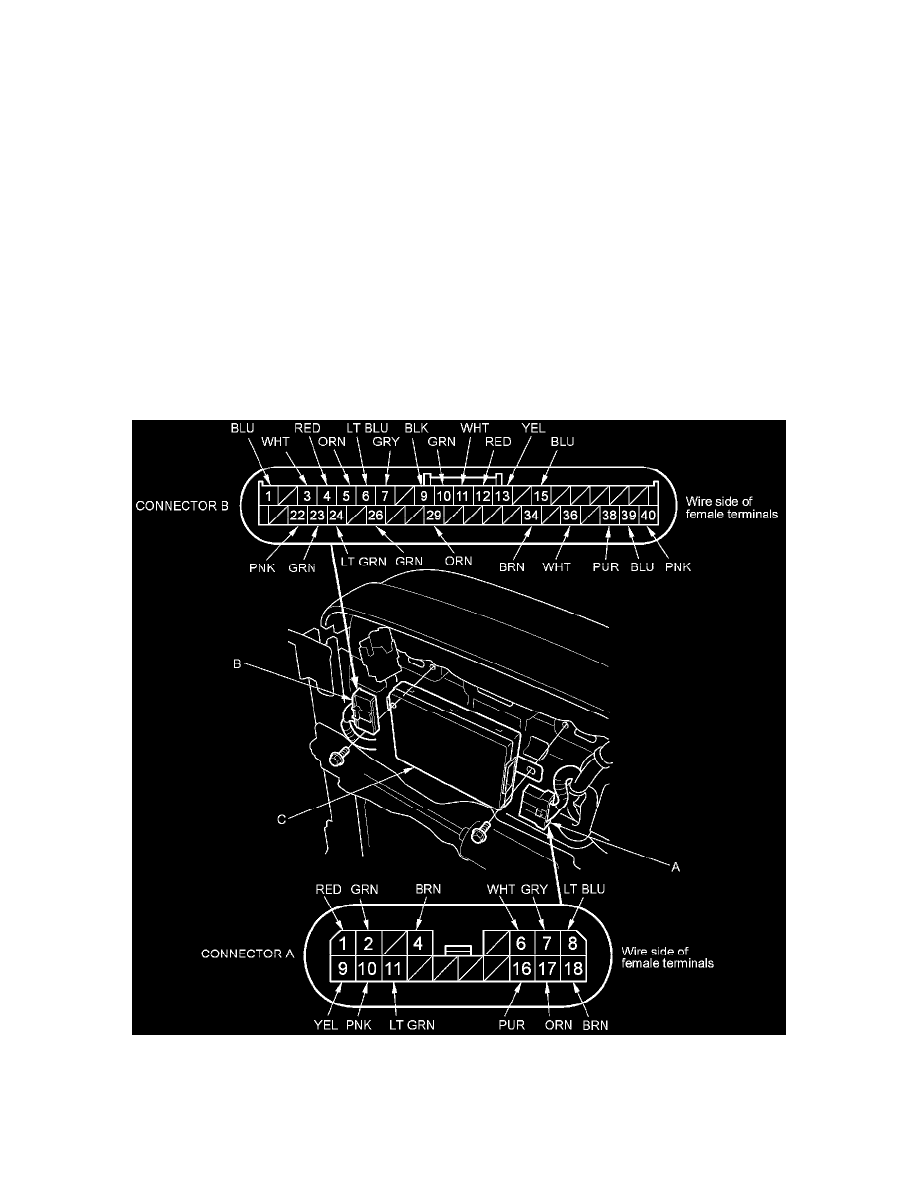
3. Disconnect the 18P connector (A) and 40P connector (B) from the power seat control unit (C).
4. Inspect the connector and socket terminals to be sure they are all making good contact.
-
If the terminals are bent, loose or corroded, repair them as necessary and recheck the system.
-
If the terminals look OK, go to step 5.