
ZDX V6-3.7L (2010)
Braking Sensor/Switch: Adjustments
Brake Pedal and Brake Pedal Position Switch Adjustment
Pedal Height
1. Remove the driver's dashboard undercover See: Body and Frame/Interior Moulding / Trim/Dashboard / Instrument Panel/Service and
Repair/Driver's Dashboard Undercover Removal/Installation.
2. Turn the brake pedal position switch 45 ° counterclockwise, and pull it back until it is no longer touching the brake pedal.
3. Remove the driver's side kick panel See: Body and Frame/Interior Moulding / Trim/Scuff Plate/Service and Repair.
4. Remove the footrest See: Body and Frame/Interior Moulding / Trim/Carpet/Service and Repair.
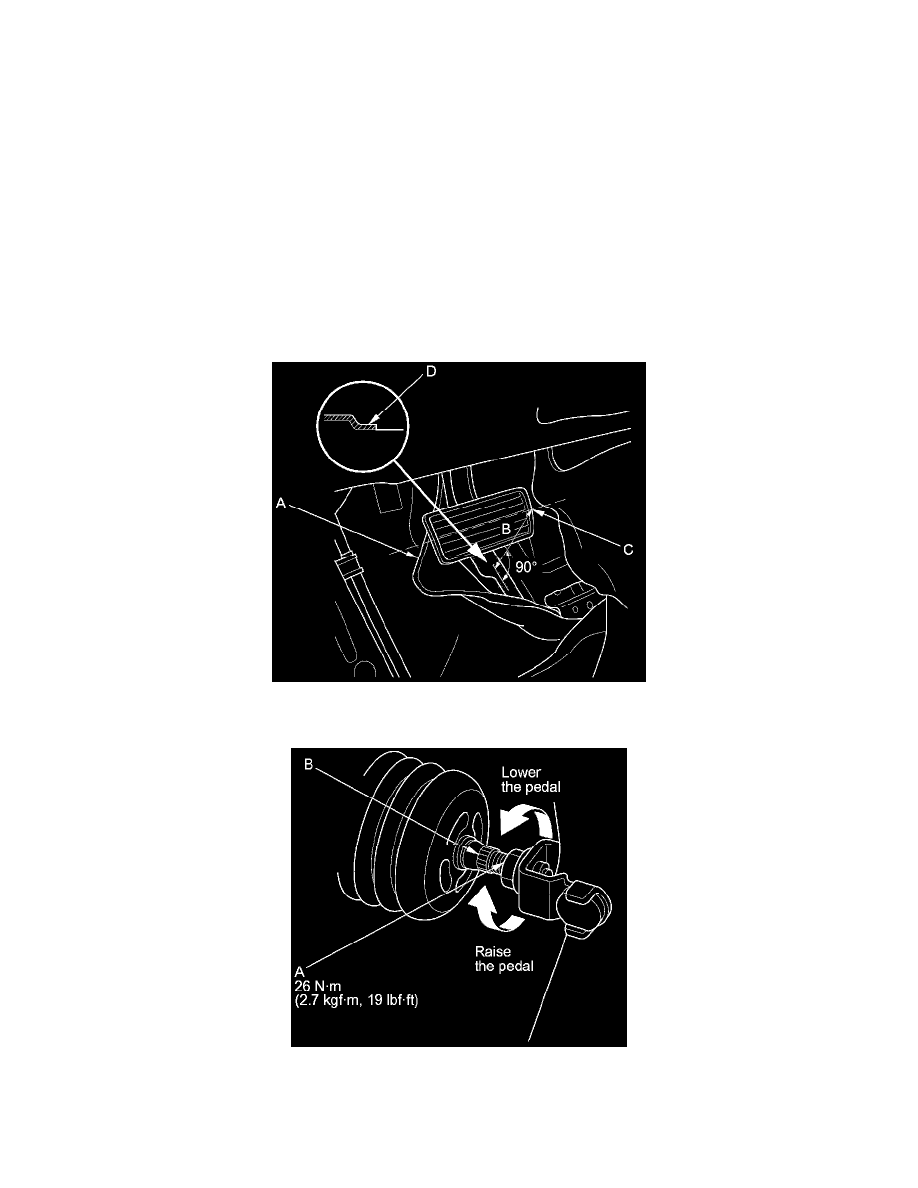
5. Pull back the carpet, and pull back the insulation (A). Measure the pedal height (B) from the right side middle of the pedal pad (C) to the floor (D).
Standard pedal height: 165 mm (6.50 in)
6. Loosen the pushrod locknut (A), and screw the pushrod (B) in or out with pliers until the standard pedal height from the floor is reached. After
adjustment, tighten the locknut firmly. Do not adjust the pedal height with the pushrod pressed.
Brake Pedal Position Switch Adjustment
7. Lift up on the brake pedal by hand. Push in the brake pedal position switch until its plunger is fully pressed (threaded end (A) touching the pad (B)
on the pedal arm). Turn the switch 45 ° clockwise to lock it. The gap between the brake pedal position switch and the pad is automatically adjusted
to 0.7 mm(0.028 in) by locking the switch. Make sure the brake lights go off when the pedal is released.