ZDX V6-3.7L (2010)

8. Inspect the brake disc/drum for runout, thickness, parallelism See: Brake Rotor/Disc/Testing and Inspection/Rear Brake Disc Inspection, and
check for damage and cracks.
9. Apply a thin coat of M-77 assembly paste (P/N 08798-9010) to the retainer mating surface of the caliper bracket (indicated by the arrows).
10. Install the upper and lower pad retainers. Wipe off the excess assembly paste from the retainers. Keep the assembly paste away from the discs and
pads.
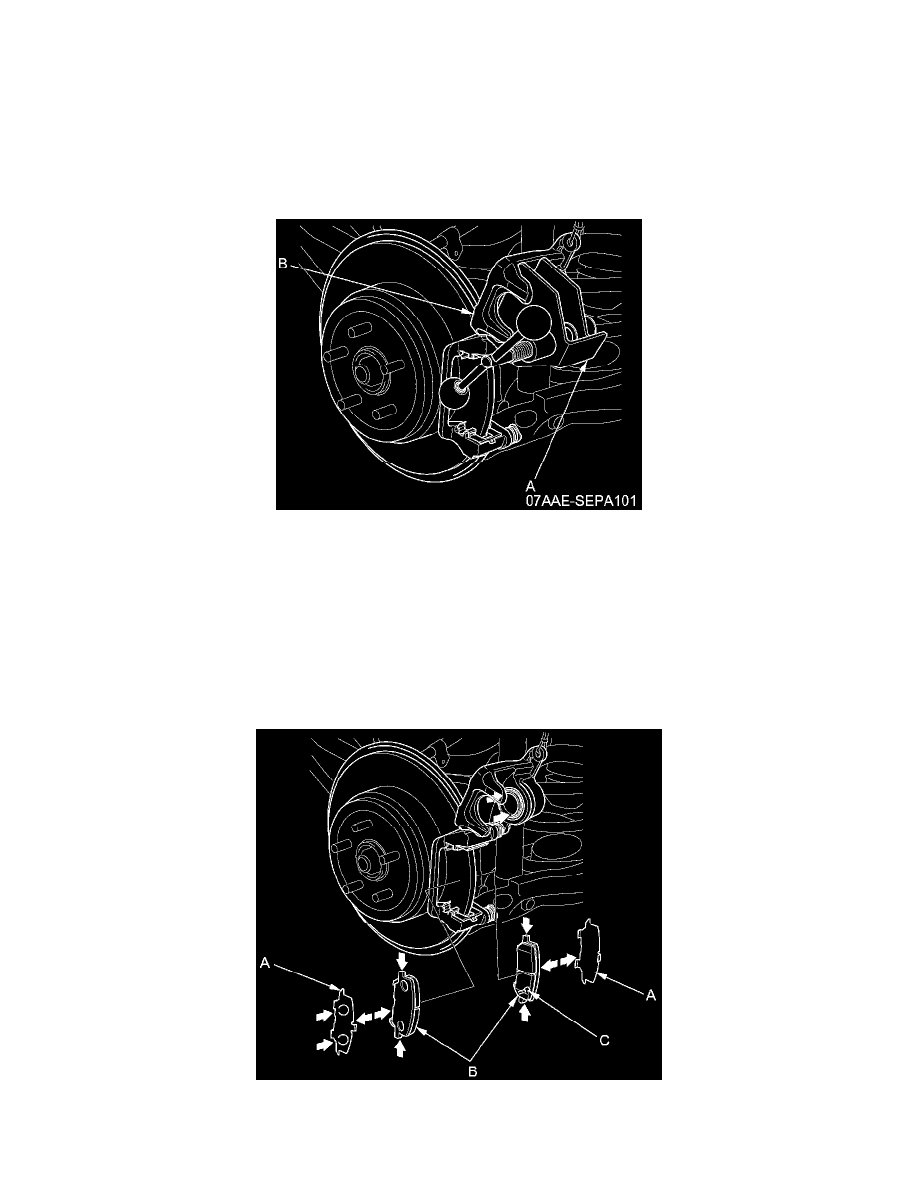
11. Install the brake caliper piston compressor tool (A) on the caliper body (B).
12. Press in the piston with the brake caliper piston compressor tool so the caliper will fit over the brake pads. Make sure the piston boot is in position
to prevent damaging it when pivoting the caliper down.
NOTE: Be careful when pressing in the piston; brake fluid might overflow from the master cylinder's reservoir. If brake fluid gets on any painted surface,
wash it off immediately with water.
13. Remove the brake caliper piston compressor tool.
14. Apply a thin coat of M-77 assembly paste (P/N 08798- 9010) to the pad side of the shims (A), the back of the brake pads (B), and the other areas
indicated by the arrows. Wipe off the excess assembly paste from the pad shims and brake pads friction material. Keep grease and assembly paste
away from the brake disc/drum and brake pads. Contaminated brake disc/drum or brake pads reduce stopping ability.
15. Install the brake pads and pad shims correctly. Install the brake pad with the wear indicator (C) on the bottom inside position. If you are reusing
the brake pads, always reinstall the brake pads in their original positions to prevent a temporary loss of braking efficiency.
