
ZDX V6-3.7L (2010)
Brake Rotor/Disc: Testing and Inspection
Rear Brake Disc Inspection
Rear Brake Disc Inspection
Runout
1. Raise and support the vehicle See: Maintenance/Vehicle Lifting/Service and Repair.
2. Remove the rear wheels.
3. Remove the brake pads See: Brake Pad/Service and Repair/Rear Brake Pad Inspection and Replacement.
4. Inspect the brake disc/drum to wheel surface for damage and cracks. Clean the brake disc/drum thoroughly, and remove all rust.
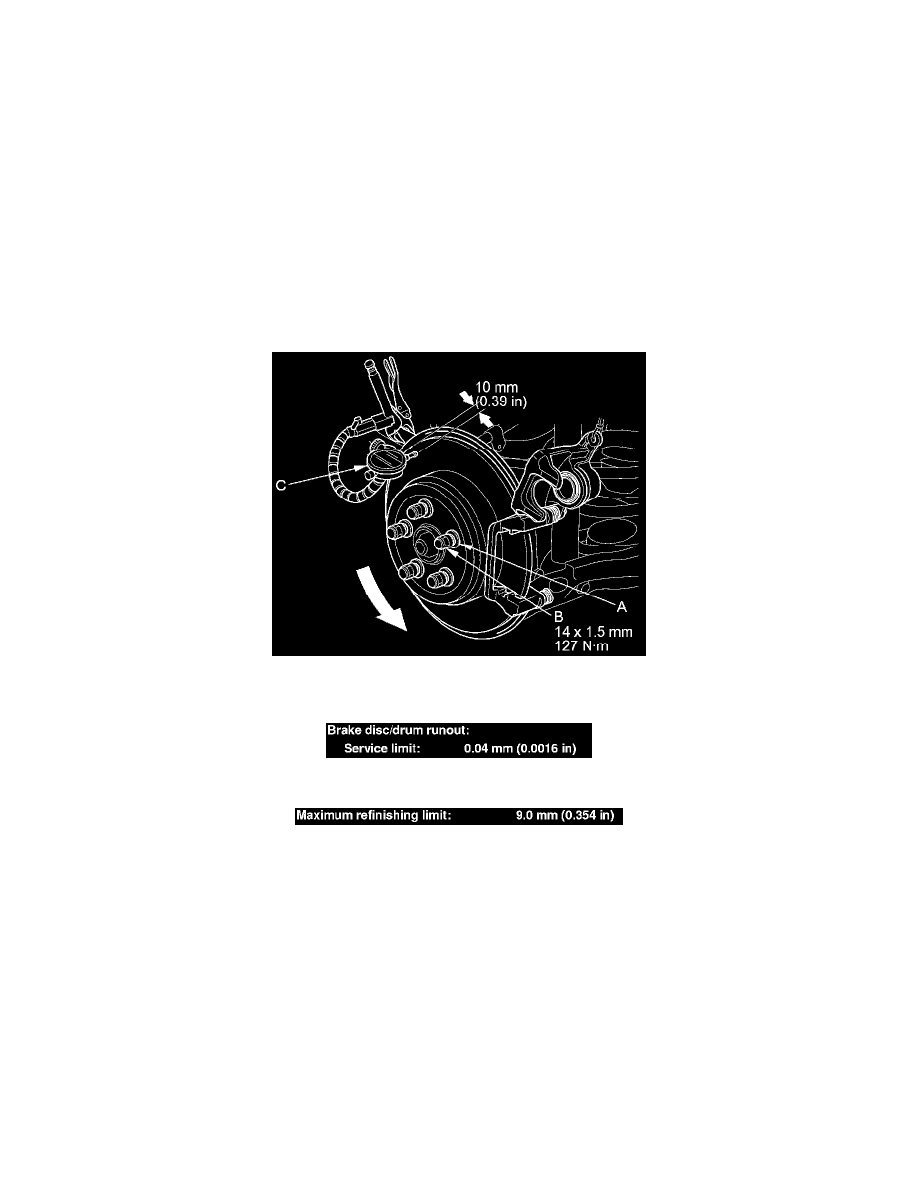
5. Install suitable flat washers (A) and wheel nuts (B), and tighten the wheel nuts to the specified torque to hold the brake disc/drum securely against
the hub.
6. Set up the dial gauge (C) against the brake disc/drum as shown, and measure the runout at 10 mm(0.39 in) from the outer edge of the brake
disc/drum.
7. If the brake disc/drum is beyond the service limit, refinish the brake disc/drum with a Honda-approved commercially available on-car brake lathe.
NOTE:
-
If the brake disc/drum is beyond the service limit for refinishing, replace it See: Service and Repair/Rear Brake Disc Replacement.
-
If the brake disc/drum is replaced with a new one, check the new disc/drum for runout. If the new disc/drum is out of specification, refinish the
disc/drum.
8. Install the brake pads See: Brake Pad/Service and Repair/Rear Brake Pad Inspection and Replacement.
9. Clean the mating surfaces between the brake disc/drum and the inside of the wheel, then install the rear wheels.
Thickness and Parallelism
1. Raise and support the vehicle See: Maintenance/Vehicle Lifting/Service and Repair.
2. Remove the rear wheels.
3. Remove the brake pads See: Brake Pad/Service and Repair/Rear Brake Pad Inspection and Replacement.