
ZDX V6-3.7L (2010)
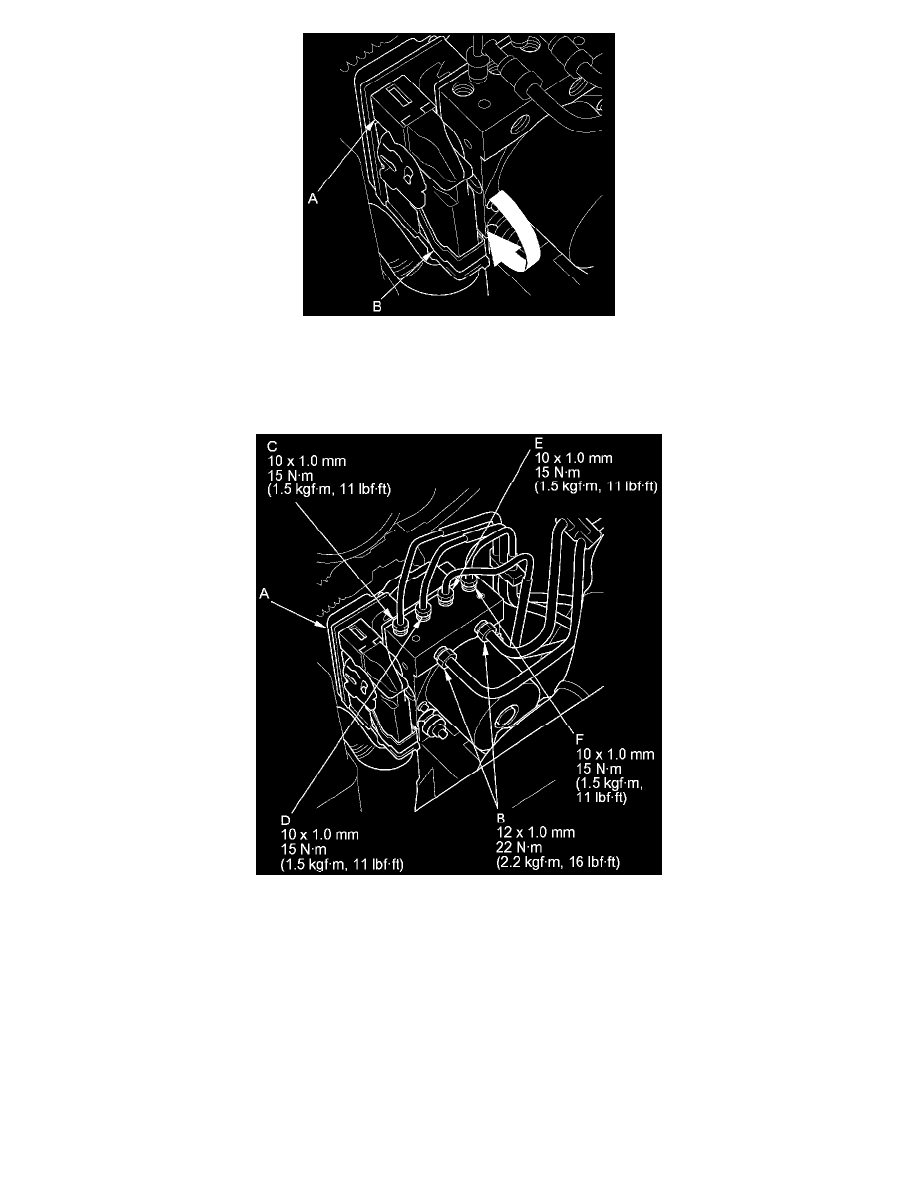
5. Pull down the lever (B) of the VSA modulator-control unit 46P connector, then confirm the connector is fully seated.
6. Connect the 10 mm brake lines and the 12 mm brake lines to the VSA modulator-control unit (A).
NOTE: Brake lines are connected to the master cylinder (B), the right-front (C), the left-rear (D), the right-rear (E), and the left-front (F) brake systems.
7. Install the air cleaner See: Engine, Cooling and Exhaust/Engine/Tune-up and Engine Performance Checks/Air Cleaner Housing/Service and
Repair.
8. Bleed the brake system See: Brake Bleeding/Service and Repair.
9. Do the VSA modulator-control unit update See: Antilock Brakes / Traction Control Systems/Testing and Inspection/Programming and
Relearning/VSA Modulator-Control Unit Update.
10. Do the VSA sensor neutral position memorization procedure See: Antilock Brakes / Traction Control Systems/Testing and
Inspection/Programming and Relearning/VSA Sensor Neutral Position Memorization.
11. Do the CMBS initial check (DTC 100) See: Powertrain Management/Computers and Control Systems/Testing and Inspection/Diagnostic Trouble
Code Tests and Associated Procedures/Manufacturer Code Charts/100.
12. Start the engine, and make sure the ABS and the VSA indicators go off.