
ZDX V6-3.7L (2010)
Rocker Arm Assembly: Overhaul
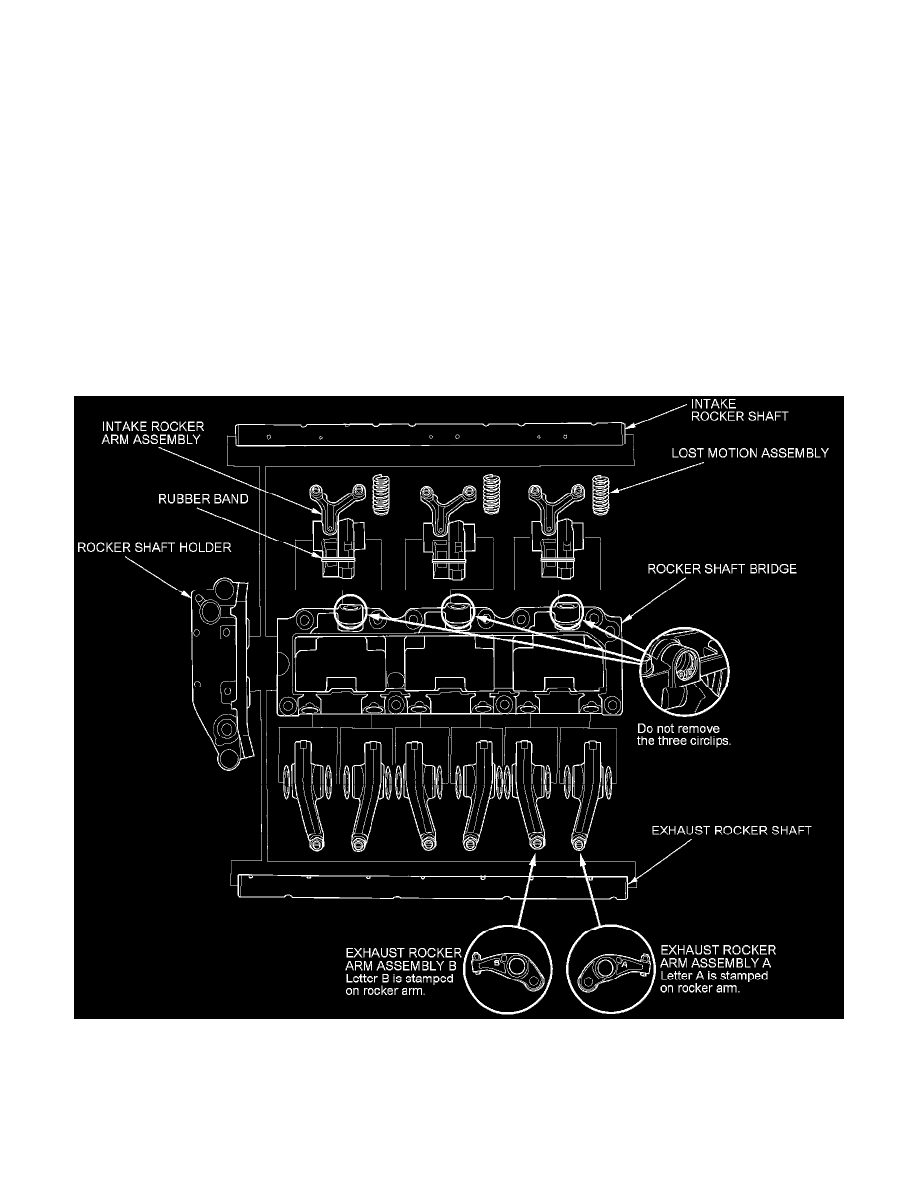
Rocker Arm and Shaft Disassembly/Reassembly
Front
NOTE:
-
Identify parts as they are removed so they can be reinstalled in their original locations.
-
Inspect the rocker shafts and the rocker arms See: Cylinder Head Assembly/Service and Repair/Overhaul/Rocker Arm and Shaft Inspection.
-
If reused, the rocker arms must be installed in their original locations.
-
When removing or installing the rocker arm assembly, do not remove the mounting bolts. The bolts will keep the rocker arms, the rocker shaft
bridge, and the rocker shaft holder on the shaft.
-
If the rocker shaft cannot be removed or installed by hand, remove or install the rocker shaft by heating the rocker shaft bridge.
-
Bundle the rocker arms with rubber bands to keep them together as a set, and remove the bands after the rocker arms have been installed.
-
Prior to reassembling, clean all the parts in solvent, dry them, and apply new engine oil to all the contact points, the bearing surfaces, and the lost
motion assembly.
-
When replacing the rocker arm assembly, remove the fastening hardware from the new rocker arm assembly.
-
Never remove any of the circlips that retain the lost motion assemblies in the rocker shaft bridge. The circlips are not available separately, and are
factory installed in the rocker shaft bridge. To remove the lost motion assemblies, first remove the rocker shafts and the rocker arms.
Rear
NOTE:
-
Identify parts as they are removed so they can be reinstalled in their original locations.
-
Inspect the rocker shafts and the rocker arms See: Cylinder Head Assembly/Service and Repair/Overhaul/Rocker Arm and Shaft Inspection.