
ZDX V6-3.7L (2010)
Piston: Service and Repair
Crankshaft and Piston Installation
Crankshaft and Piston Installation
Special Tools Required
-
Driver Handle, 15 x 135L 07749-0010000
-
Oil Seal Driver Attachment, 106 mm 070AD-RCA0200
1. Check the connecting rod bearing clearance with plastigage See: Connecting Rod Bearing/Service and Repair.
2. Check the main bearing clearance with plastigage See: Crankshaft Main Bearing/Service and Repair.
3. Install the bearing halves in the engine block and the connecting rods.
4. Apply new engine oil to the inside of the main bearings and the rod bearings.
5. Install the crankshaft position (CKP) pulse plate to the crankshaft See: Powertrain Management/Computers and Control Systems/Crankshaft
Position Sensor/Service and Repair/CKP Pulse Plate Replacement.
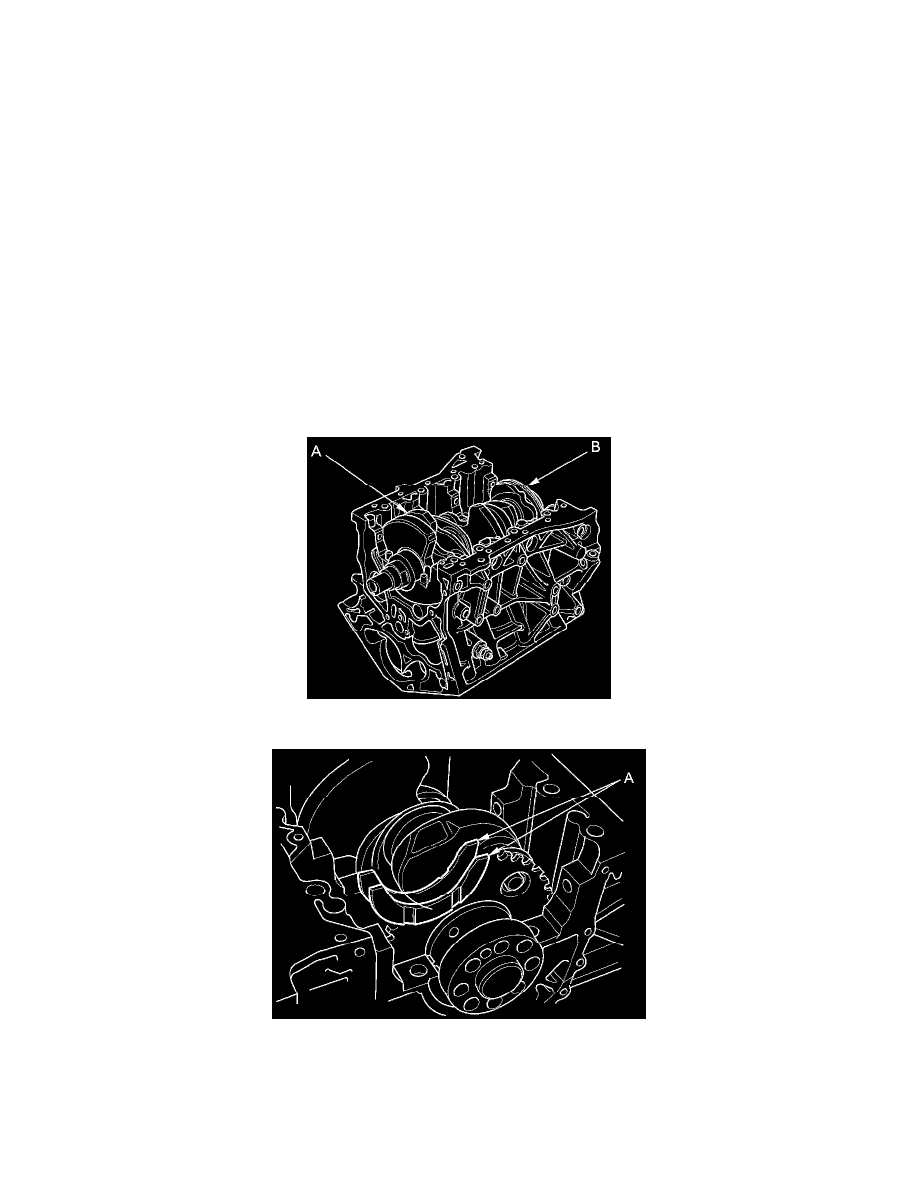
6. Lower the crankshaft (A) into the engine block, being careful not to damage the journals and the CKP pulse plate (B).
7. Apply new engine oil to the side with the thrust washer groove. Install the thrust washers (A) in the No. 3 journal.
8. Install the bearings (A) and the main bearing caps (B) with the arrow (C) facing the timing belt side of the engine block.