
ZDX V6-3.7L (2010)
Rocker Arm Assembly: Testing and Inspection
VTEC Rocker Arm Test
VTEC Rocker Arm Test
Special Tools Required
-
VCM Air Adapter 070AJ-001A101
-
VTEC Air Stop Tool B 07AAJ-R70A200
-
Air Pressure Regulator 07AAJ-PNAA101
-
VTEC Air Stop Tool A 07AAJ-R70A100
1. Start the engine and let it run for 5 minutes, then turn the ignition switch to LOCK (0), or press the engine start/stop button to select the OFF
mode.
2. Remove the six ignition coils and the six spark plugs See: Powertrain Management/Ignition System/Ignition Coil/Service and Repair.
3. Remove the cylinder head covers See: Valve Cover/Service and Repair/Cylinder Head Cover Removal.
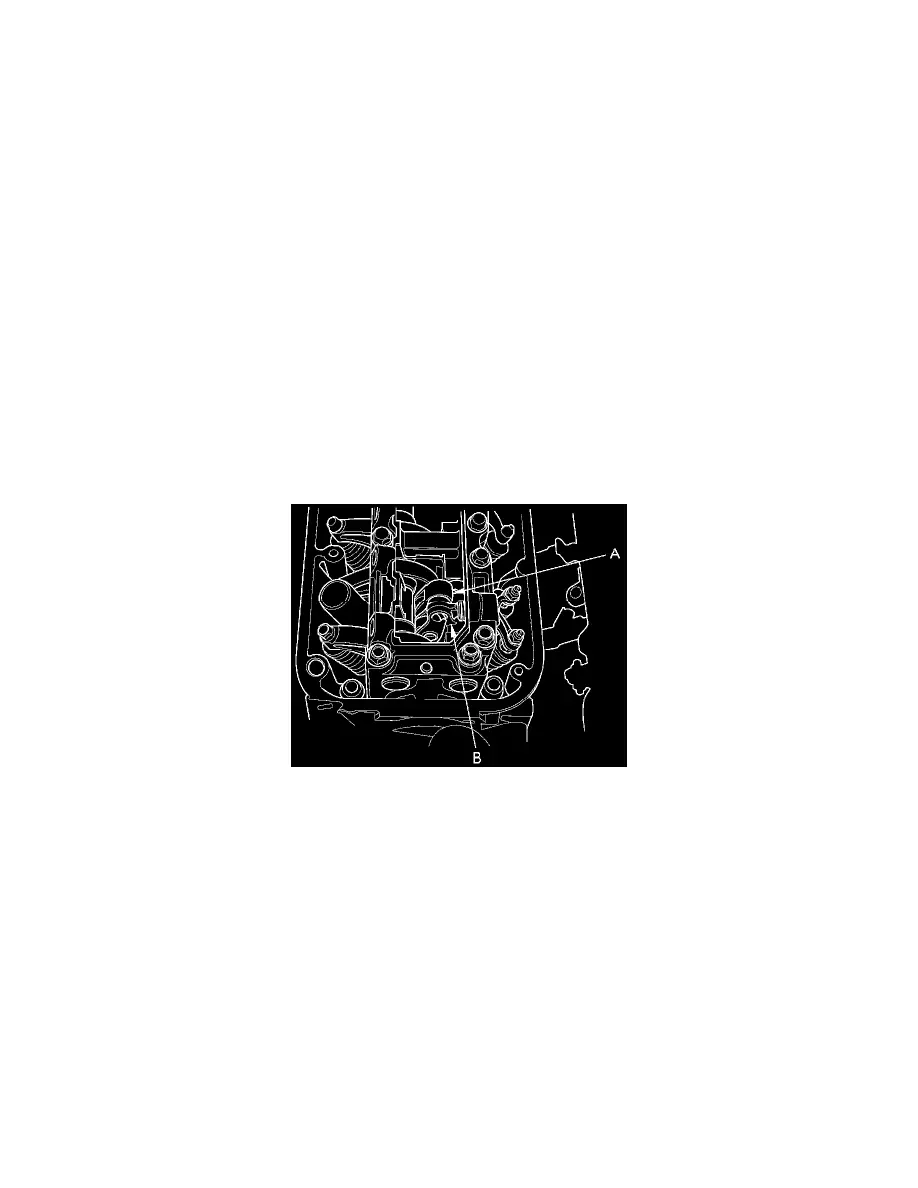
4. Rotate the crankshaft pulley clockwise, and visually check all the intake primary rocker arms (A) and the intake secondary rocker arms (B) moves
independently.
-
If the intake primary rocker arm and the intake secondary rocker arm move together, remove the intake primary rocker arm and the intake
secondary rocker arm as an assembly, and check that the pistons in the rocker arms move smoothly. If any intake rocker arm needs replacing,
replace the primary and secondary rocker arms as an assembly, then retest.
-
If the intake primary rocker arm and the intake secondary rocker arm move independently, go to step 5.
5. Check that the air pressure on the shop air compressor gauge indicates over 981 kPa (10.00 kgf/cm2, 142.3 psi).
6. Inspect the valve clearance See: Valve Clearance/Adjustments.
7. Remove the sealing bolts, then install the VCM air adapter (A) and VTEC air stop tool B to the inspection hole, then connect the air pressure
regulator (C) as shown.