
ZDX V6-3.7L (2010)
Compressor Clutch: Service and Repair
A/C Compressor Clutch Overhaul
Special Tools Required
-
A/C Clutch Holder Robinair 10290 or Kent-Moore J37872, commercially available
-
A/C Clutch Holder Honda Tool and Equipment ACT499A, commercially available
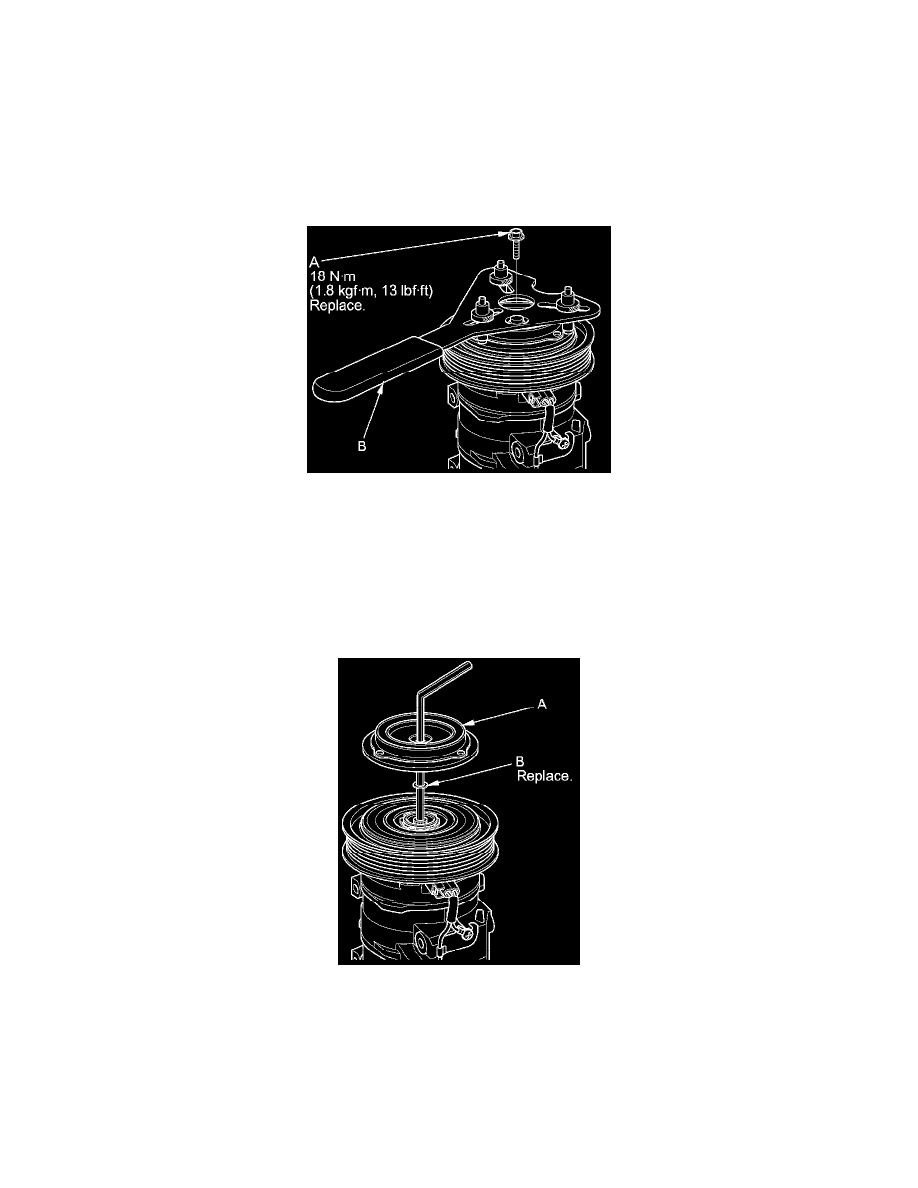
1. Remove the center bolt (A) while holding the pressure plate with a commercially available A/C clutch holder (B).
2. Remove the pressure plate (A) and the shim(s) (B), taking care not to lose the shim(s). If the clutch needs adjustment, increase or decrease the
number and thickness of shims as necessary, then reinstall the pressure plate, and recheck its clearance See: Testing and Inspection.
NOTE:
-
The shims are available in three thicknesses: 0.1 mm,0.3 mm, and 0.5 mm.
-
Do not pry on the pressure plate with screwdrivers or similar tools. Prying damages the pressure plate and the pulley.
-
When replacing the clutch set, place a trial stack of shims, 1 mm total thickness, on the A/C compressor shaft. Install the pressure plate, and
check its clearance See: Testing and Inspection. If the clearance is not within specification, add or subtract shims as needed.
3. If you are replacing the field coil, remove the snap ring (A) with snap ring pliers, then remove the pulley (B). Be careful not to damage the pulley
or the A/C compressor.
NOTE:
-
Do not hammer or pry on the pulley to remove it. Using a hammer damages the A/C compressor. If the pulley is difficult to remove, use a
commercially available pulley removing tool. Make sure the jaws of the pulling tool engage the back face of the pulley, not the pulley grooves.