
ZDX V6-3.7L (2010)
Relay Box: Service and Repair
Drivers Under-Dash Fuse/Relay Box (Drivers MICU) Removal and Installation
Driver's Under-Dash Fuse/Relay Box (Driver's MICU) Removal and Installation
Special Tools Required
-
Relay Puller 07AAC-000A1A0 or 07AAC-000A2A1
NOTE: SRS components are located in this area. Review the SRS component locations See: Restraint Systems/Air Bag Systems/Locations, precautions
and procedures See: Air Bag(s) Arming and Disarming/Service and Repair before doing repairs or servicing.
Removal
1. Do the battery terminal disconnection procedure See: Starting and Charging/Battery/Service and Repair/Procedures.
2. Remove these items:
-
Multi switch See: Body and Frame/Doors, Hood and Trunk/Trunk / Liftgate/Testing and Inspection/Component Tests and General
Diagnostics/Drivers Power Tailgate Switch Test/Replacement
-
Driver's dashboard undercover See: Body and Frame/Interior Moulding / Trim/Dashboard / Instrument Panel/Service and Repair/Driver's
Dashboard Undercover Removal/Installation
-
Driver's kick panel See: Body and Frame/Interior Moulding / Trim/Trim Panel/Service and Repair/Pillar Trim/Interior Trim
Removal/Installation - Pillar Areas
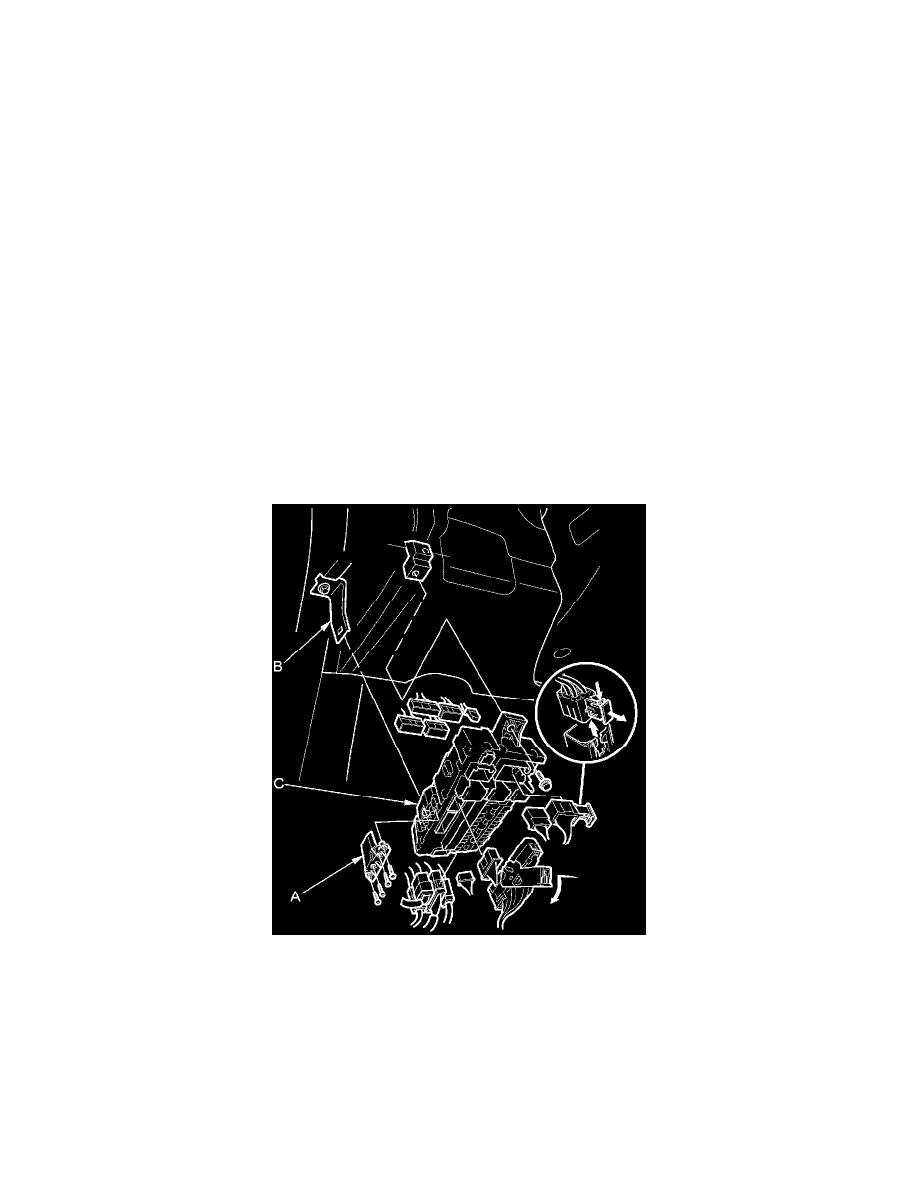
3. Canada models: Remove the screws and cover (A) from the driver's under-dash fuse/relay box.
4. Remove the mounting bolt, release the tab (B), and pull the driver's under-dash fuse/relay box (C) away from the body.
5. Disconnect the connectors from the fuse side of the driver's under-dash fuse/relay box.
6. Disconnect the connectors from the back side of the driver's under-dash fuse/relay box, then remove the driver's under-dash fuse/relay box.
7. Carefully remove the relays by prying under the base of the relay using the relay puller See: Power and Ground Distribution/Testing and
Inspection.
NOTE: Do not use pliers. Pliers will damage the relays, which could cause the engine to stall or not start or cause other functions to fail.