ZDX V6-3.7L (2010)

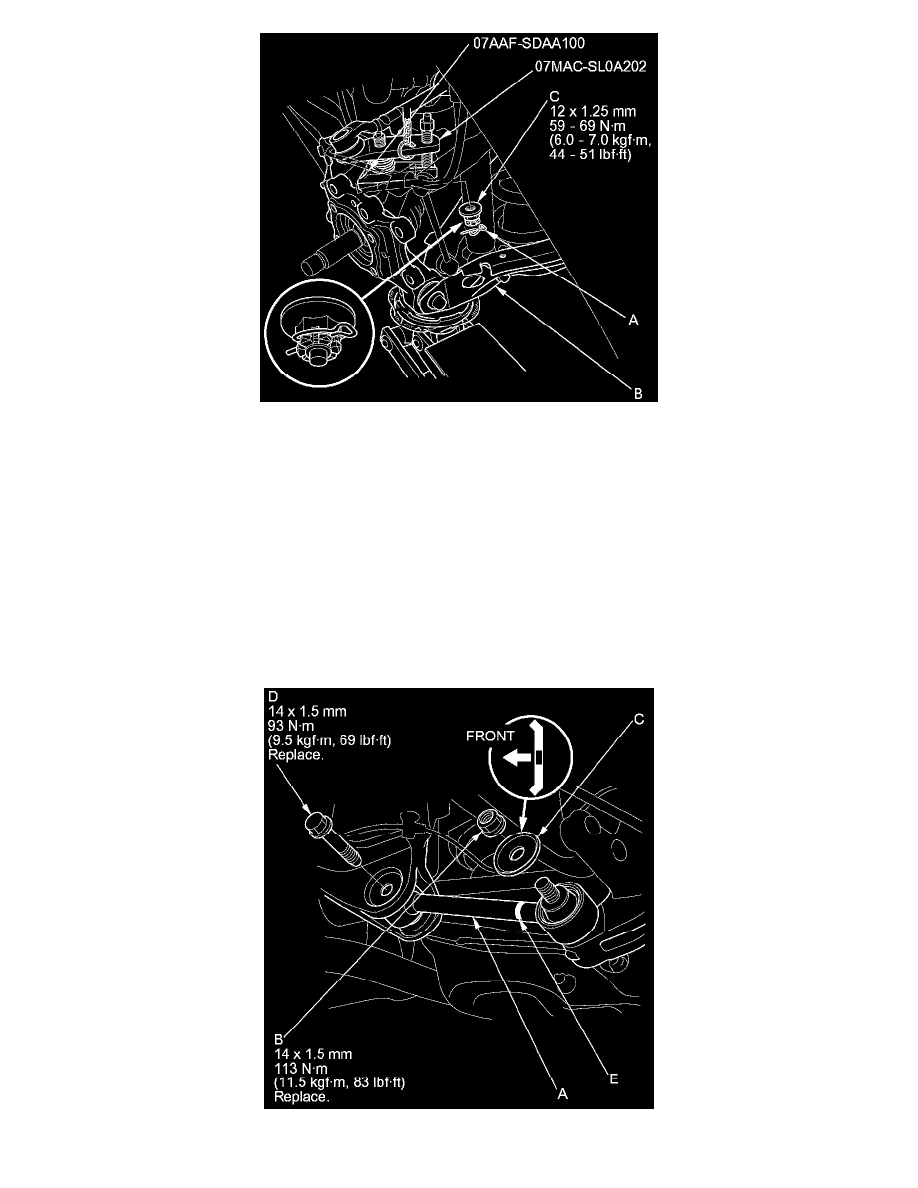
6. Remove the lock pin (A) from the upper arm ball joint, then remove the castle nut (C).
NOTE: During installation, install the lock pin as shown after tightening the castle nut.
7. Disconnect the upper arm ball joint from the knuckle using the ball joint thread protector and the ball joint remover See: Steering and
Suspension/Suspension/Ball Joint/Service and Repair/Ball Joint Removal.
NOTE: Be careful not to damage the ball joint boot when installing the remover.
8. Remove the self-locking nut (B), the washer (C), and the flange bolt (D), then remove lower arm A.
NOTE:
-
During installation, position the paint mark (E) on lower arm A toward the outside of the vehicle.
-
Use a new self-locking nut and the new flange bolt, during reassembly.
9. Remove the flange nuts (A) from the trailing arm (B).
