
ZDX V6-3.7L (2010)
Wheel Fastener: Service and Repair
Wheel Bolt Replacement
Special Tools Required
-
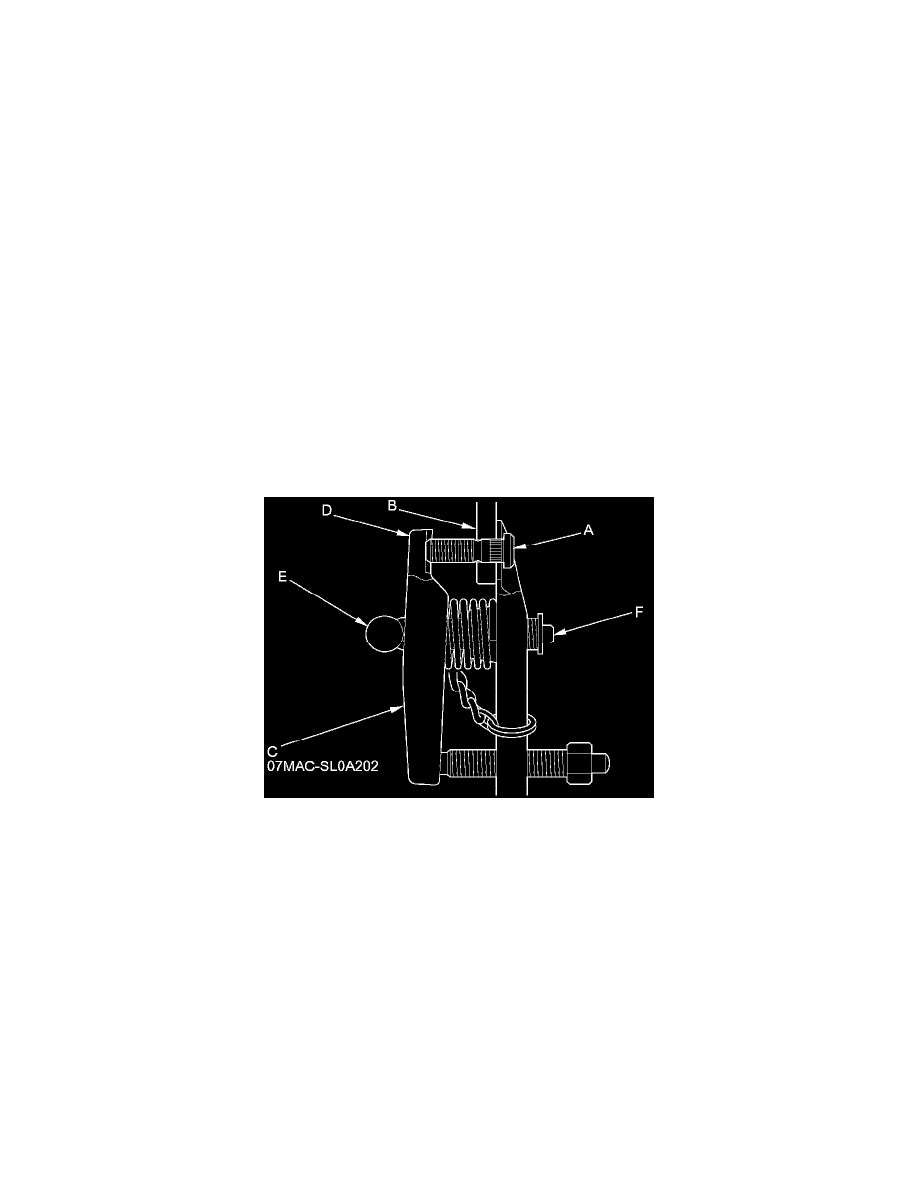
Ball Joint Remover, 28 mm 07MAC-SL0A202
NOTICE
-
Do not use a hammer or impact tools (pneumatic or electric) to remove and install the wheel bolts.
-
Be careful not to damage the threads of the wheel bolts.
Front
1. Raise and support the vehicle See: Vehicle Lifting/Service and Repair.
2. Remove the front brake disc See: Brakes and Traction Control/Disc Brake System/Brake Rotor/Disc/Service and Repair/Front Brake Disc
Replacement.
3. Separate the wheel bolt (A) from the hub (B) using the ball joint remover (C), and keep the jaw (D) of ball joint remover vertical against the wheel
bolt See: Steering and Suspension/Suspension/Ball Joint/Service and Repair/Ball Joint Removal.
NOTE:
-
If the angle of the remover against the wheel bolt is not square, readjust the ball joint remover by turning the head (E) of the adjusting bolt (F).
-
Before installing the new wheel bolt, clean the mating surfaces on the bolt and the hub.
4. Insert the new wheel bolt (A) into the hub (B) while aligning the splined surfaces (C) on the hub hole with the wheel bolt. Adjust the measurement
(D) with the washers (P/N 94101-14800 or equivalent) (E), then install a nut (P/N 90304-SHJ-A91 or equivalent) (F) hand-tight.
NOTE:
-
Degrease the area around the wheel bolt and the threaded section of the nut.
-
Make sure the wheel bolt is installed vertically in relation to the hub disc surface.
-
Do not install the nut and the washers that have been used as tools on a vehicle.