ZDX V6-3.7L (2010)

9. Select the REPLACE TCM/PCM MENU, then select READ DATA, and follow the screen prompts.
NOTE:
-
Doing this step copies (READS) the ATF life data from the original PCM so you can later download (WRITES) it into the new PCM.
-
If READ DATA indicates FAILED, continue with this procedure.
10. Turn the ignition switch to LOCK (0), or press the engine start/stop button to select the OFF mode.
11. Jump the SCS line with the HDS.
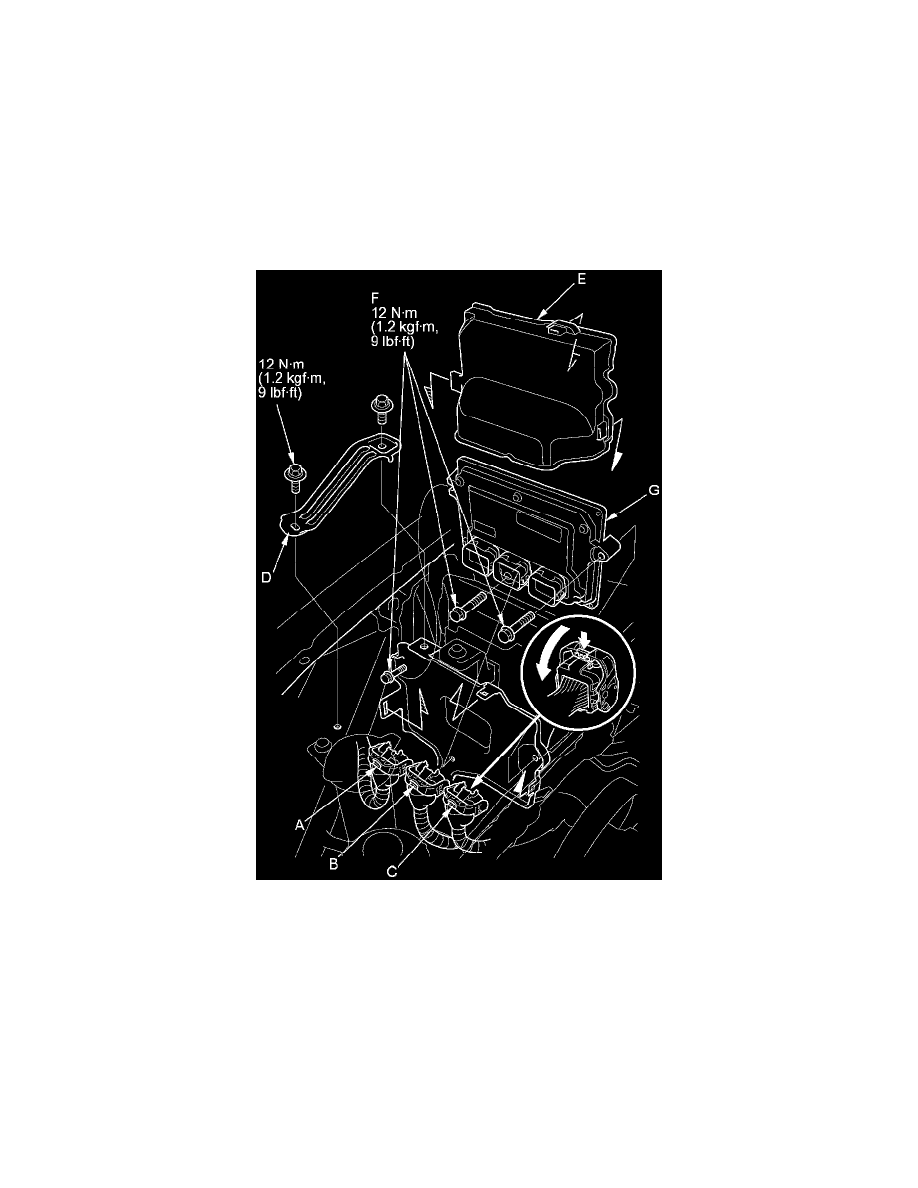
12. Remove the bracket (D), then remove the cover (E).
13. Disconnect PCM connectors A, B, and C.
NOTE: PCM connectors A, B, and C have symbols (A=Square, B=Triangle, C=Circle) embossed on them for identification.
14. Loosen or remove the bolts (F), and remove the PCM (G).
15. Install the PCM in the reverse order of removal.
16. Turn the ignition switch to ON (II), or press the engine start/stop button to select the ON mode.
17. Manually input the VIN to the PCM with the HDS.
NOTE: DTC P0630 VIN Not Programmed or Mismatch may be stored because the VIN has not been programmed into the PCM; ignore it, and continue
this procedure.
