ZDX V6-3.7L (2010)

Air Bag Control Module: Service and Repair
SRS Unit Replacement
SRS Unit Replacement
Removal
1. Turn the ignition switch to ON (II), or press the engine start/stop button to select the ON mode.
2. Move the driver's and passenger's seats all way to the rear position.
3. Turn the ignition switch to LOCK (0), or press the engine start/stop button to select the OFF mode.
4. Do the battery terminal disconnection procedure See: Starting and Charging/Battery/Service and Repair/Procedures, then wait at least 3 minutes
before starting work.
5. Remove the driver 's center console trim See: Body and Frame/Interior Moulding / Trim/Console/Service and Repair/Removal and
Replacement/Center Console Removal/Installation and the passenger's center console trim See: Body and Frame/Interior Moulding /
Trim/Console/Service and Repair/Removal and Replacement/Center Console Removal/Installation.
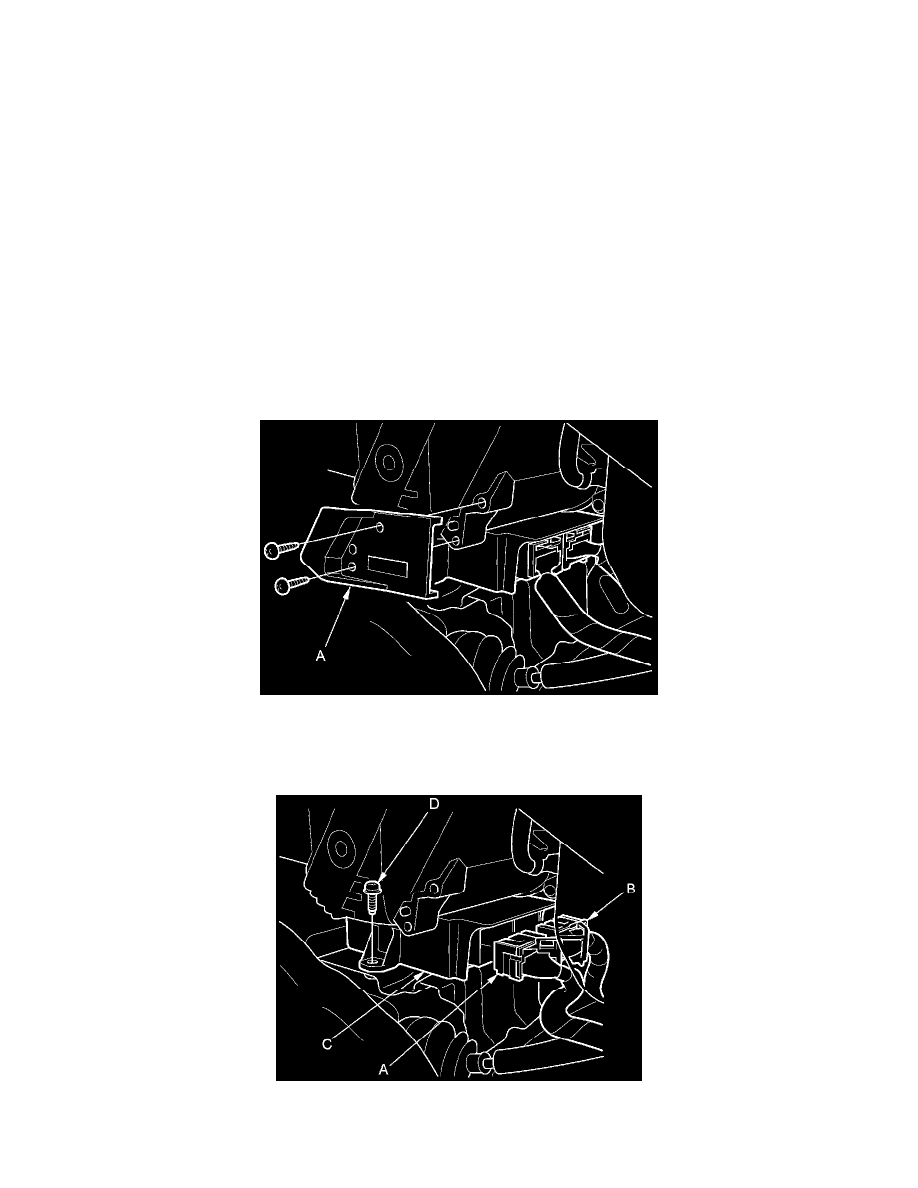
6. Remove the two screws from the driver's side center console clip bracket (A), then remove the bracket.
7. Disconnect SRS unit connectors A (39P) and B (39P) from the SRS unit (C).
NOTE: The SRS unit connectors have lever locks. Release the locks before disconnecting the connectors See: Body and Frame/Interior Moulding /
Trim/Dashboard / Instrument Panel/Air Bag(s) Arming and Disarming/Service and Repair.
8. Remove the TORX bolt (D) from driver's side, using a TORX T30 bit.
9. Remove the TORX bolts (A) from passenger's side, using a TORX T30 bit.
