
ZDX V6-3.7L (2010)
Impact Sensor: Service and Repair
Side Impact Sensor (First) Replacement
Side Impact Sensor (First) Replacement
Removal
1. Do the battery terminal disconnection procedure See: Starting and Charging/Battery/Service and Repair/Procedures, then wait at least 3 minutes
before starting work.
2. Remove the B-pillar lower trim See: Body and Frame/Interior Moulding / Trim/Trim Panel/Service and Repair/Pillar Trim/Interior Trim
Removal/Installation - Pillar Areas.
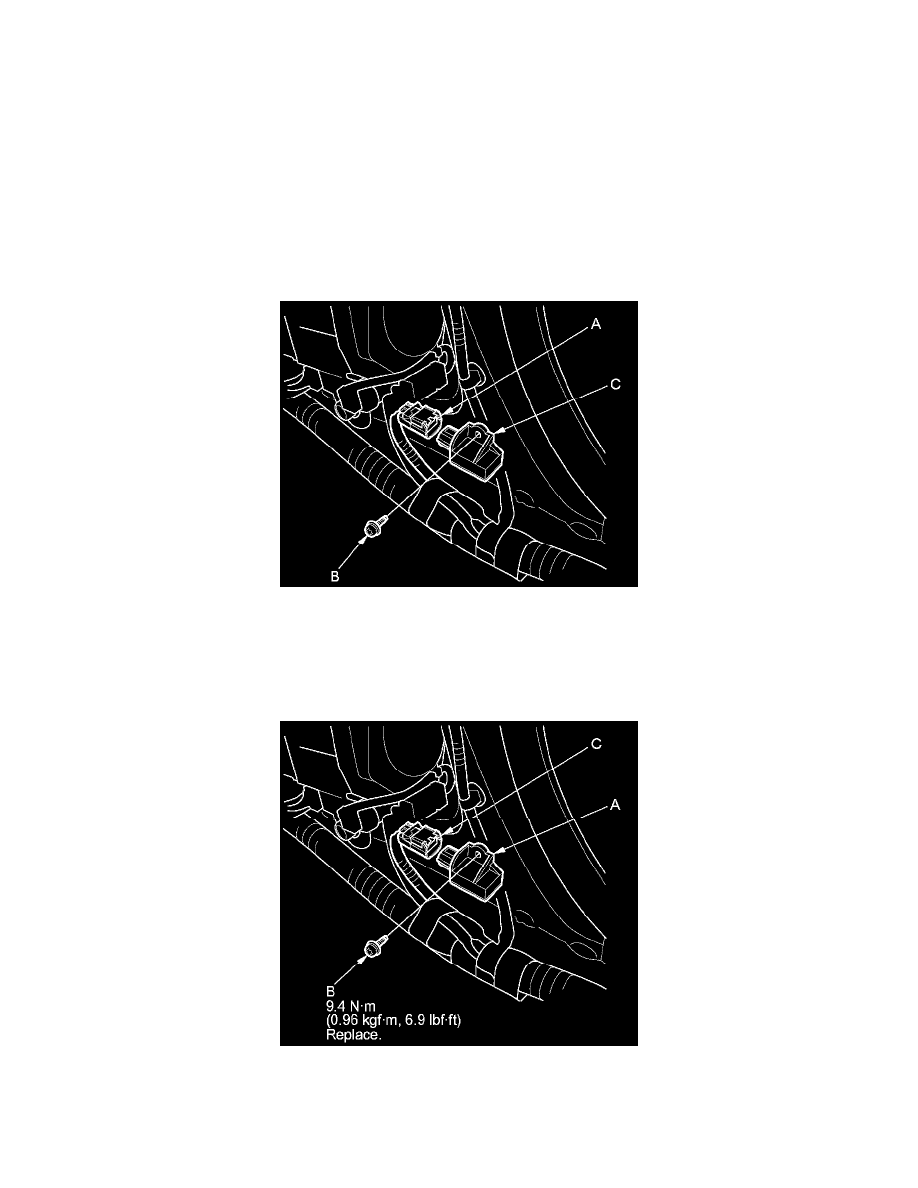
3. Disconnect the side impact sensor (first) 4P connector (A) on the floor wire harness.
4. Remove the TORX bolt (B) using a TORX T30 bit, then remove the side impact sensor (first) (C).
Installation
1. Install the side impact sensor (first) (A) with a new TORX bolt (B) using a TORX T30 bit. Connect the side impact sensor (first) 4P connector (C)
on the floor wire harness.
2. Do the battery terminal reconnection procedure See: Starting and Charging/Battery/Service and Repair/Procedures.
3. Clear any DTCs with the HDS See: Testing and Inspection/Reading and Clearing Diagnostic Trouble Codes.
4. Confirm proper SRS operation: Turn the ignition switch to ON (II), or press the engine start/stop button to select the ON mode, and check that the