
ZDX V6-3.7L (2010)
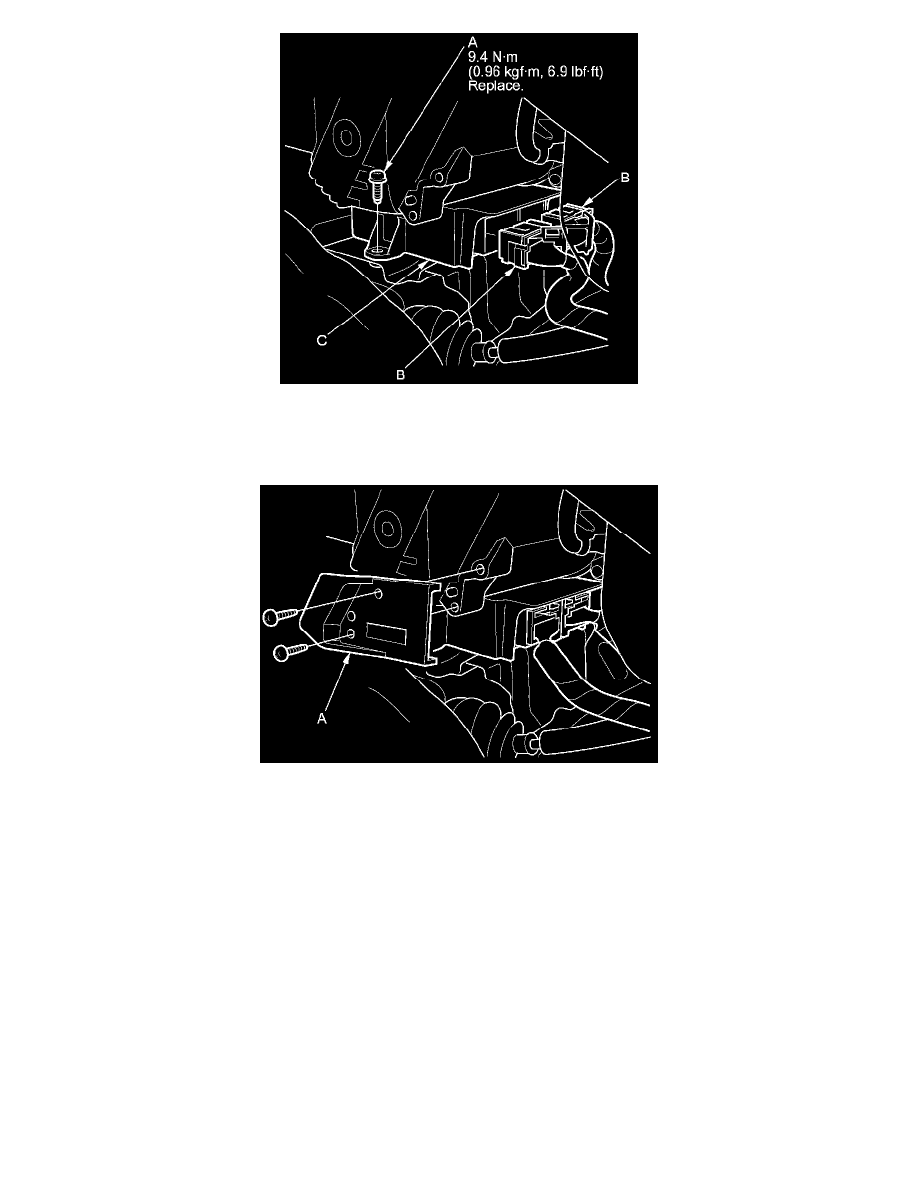
3. Connect the SRS connectors (B) to the SRS unit (C); push them into position until they click and the lever locks are fully secured See: Air Bag
Systems/Air Bag(s) Arming and Disarming/Service and Repair.
4. Install the driver's side center console clip bracket (A) with two screws.
5. Install the driver 's center console trim See: Body and Frame/Interior Moulding / Trim/Console/Service and Repair/Removal and
Replacement/Center Console Removal/Installation and the passenger's center console trim See: Body and Frame/Interior Moulding /
Trim/Console/Service and Repair/Removal and Replacement/Center Console Removal/Installation.
6. Do the battery terminal reconnection procedure See: Starting and Charging/Battery/Service and Repair/Procedures.
7. Make sure the SRS unit has the latest software. If it does not have the latest, update the software in the SRS unit See: Air Bag Systems/Testing
and Inspection/Programming and Relearning/SRS Unit Update.
8. Do the ODS unit initialization See: Air Bag Systems/Testing and Inspection/Programming and Relearning/ODS Unit Initialization.
9. Check the operation of the ODS unit with the HDS See: Air Bag Systems/Testing and Inspection/Component Tests and General Diagnostics/ODS
Unit Operation Check.
10. Confirm proper SRS operation: Turn the ignition switch to ON (II), or press the engine start/stop button to select the ON mode, and check that the
SRS indicator comes on for about 6 seconds and then goes off.