
ZDX V6-3.7L (2010)
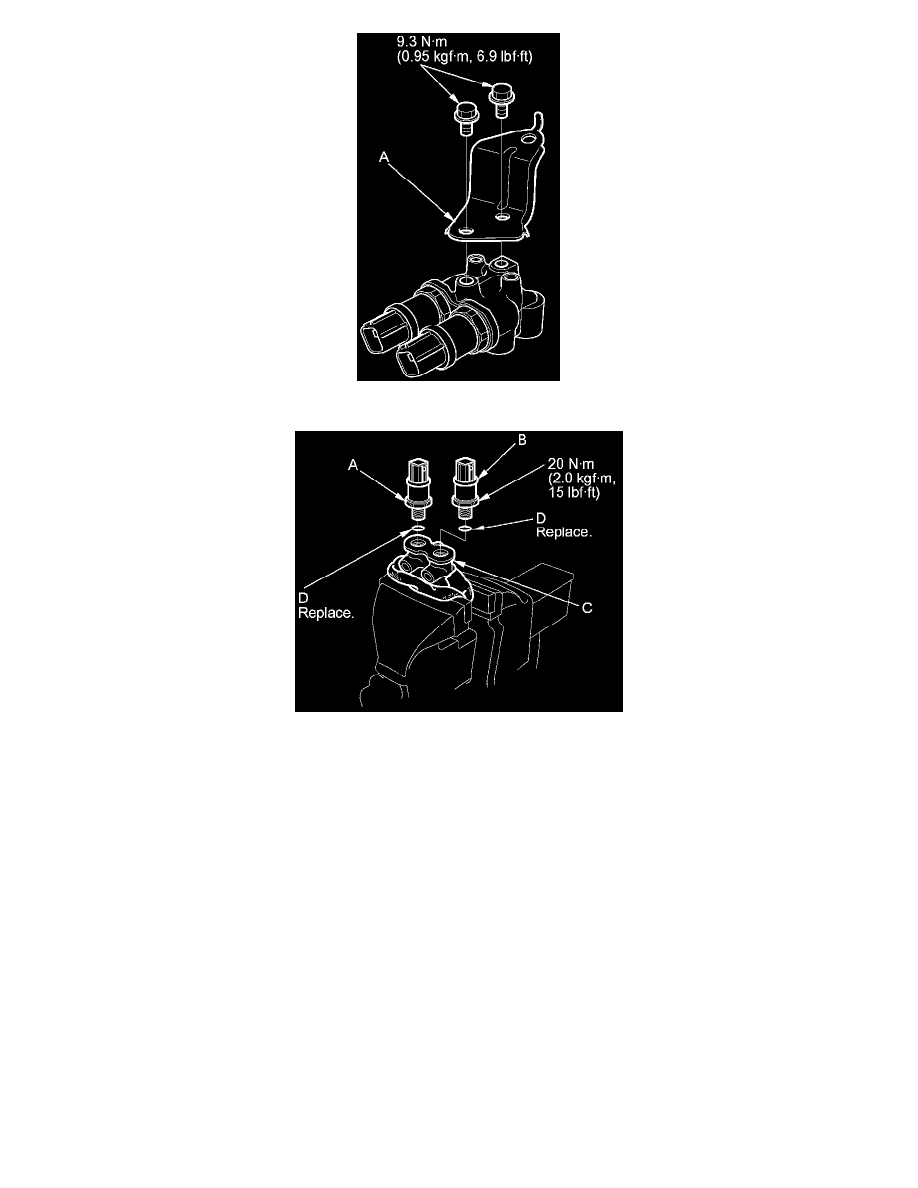
7. Remove the left (A) and right (B) front brake fluid pressure sensors from the brake 4-way joint (C).
8. Install the parts in the reverse order of removal with new O-rings (D).
NOTE: Make sure the connector colors and the brake fluid pressure sensor locations are correct.
9. After installation, refill the brake fluid, and bleed the brake system See: Brakes and Traction Control/Brake Bleeding/Service and Repair.
10. Do these checks:
-
Check the brake hose and line joint for leaks, and tighten if necessary.
-
Check the brake hoses for interference and twisting.
11. Connect the HDS to the data link connector.
12. Press the engine start/stop button to select the ON mode.
13. Press the MAIN switch ON.
14. Clear the DTCs with the HDS See: Cruise Control/Testing and Inspection/Reading and Clearing Diagnostic Trouble Codes.
15. Select ADAPTIVE CRUISE CONTROL (ACC) from ACC/CMBS menu, then enter FUNCTION TEST.
16. Activate BRAKE ACTUATOR 3 from the FUNCTION TEST.
NOTE: BRAKE ACTUATOR 3 operates the ACC brake in this order (pressurization-stop-pressurization-stop). It takes about 6 seconds.