
ZDX V6-3.7L (2010)
Suspension Control Module: Service and Repair
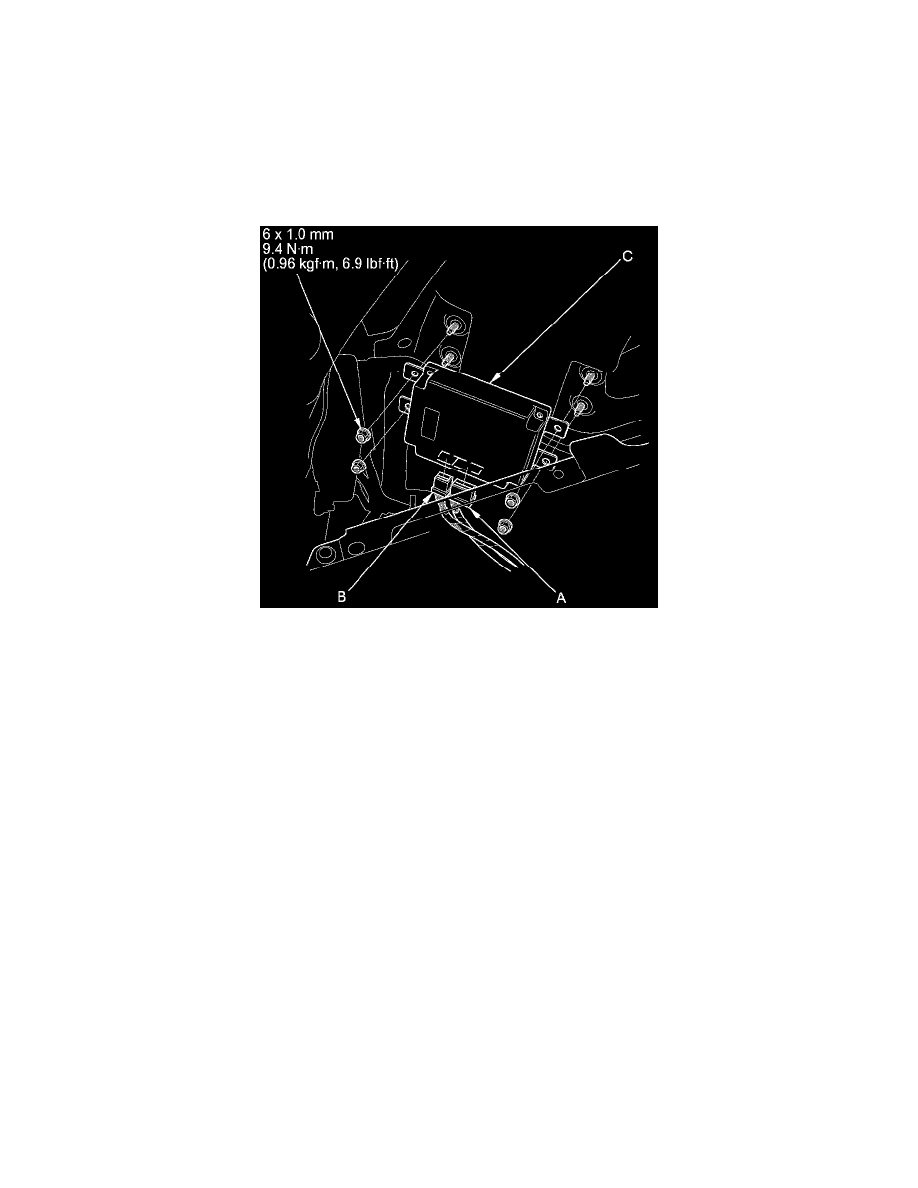
Active Damper Control Unit Replacement
1. Press the engine start/stop button to select the OFF mode.
2. Remove the rear side trim panel See: Body and Frame/Interior Moulding / Trim/Trim Panel/Service and Repair/Interior Trim
Removal/Installation - Rear Side Area.
3. Disconnect active damper control unit connector A (20P) and B (14P).
4. Remove the mounting nuts, and pull out the active damper control unit (C).
5. Install the active damper control unit in the reverse order of removal.
NOTE: Do not pinch the wire harnesses between the frame and the active damper control unit.
6. Do the memorizing rear suspension full rebound position See: Suspension Control ( Automatic - Electronic )/Testing and Inspection/Programming
and Relearning.
7. Start the engine, then make sure there are no active damper system DTCs with the HDS See: Suspension Control ( Automatic - Electronic
)/Testing and Inspection/Initial Inspection and Diagnostic Overview.
8. Do the DAMPER FORCE OPERATION TEST in the FUNCTIONAL TESTS MENU with the HDS, then make sure all four damper units
function normally.
9. Test-drive the vehicle, and check that the active damper system indicator does not come on See: Suspension Control ( Automatic - Electronic
)/Testing and Inspection/Initial Inspection and Diagnostic Overview.