audi Workshop Repair Guides

Audi Workshop Service and Repair Manuals

Removing and installing interior door handle > < Removing and installing switch mount
Removing and installing front door trim
Special tools and workshop equipment required
   
t  Wedges -T10383-
  W00-10676
Removing
–  Switch off the ignition and remove the ignition key.
–  Remove the cover for the door puller → Chapter.
–  Remove the mid-range loudspeaker trim → Chapter.
–  Equipment version with manual mirror adjuster: Detach the actuator -2- and unscrew the nut -1-.
  A70-11429
–  Screw out the bolts -1 ... 4-.
  A70-11428
–  Starting in the bottom rear corner, use the wedge -T10383- to unclip the door trim from the door. To do so, insert the wedge between the door trim and door in the area of the retaining clips.
  A70-11419
l  Position of retaining clips -arrows-
–  Disengage the door trim from the door at the top of the window slot. To do so, pull the door trim upwards.
  A70-11430
–  Carefully unclip the Bowden cable -3- from the interior door handle -2-.
–  Swivel the Bowden cable for the interior door handle -arrow-.
–  Disengage the end of the cable -1- at the interior door handle.
  A70-11431
–  To unplug the connector, press the catch -1-, turn the holder -arrow- and unplug the connector.
–  Unplug the mid-range loudspeaker connector.
–  Detach the door trim.
  A90-0199
Installing
–  Engage the end of the cable -1- in the lever of the interior door handle.
–  Clip in the Bowden cable -3- for the interior door handle at the interior door handle -2-.
l  The Bowden cable must be heard to engage.
  A70-11431
  WARNING
t  
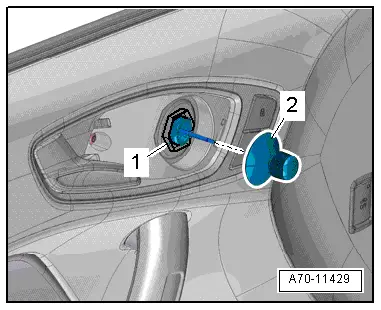
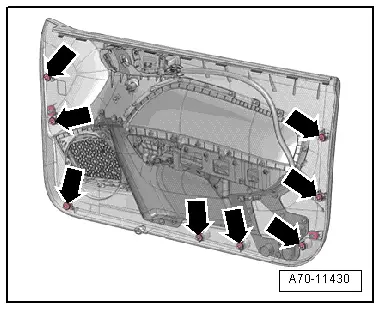
The crash sensor (pressure sensor) will only function properly if the door provides a reliable seal.
t  The door trim retaining clips -arrows- provide a seal for the system. Replace the door trim retaining clips if necessary.
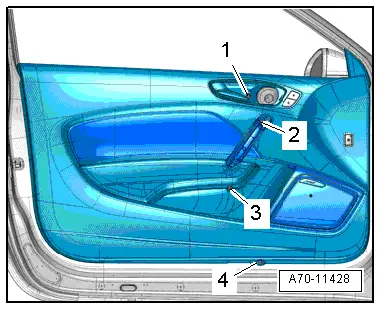
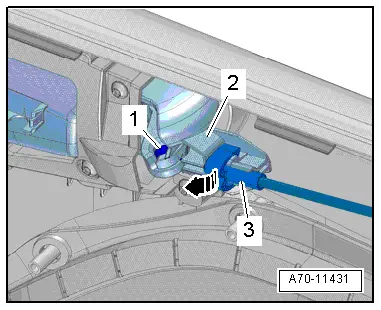
–  Plug in the connector at the door control unit.
–  Position the door trim at the window slot and press on downwards.
–  Carefully fit the door trim clips at the door and press the door trim onto the door until it is heard to engage at the fastening points.
Perform further installation operations in the reverse order of removal.
Notes on installation: For example tightening torques, component replacement → Chapter, → Fig..
  A70-11430

Removing and installing interior door handle > < Removing and installing switch mount