
A1
|
|
|
|
|
|

|
 Note
Note
|
|
|
|
Note
|
|
 Caution
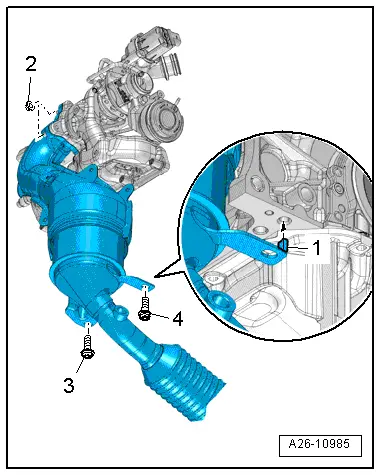
| Stage | Bolts/nuts | Tightening torque |
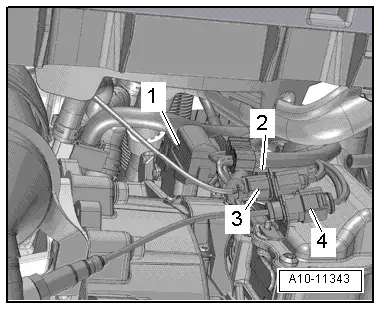
| 1. | Insert centring lug -1- on catalytic converter in hole in cylinder block -arrow-. | |
| 2. | Fit catalytic converter onto studs of turbocharger. | |
| 3. | -2- | Screw in by hand until it makes contact |
| 4. | -3- | Tighten |
| 5. | -4- | Tighten |
| 6. | -2- | Tighten |
|