Audi Workshop Service and Repair Manuals
HOME
FEATURES
MENU
INDEX
ABOUT US
Checking charge air system for leaks >
< Removing and installing charge pressure senderG31 / intake air temperature sender 2G299
A1
Power unit
4-cylinder direct petrol injection engine (1.4 ltr. 4-valve turbo), mechanics
Exhaust turbocharger, G-charger
Charge air cooler
Removing and installing charge air cooler
Removing and installing charge air cooler
Removing and installing charge air cooler
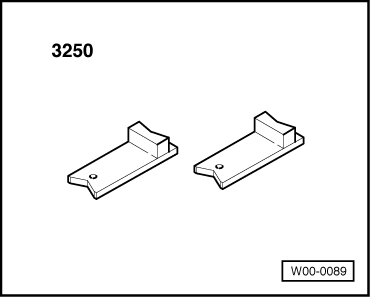
Special tools and workshop equipment required
t
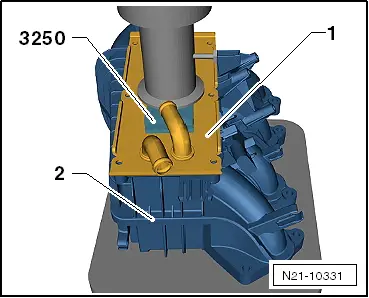
Support -3250-
Removing
–
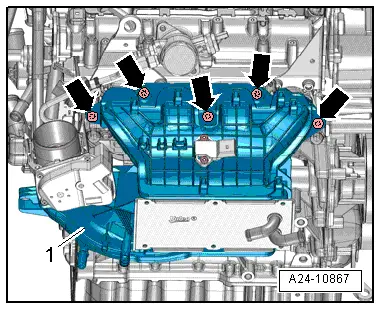
Remove intake manifold (top section)
→ Rep. gr.24
.
–
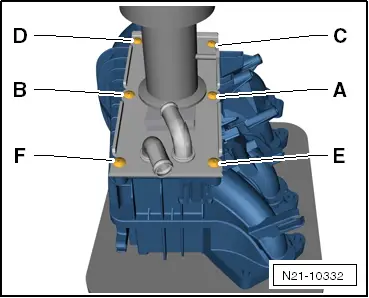
Slacken and remove bolts in the sequence:
-A … F-
and pull charge air cooler out of intake manifold.
Installing
l
Tightening torques
→ Fig.
Note
t
Renew gasket.
t
The workshop press is used to install the charge air cooler to ensure a perfect seal.
–
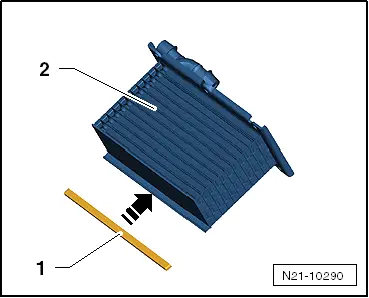
Press sealing lip
-1-
onto edge of charge air cooler
-arrow-
.
–
Check that seal is correctly seated on intake manifold.
–
Insert charge air cooler into intake manifold as far as stop (take care not to tilt it).
–
Position intake manifold on table of workshop press with a piece of wood underneath.
l
Housing of charge air cooler
-1-
must be horizontal.
–
Apply support -3250- to centre of charge air cooler.
–
Carefully lower workshop press until housing of charge air cooler makes contact with intake manifold
-2-
.
Remaining installation steps are carried out in reverse sequence; note the following:
–
Tighten bolts for charge air cooler
→ Fig.
.
–
Install intake manifold (top section)
→ Rep. gr.24
.
Power unit
4-cylinder direct petrol injection engine (1.4 ltr. 4-valve turbo), mechanics
Exhaust turbocharger, G-charger
Charge air cooler
Removing and installing charge air cooler
Checking charge air system for leaks >
< Removing and installing charge pressure senderG31 / intake air temperature sender 2G299
 Note
Note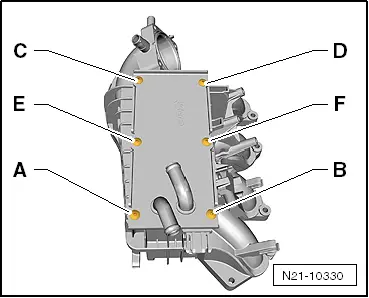
 Note
Note