audi Workshop Repair Guides

Audi Workshop Service and Repair Manuals

Removing and installing oil pressure switchF1 > < Oil filter bracket and engine oil cooler - exploded view
Removing and installing oil filter bracket with engine oil cooler
Special tools and workshop equipment required
   
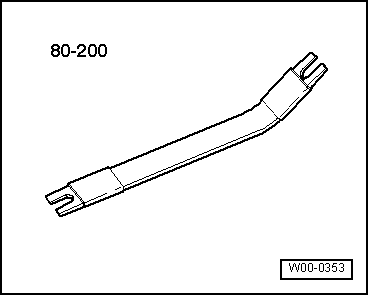
t  Removal lever -80 - 200-
  W00-0353
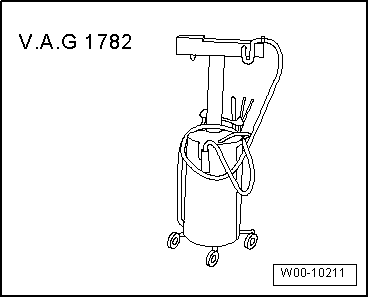
t  Used oil collection and extraction unit -V.A.G 1782-
  W00-10211
Removing
–  Drain coolant → Chapter.
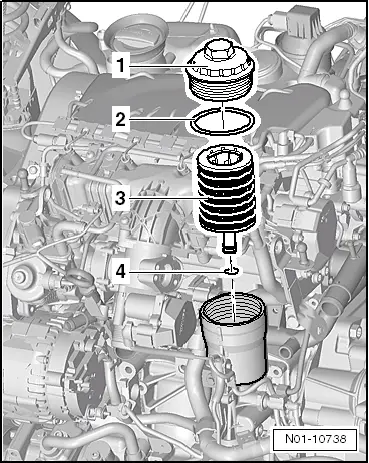
–  Remove oil filter element → Booklet819.
  N01-10738
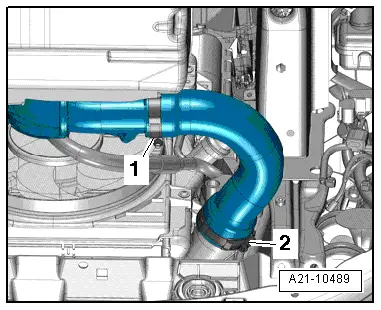
–  Release hose clips -1- and -2- and remove air hose.
  A21-10489
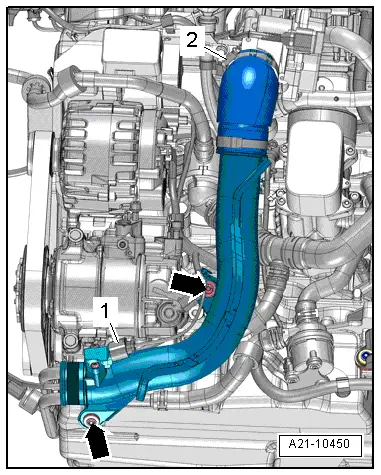
–  Remove bolts -arrows-.
–  Loosen hose clip -2-.
–  Unplug electrical connector -1- on charge pressure sender -G31-/intake air temperature sender -G42- and move clear electrical wiring.
–  Detach air pipe (right-side).
  A21-10450
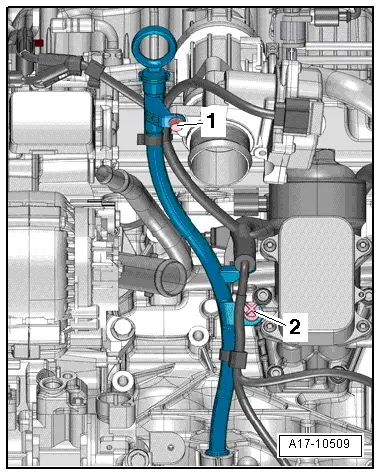
–  Pull oil dipstick out slightly and remove bolt -1-.
–  Release clip -2- with removal lever -80 - 200-.
–  Pull guide tube for oil dipstick upwards out of cylinder block and push to one side.
  A17-10509
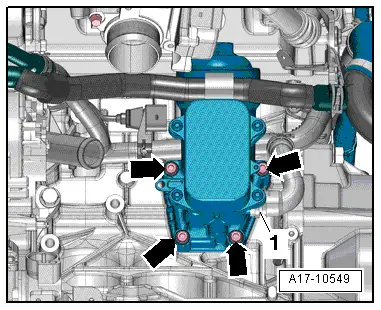
–  Position used oil collection and extraction unit -V.A.G 1782- below engine.
–  Unscrew bolts -arrows- and remove oil filter bracket with engine oil cooler.
  Note
Disregard -item 1-.
Installing
Installation is carried out in the reverse order; note the following:
Tightening torques:
l  → Chapter „Oil filter bracket and engine oil cooler - exploded view“.
l  → Chapter „Oil pump and sump - exploded view“.
l  → Chapter „Charge air cooler - exploded view“.
l  → Fig. „„Installing air hoses with screw-type clips““.
  Note
Renew gaskets, seals and O-rings.
–  Install oil filter element, fill up with engine oil and check oil level → Booklet819.
–  Fill up cooling system (or change coolant if the engine oil cooler has been renewed) → Anchor.
  A17-10549

Removing and installing oil pressure switchF1 > < Oil filter bracket and engine oil cooler - exploded view