audi Workshop Repair Guides

Audi Workshop Service and Repair Manuals

Exploded view - drive shaft with triple roller joint AAR 2000/108 > < Checking outer constant velocity joint
Checking inner constant velocity joint
   
Removing
The joint must be dismantled:
t  to fill with fresh grease,
t  if joint has collected a large amount of dirt or
t  if ball races are to be checked for wear and damage.
–  Swivel ball hub and ball cage.
–  Press out joint body in direction of -arrow-.
–  Push balls out of cage.
  V40-0009
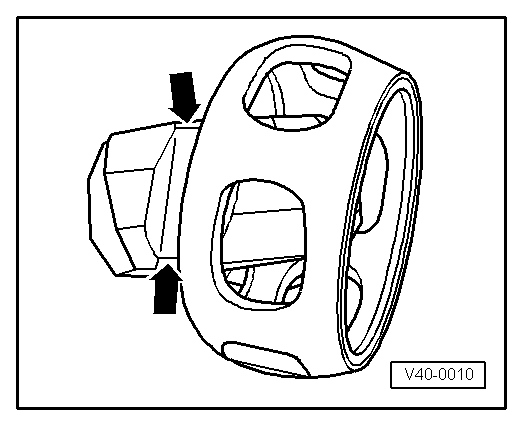
Ball hub and joint body are paired. Do not interchange.
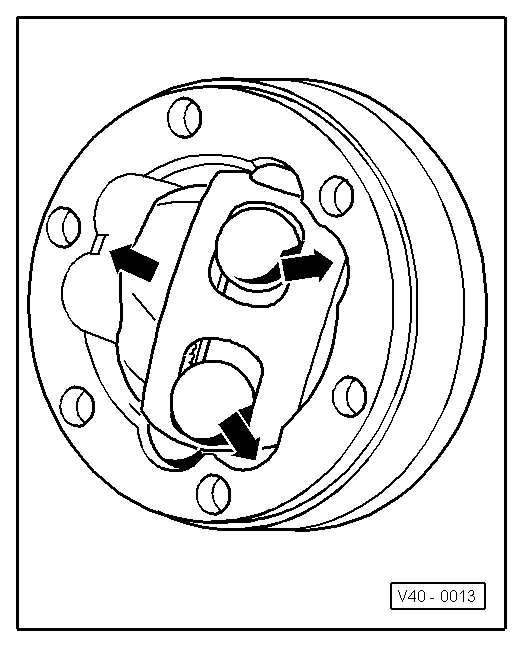
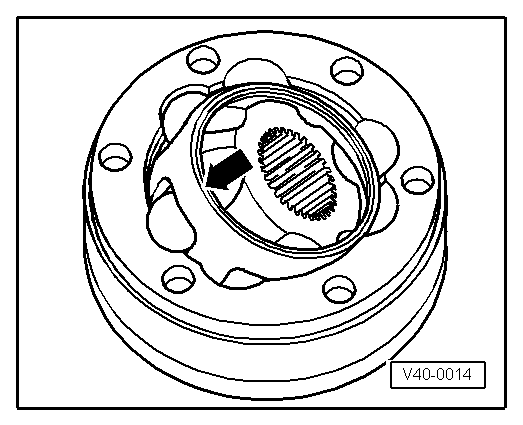
–  Align ball hub with cage as shown -arrows- and pivot hub out of cage.
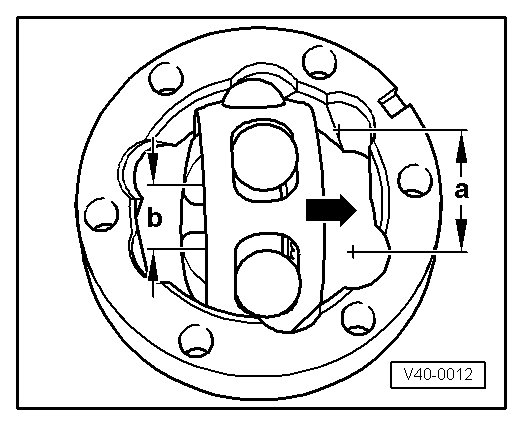
–  Check joint, ball hub, ball cage and balls for pitting and signs of seizure.
Excessive backlash in the joint will cause knocking or jolts under load change. In such cases the joint must be renewed. Polished areas and visible tracks in the ball races are not a reason for renewing the joint.
  V40-0010
Installing
–  Insert hub into cage via the two chamfers. No specific installation position is required. Push balls into cage.
–  Insert hub with cage and balls at a right angle to the joint body.
  V40-0011
When inserting, ensure that the wide spacing -a- on the joint body is aligned with the narrow spacing -b- on the hub after it is swung in.
  V40-0012
Chamfer on internal diameter of ball hub (splines) must face large diameter of joint body.
–  Swivel the hub into the joint body; at the same time the hub must be swivelled out of the cage -arrows- far enough to allow the balls to fit into the ball races.
  V40-0013
–  Swivel in the hub with balls by applying firm pressure on the cage -arrow-.
Checking function of constant velocity joint
The constant velocity joint has been correctly assembled if the ball hub can be moved by hand backwards and forwards over its entire axial range of movement.
  V40-0014

Exploded view - drive shaft with triple roller joint AAR 2000/108 > < Checking outer constant velocity joint