Vehicle electricsRemoving and installing display
| Removing and installing display |
| Display unit for front information display and operating unit control unit -J685- (display) is located in dash panel (centre). |
| The display and the display kinematics carrier are combined in a single unit and can only be removed together. After removing the unit, proceed with removing the display from the display kinematics carrier. |
| –
| Switch off ignition and all electrical equipment and remove ignition key. |
|
|
|
| –
| Remove bolt -2- behind switch panel (top). |
| –
| Pry display kinematics carrier -1- out of dash panel in direction of -arrow-. |
| To do so, disengage retaining springs through vent openings with a small screwdriver. |
|
|

|
| –
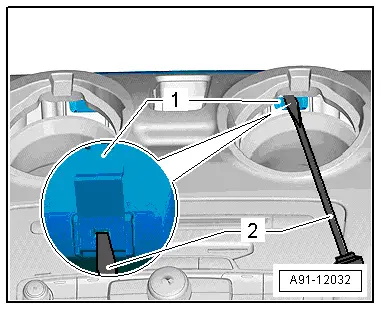
| Use a small screwdriver -2- to press on the retaining springs -1- and press out the display kinematics carrier upwards. |
| –
| Release and unplug connectors at display. |
| The display can only be removed when it is open. |
|
|
|
| –
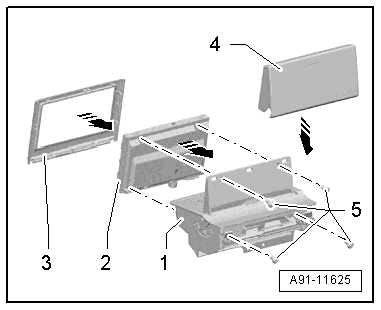
| Unclip rear trim panel -4- from display and lift off. |
| –
| Remove bolts -5- and take display -2- out of display kinematics carrier -1-. |
| –
| Unclip front trim panel -3- from display -2-. |
| –
| Install in reverse sequence of removal. |
|
|
|
05 General