
A2
| Removing, installing and adjusting rear lid and rear lid lock |

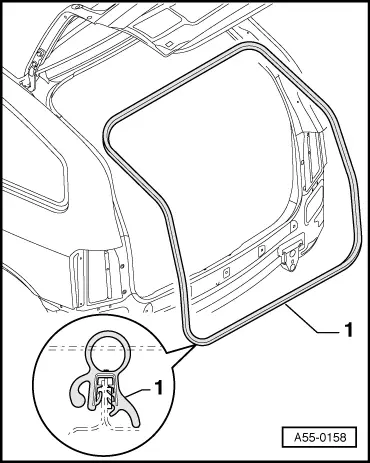
| 1 - | Rear lid |
| q | Removing: |
| – | Remove rear lid trim. |
| – | Unplug electrical connectors and pull them out of rear lid. |
| – | Disengage gas-filled struts from rear lid. |
| – | Unscrew Torx bolts → Item and detach rear lid. |
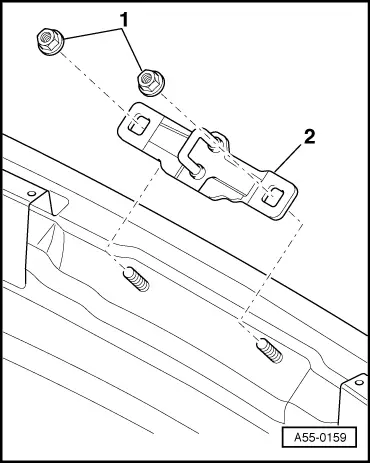
| 2 - | Stop buffer |
| q | Markings for adjusting stop buffer are located on rear lid and stop buffer. |
| q | When installing, secure stop buffer loosely. |
| q | Close rear lid and align with body contour. |
| q | Open rear lid and pull stop buffer out one division further. |
| q | Tighten bolts → Item to 8 Nm. |
| 3 - | Torx bolt |
| q | 8 Nm |
| 4 - | Hexagon nut |
| q | 23 Nm |
| 5 - | Rear lid lock |
| q | To remove, unclip operating rod for lock mechanism, unscrew nuts → Item and detach rear lid lock. |
| 6 - | Hexagon nut |
| q | 15 Nm |
| q | Not accessible without first removing headliner in this area. |
| 7 - | Torx bolt |
| q | 15 Nm |
| 8 - | Rear lid hinge |
| q | Removing: |
| – | Lower headliner in area of hexagon nut → Item and unscrew nut. |
| – | Unscrew hexagon bolts → Item and → Item. |
| 9 - | Hexagon bolt |
| q | 15 Nm |
| 10 - | Ball head studs |
| q | 10 Nm |
| 11 - | Gas-filled strut |
| q | Prop up rear lid. |
| q | Use a small screwdriver to lift retaining clip at top and bottom and detach gas-filled strut from ball head stud. |
| q | To install, simply press onto ball head stud. |
| q | The tubular end of the gas-filled strut must be engaged on the body side. |
| q | Releasing gas from gas-filled strut → Fig.. |
| 12 - | Ball head studs |
| q | 10 Nm |
|
|
 WARNING
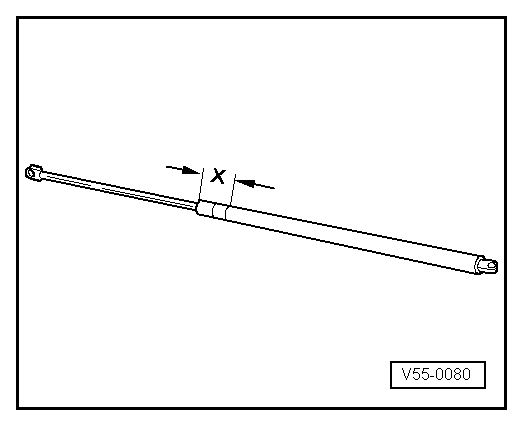
|
|