
A2
| Removing and installing front bumper - exploded view |

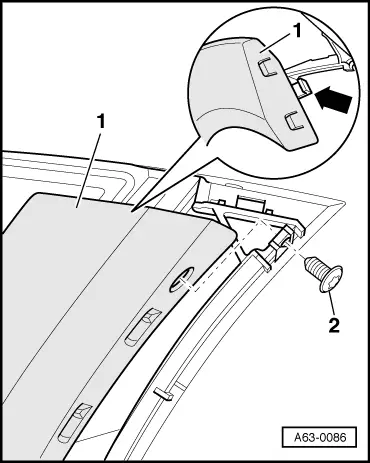
| 1 - | Cover |
| q | Removing: |
| – | Detach wheel housing liner (front) |
| – | Remove self-tapping screws → Item and → Item. |
| – | Press pins of spreader rivets in so that they engage. Do NOT press in further. |
| – | Do NOT press pin through completely. |
| – | Pull out spreader rivet. |
| – | Unclip sides of cover at left and right from wing panel → Fig.. |
| – | Detach cover from vehicle towards the front. |
| 2 - | Hexagon bolt |
| q | 4 Nm |
| 3 - | Reinforcement bar |
| q | Before removing, detach cover → Item. |
| q | Unscrew hexagon bolts → Item and detach reinforcement bar. |
| 4 - | Spreader rivets (5x) |
| q | To remove, do not press locking pins through completely, but only far enough for them to engage. |
| q | Pull out spreader rivet with locking pin. |
| q | If a pin has been pressed through completely, carefully blow it out of reinforcement bar towards the side. |
| 5 - | Bolt with washer |
| q | 23 Nm |
| 6 - | Cross member |
| q | Before removing, detach cover → Item. |
| q | Unscrew hexagon bolt → Item and detach cross member. |
| 7 - | Self-tapping screws (10x) |
| q | 1.5 Nm |
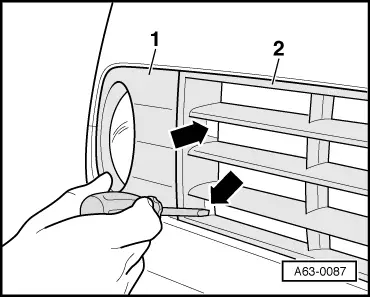
| 8 - | Trim panel for fog lights |
| q | Unclip on inner side of vehicle and detach → Fig.. |
| q | When installing, slide on at outer side of vehicle and press on at inside. |
| 9 - | Self-tapping screw (3x) |
| q | 1.5 Nm |
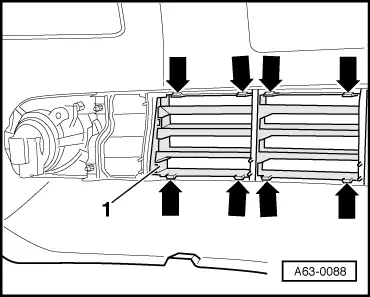
| 10 - | Air intake grille |
| q | Removing → Fig.. |
|
|
|
|