A2
|
|
|
 Note
Note| Rear seat backrest is not to be tilted further backwards when removed than when fitted so as not to damage trim for fittings. |

| 1 - | Piping |
| 2 - | Cover and padding |
| t | Removing |
| – | Remove rear seat → Chapter. |
| – | Release rear seat backrest → Chapter. |
| – | Remove release mechanism trim on both sides → Chapter. |
| – | Remove head restraints by pressing button at left head restraint guide in each case and at the same time lifting out head restraint. |
Note| Rear outer head restraints are not identical to front head restraints. All head restraints are to be marked with adhesive tape on removal. |
| – | Remove head restraint guides → Fig. |
| – | Use flat screwdriver to prise out piping -1- all round. |
| – | Detach cover and padding -2-. |
| t | Installing |
| – | Install cover and padding -2- in reverse order of removal. |
|
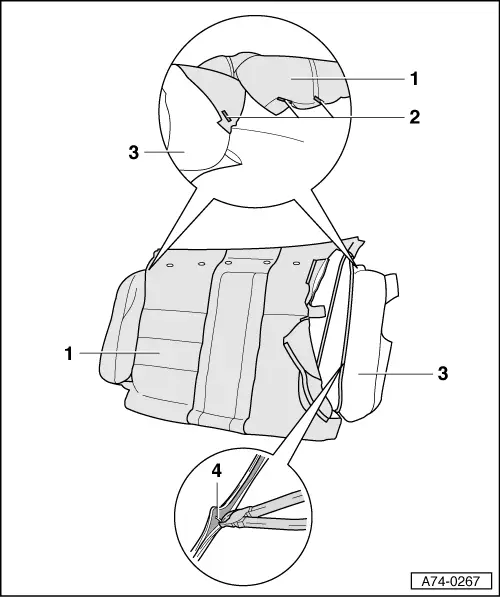
| 1 - | Cover |
| t | Removing |
| – | Unfasten staples -2- from padding -3-. |
| – | Pinch off staples -4- and detach cover -1-. |
| t | Installing |
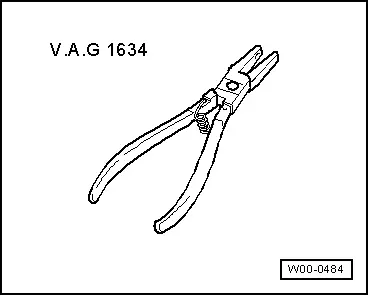
| – | Use upholstery stapler -V.A.G 1634/- to fit new staples. |
| – | To facilitate installation, push back longitudinal rods as far as first transverse rod. |
| – | When fitting, staple transverse rods first and then longitudinal rods. |
| 2 - | Staples |
| q | Commercially available as specified by stapler manufacturer. |
| q | Only use upholstery stapler. |
| 3 - | Padding |
| 4 - | Staples |